
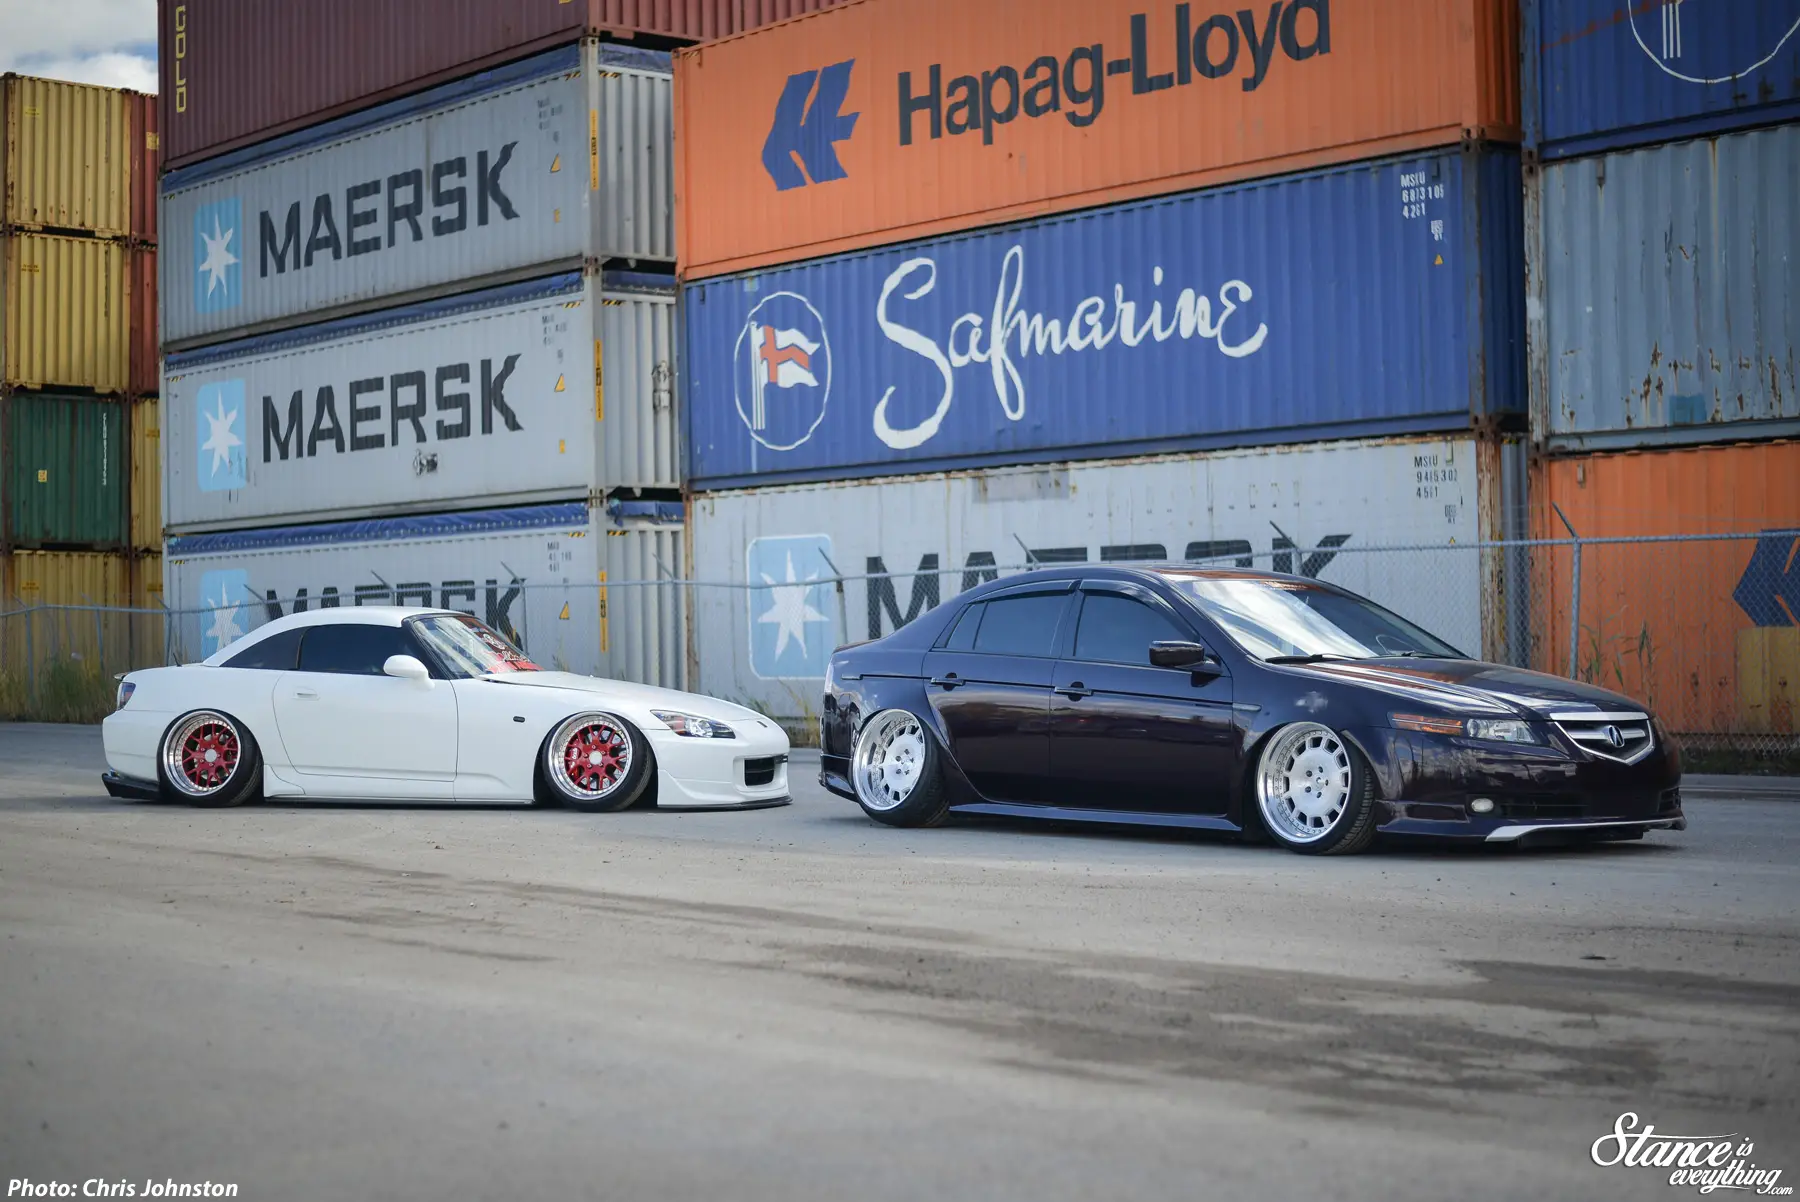
Mike Pimmenta and Steve Luangpakdy ran around last summer with two of the most polarizing bagged Honda vehicles in the GTA. Mike’s car seemed to appear virtually out of nowhere completely finished, while Steve’s was a long time coming towards its current look.
Though these two cars have no problem standing out on their own together the really make a visual impact and Chris Johnston just so happened to get the two of them together while shooting for USDMFREAX magazine.
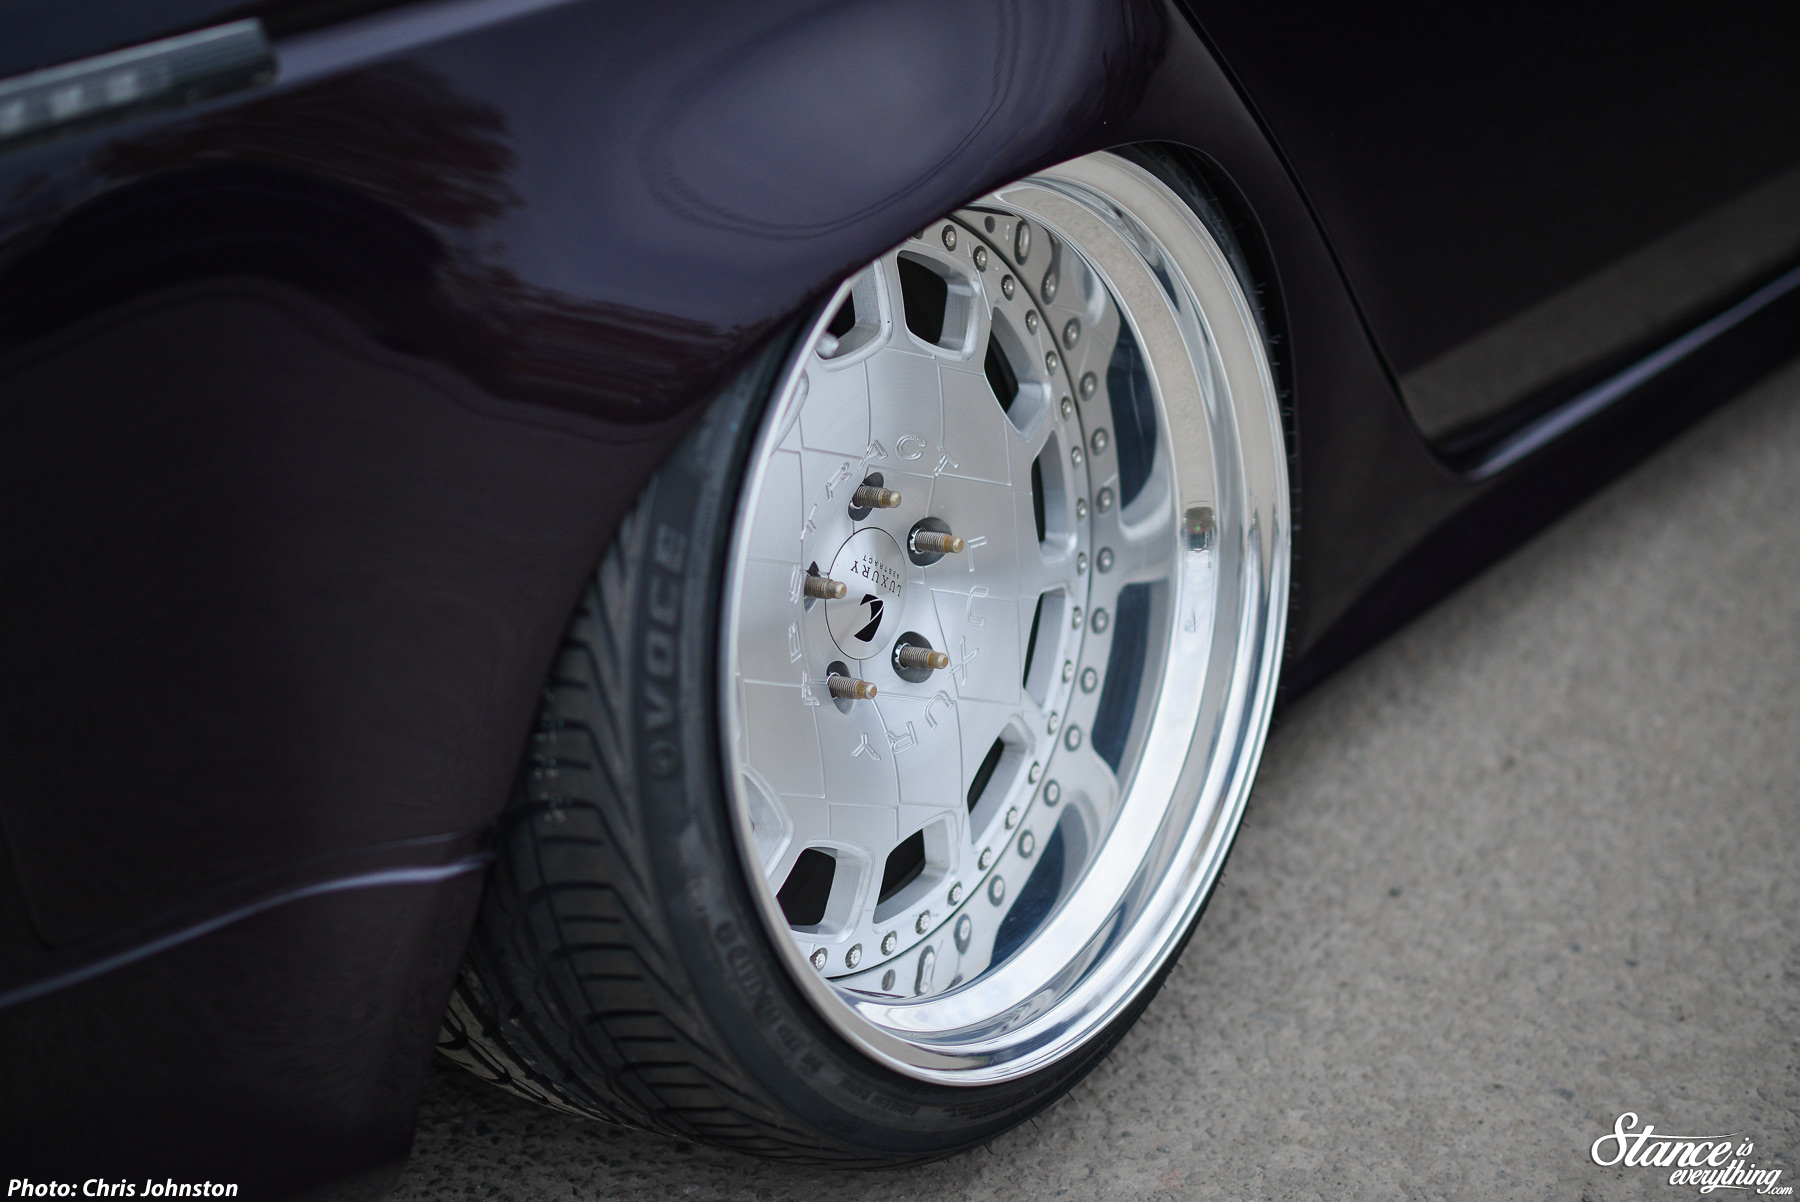
Like so many other cars featured on this site Steve’s started as a vehicle “that was going to stay stock” before “just a wheels and a drop” kicked in leading to what would eventually be a complete make over prompted by winning a set of Luxury Abstract wheels at Liberty VIP’s Black III event in 2012.
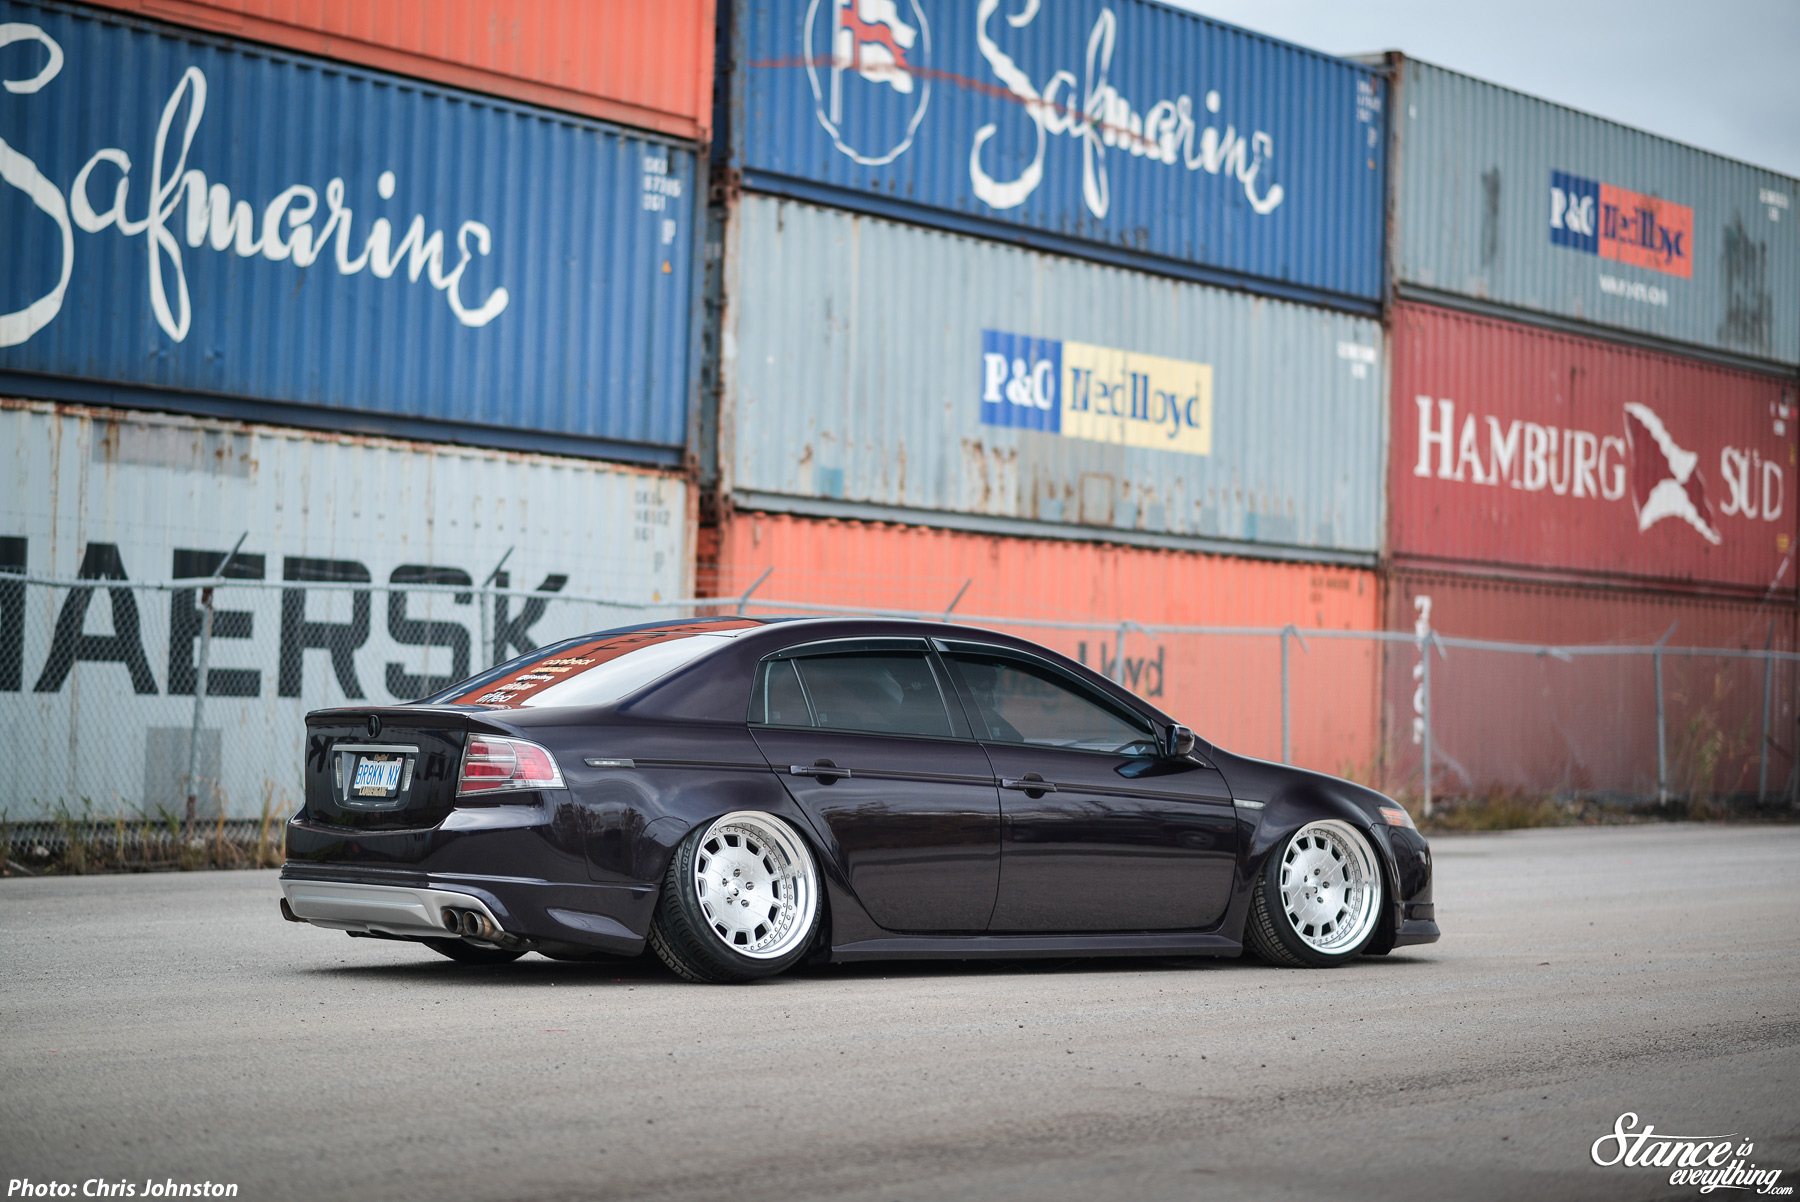
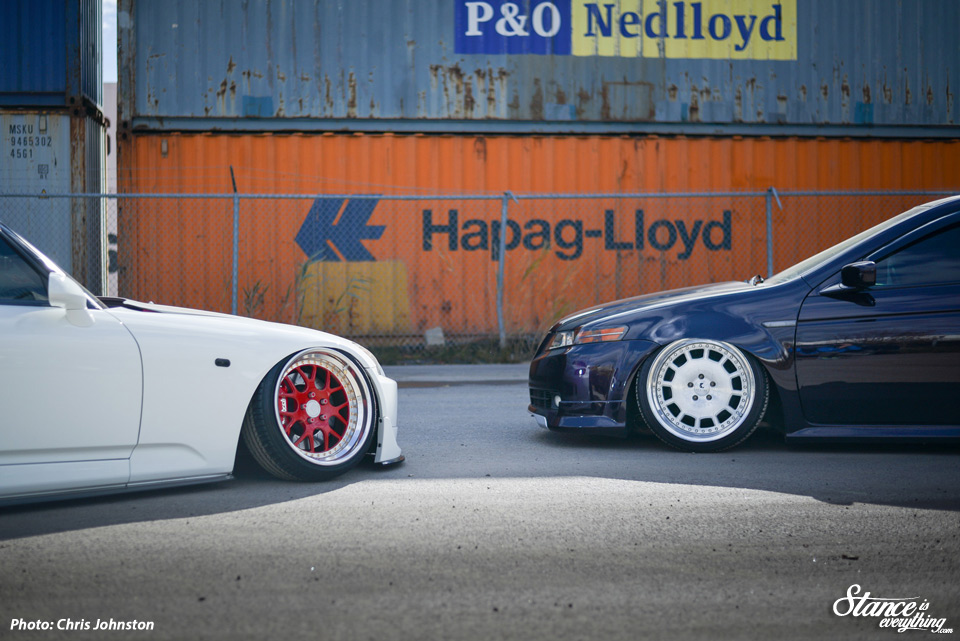
Using the go big or go home motto Steve went big and ordered his wheels at 10.5 and 12″ width all around and 19″ in overall diameter.
These wheels were much, much, too large for a standard body TL so Steve sent the car off to Ottawa Autobody for a little plastic surgery. The ensuing wide-body build used oem fenders borrowed from a different vehicle along with a lot of man hours and block sanding.
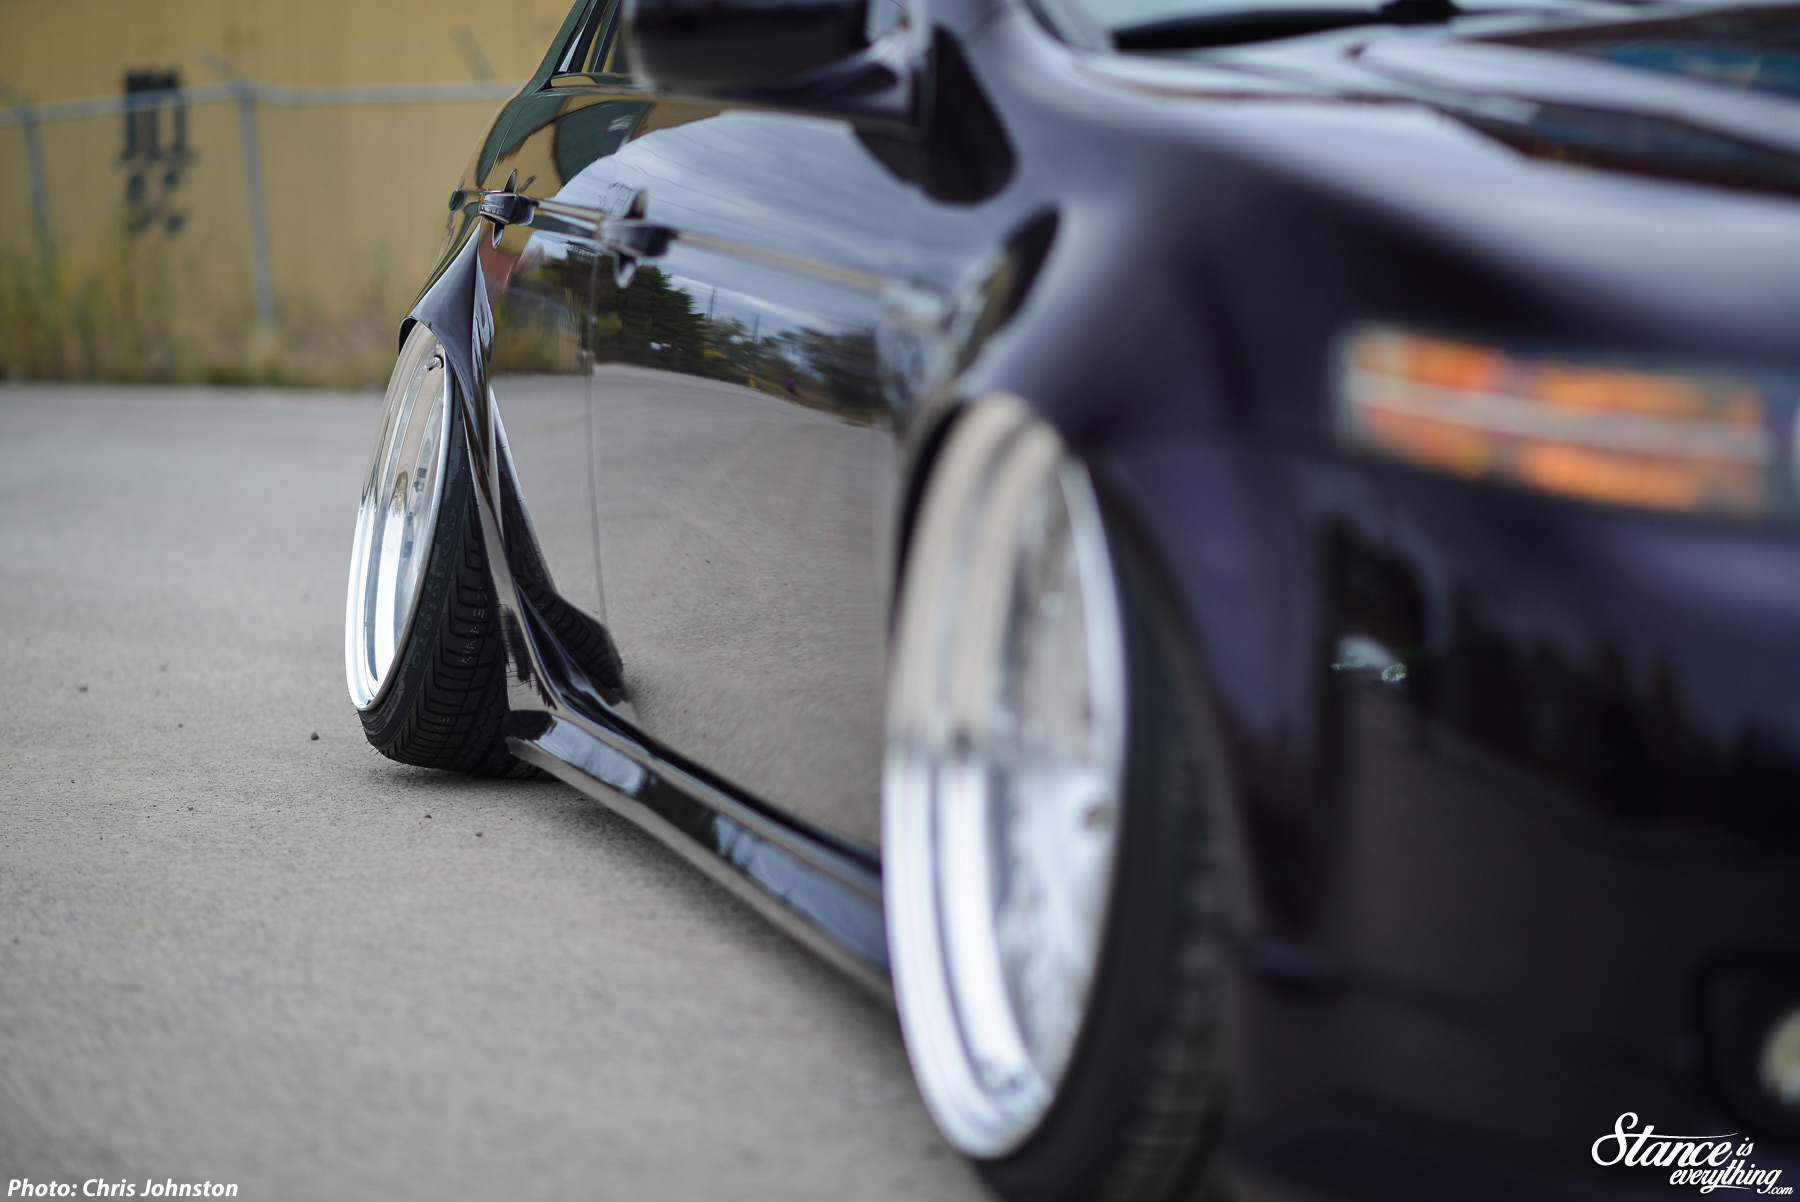
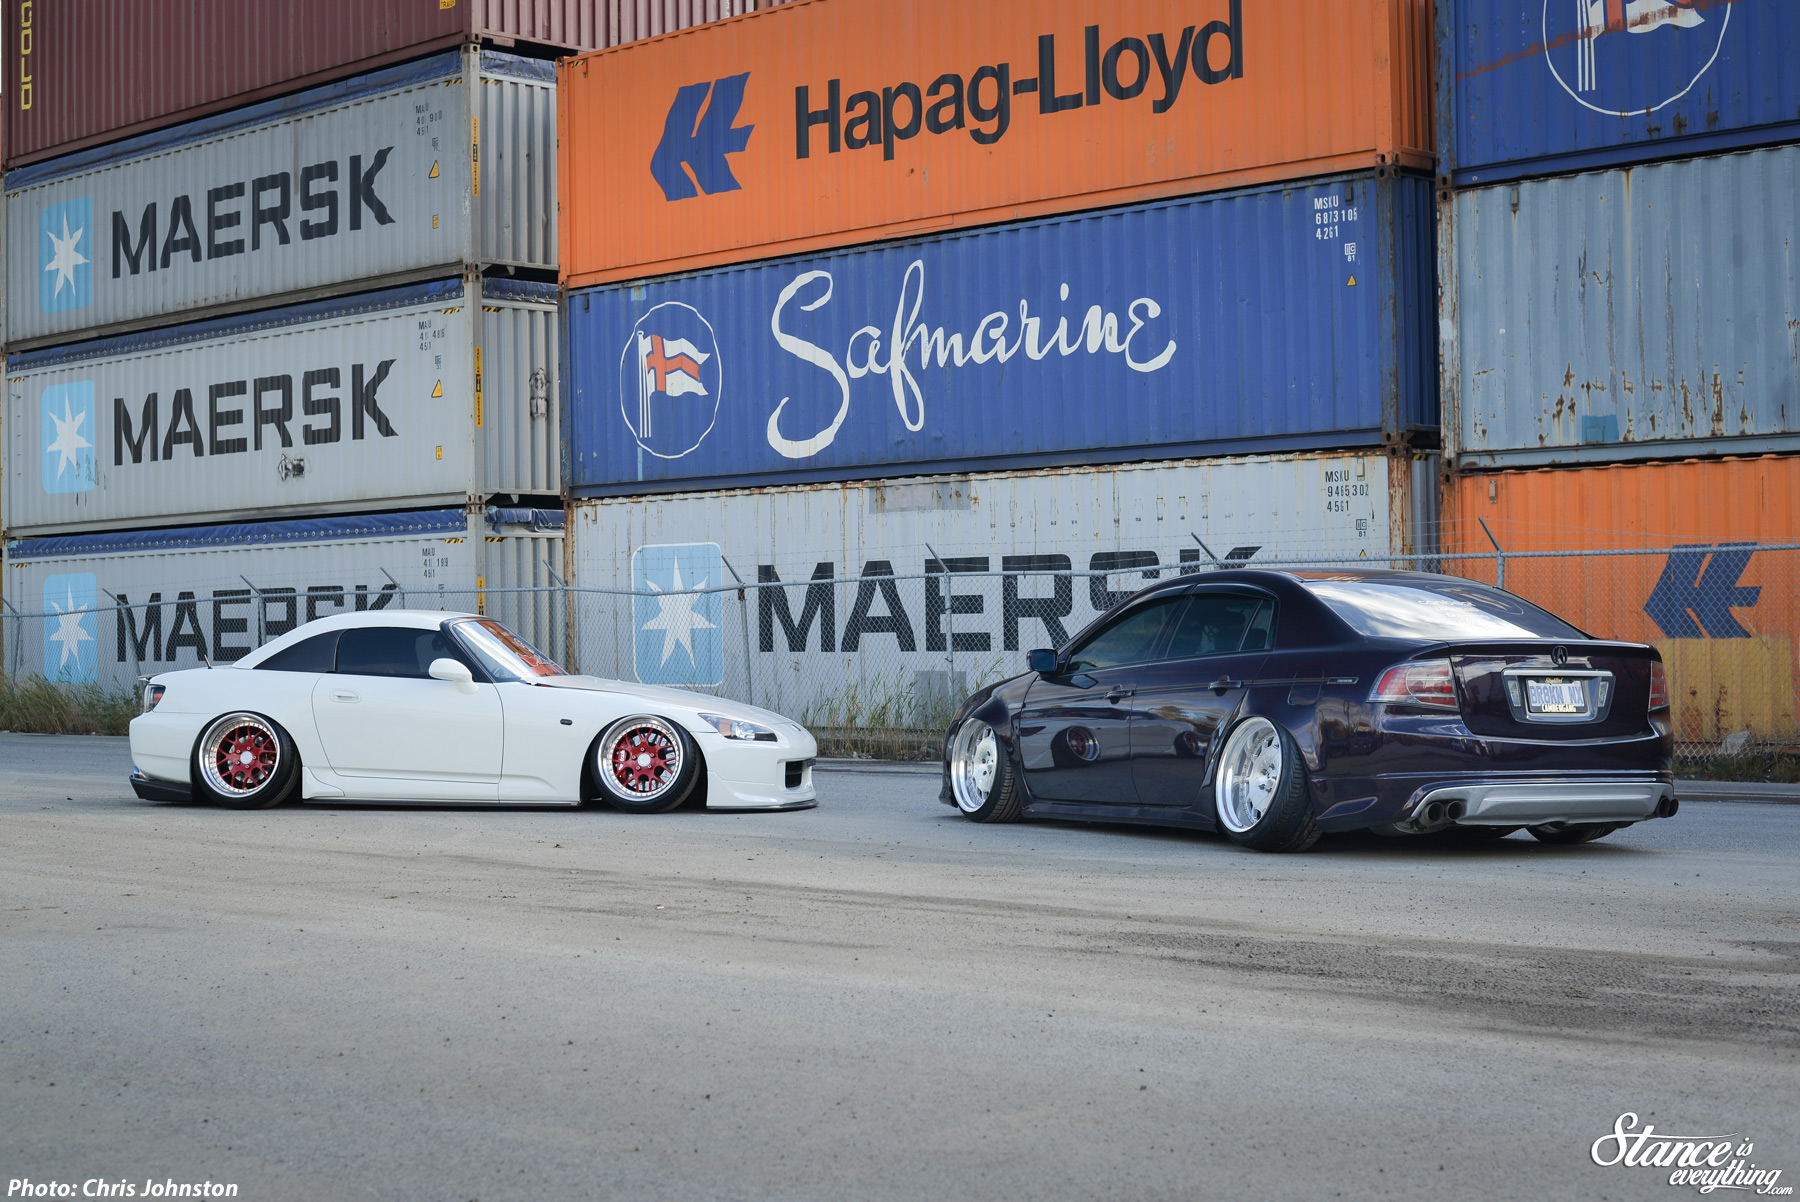
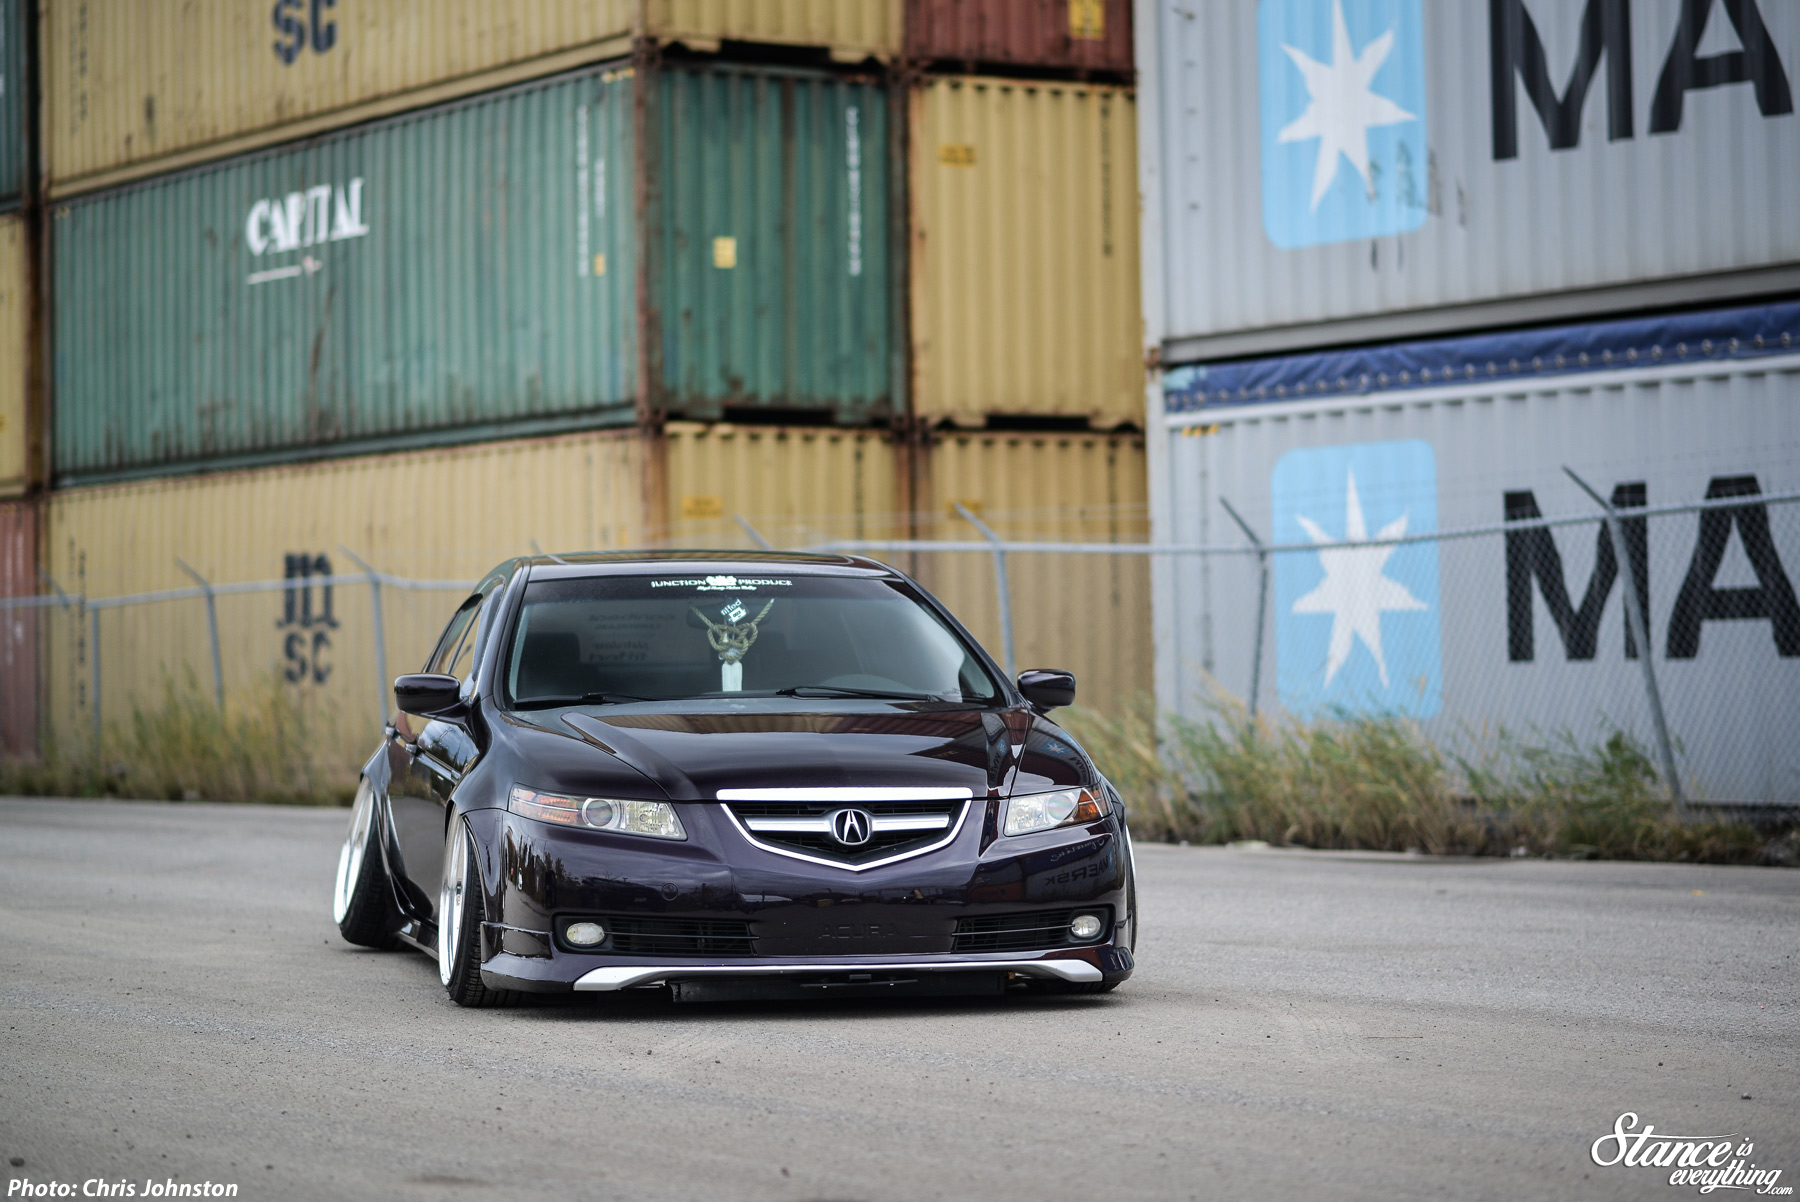
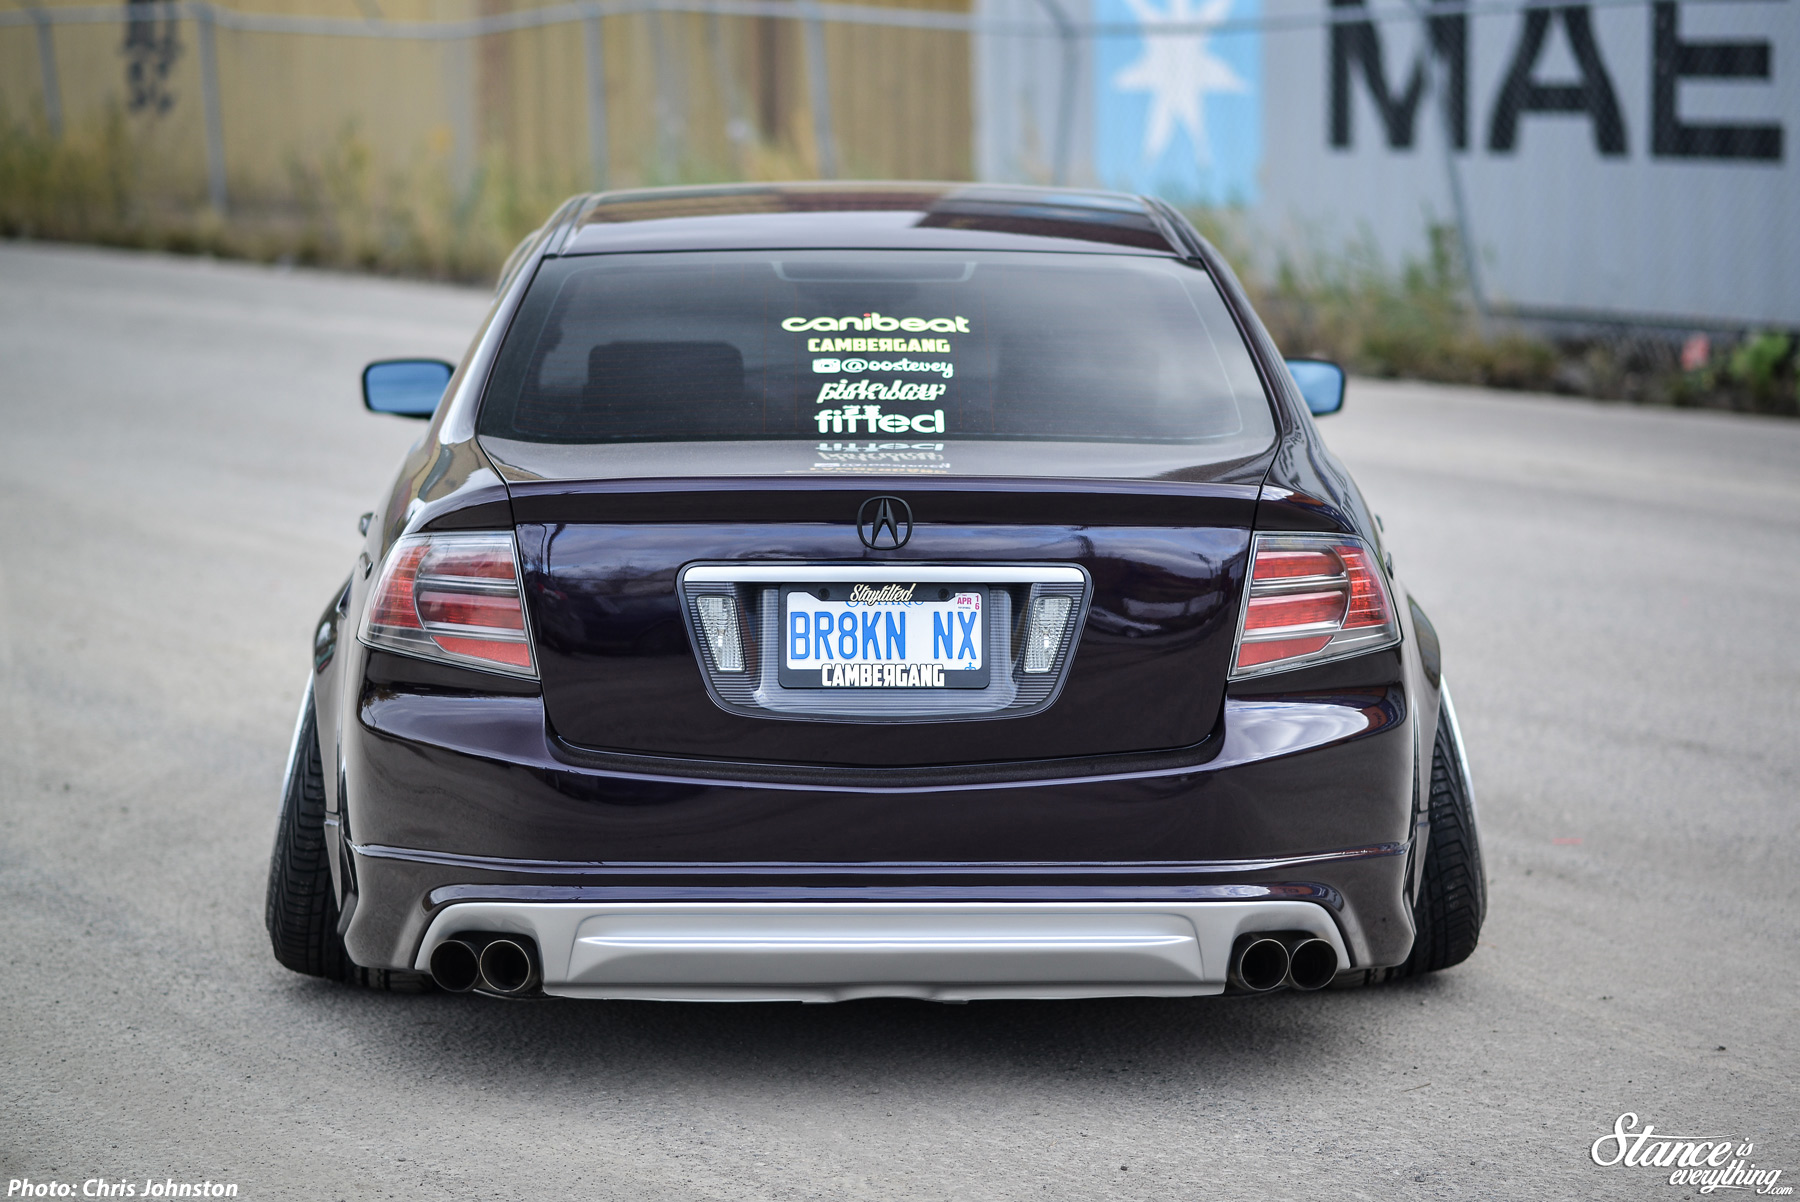
After an extended stay in the body shop the car came back purple with much wider hips.
Tucking the wheels into the new fenders is Air Lift Performance suspension controlled by a DVS switch box.
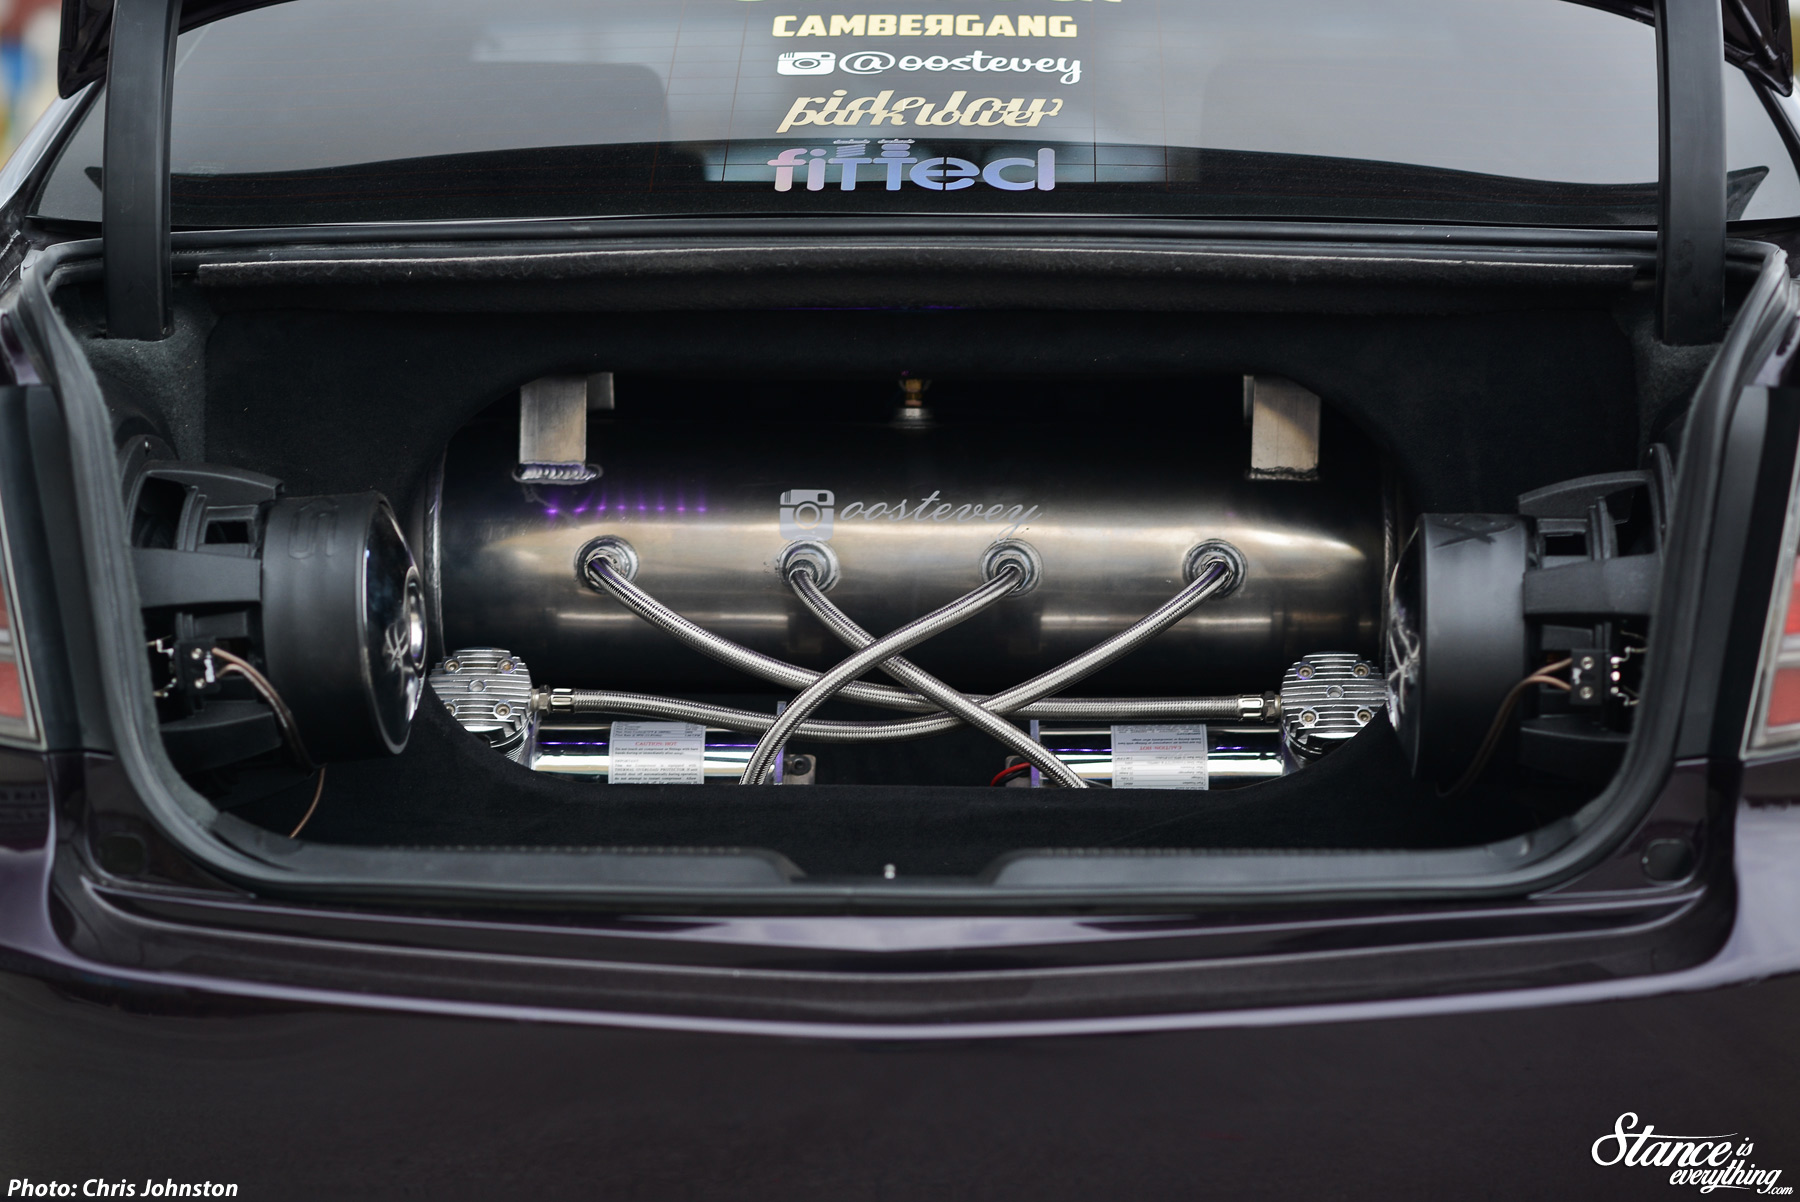
Ultimate Motorsports handled the trunk install that features a host of RE Audio components including XXX subs, speakers and components powered by an RE Audio 45KV amplifier that’s been mounted in the center of the trunk floor in a way that allows the guts to be showcased.

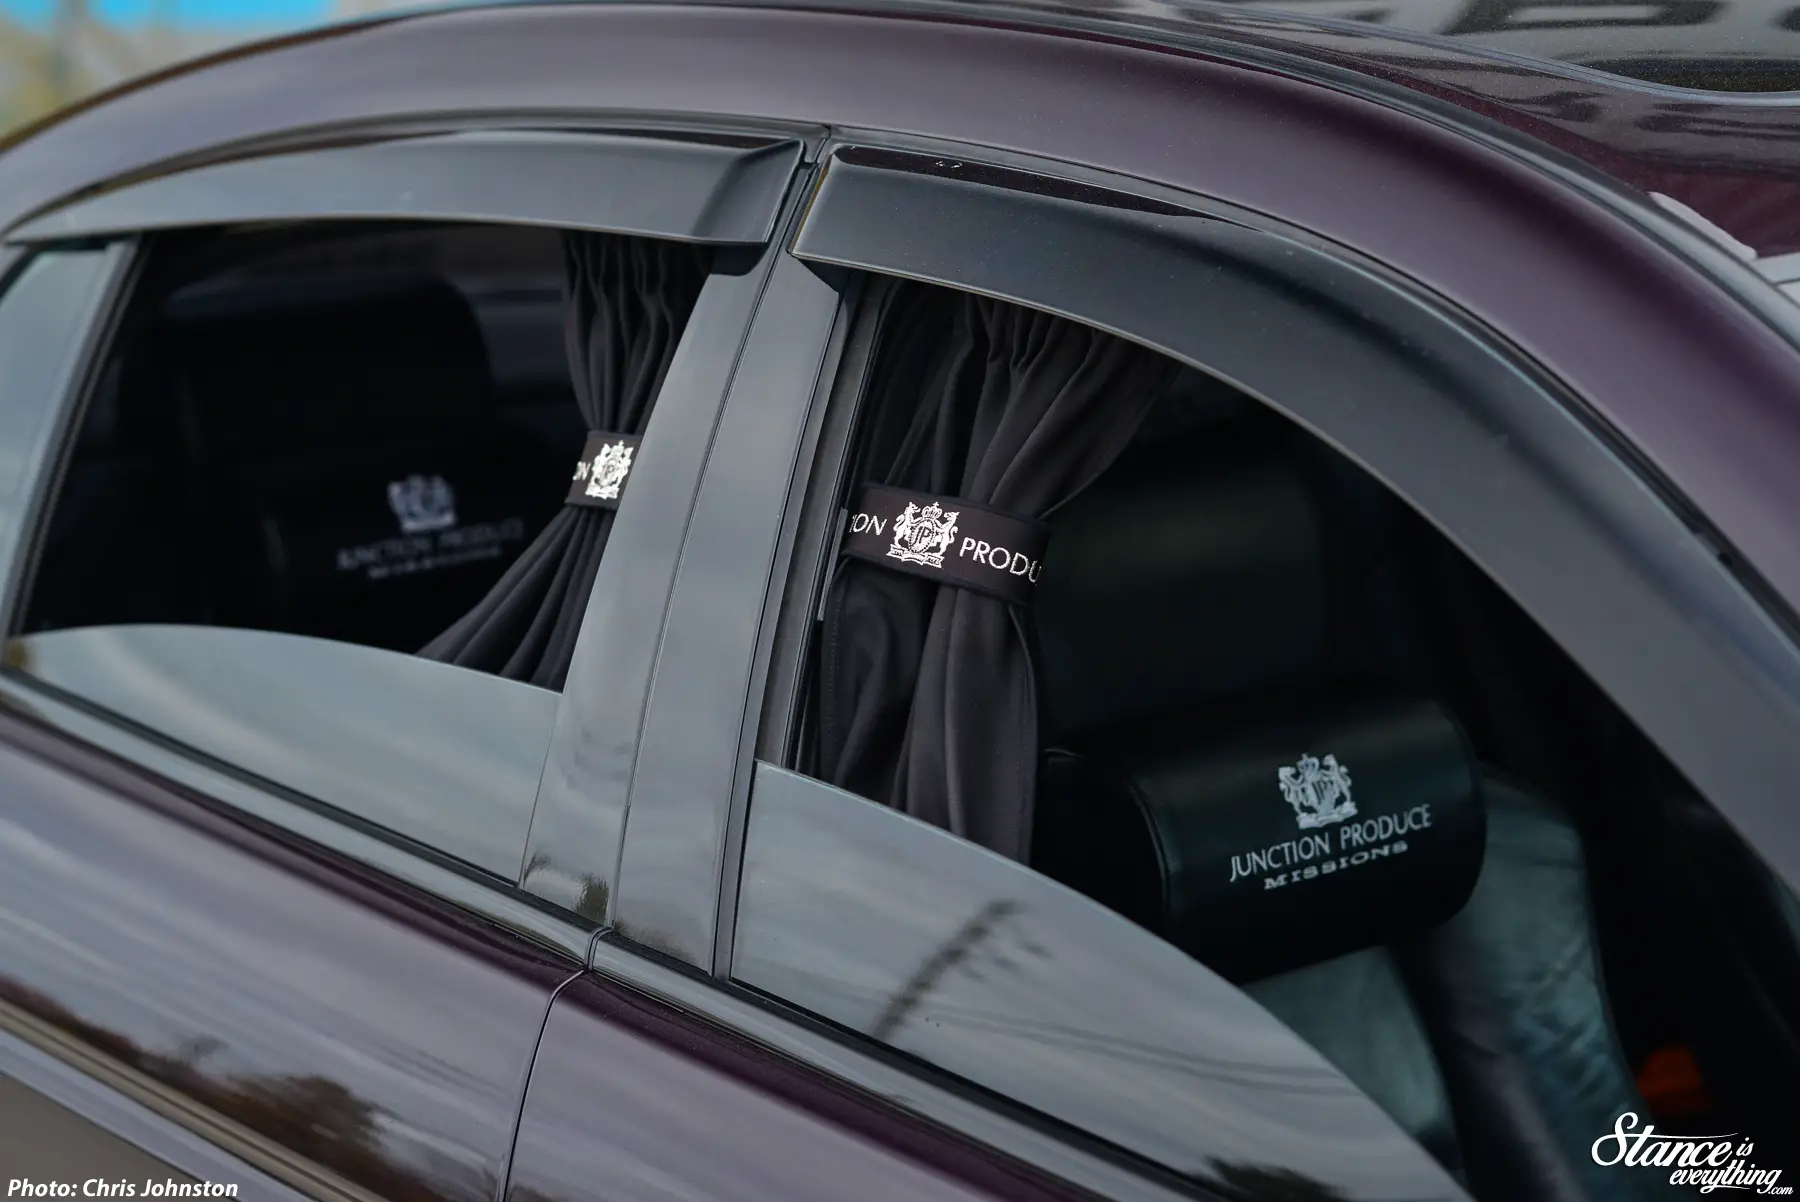
Inside Steve, the newest Canadian member of the Liberty VIP Car club, went the VIP route with carbon fiber interior accents, Junction produce neck pillows, Junction Produce curtains, and a matching JP Kitsuna knot.

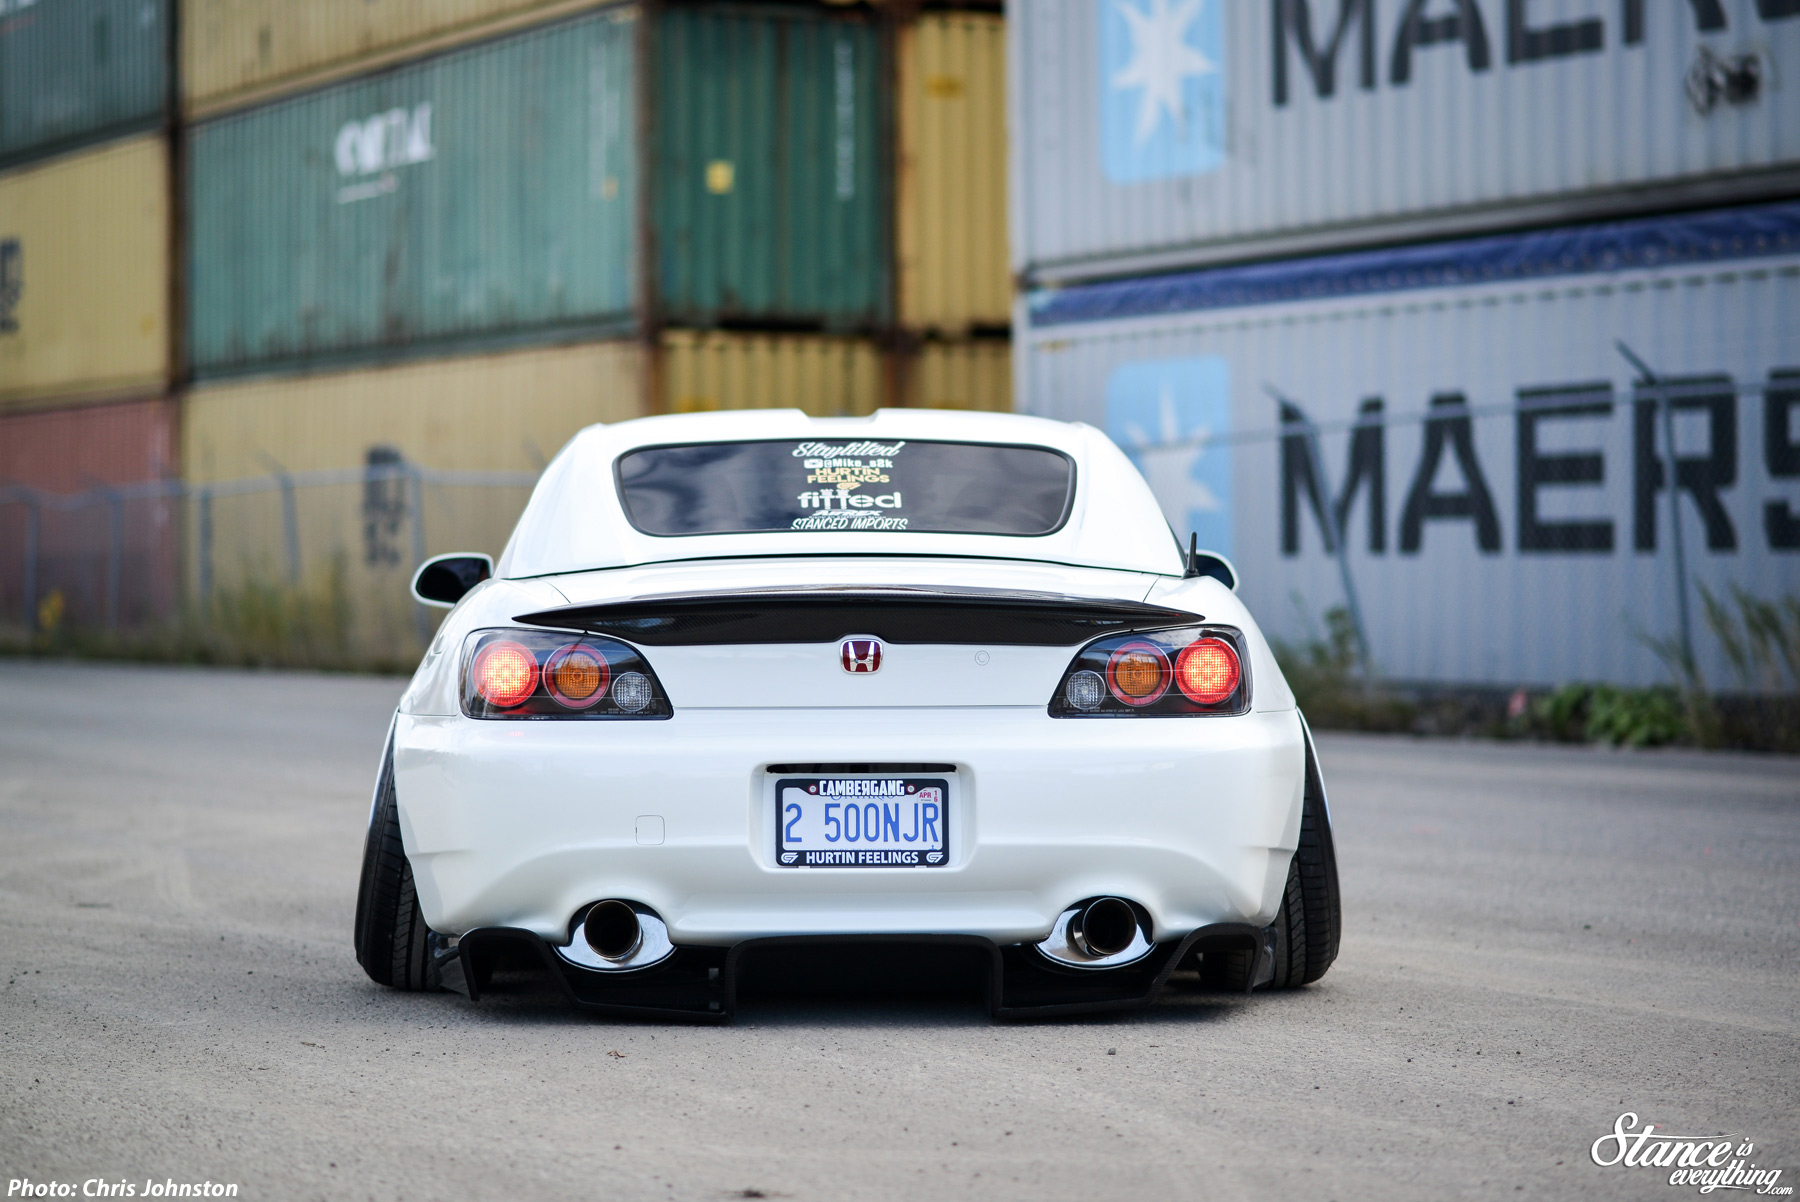
Mike, previously a Civic owner who valued function over form, took the complete opposite approach when it came to modifying his s2000 opting to flip the script and put form over function.
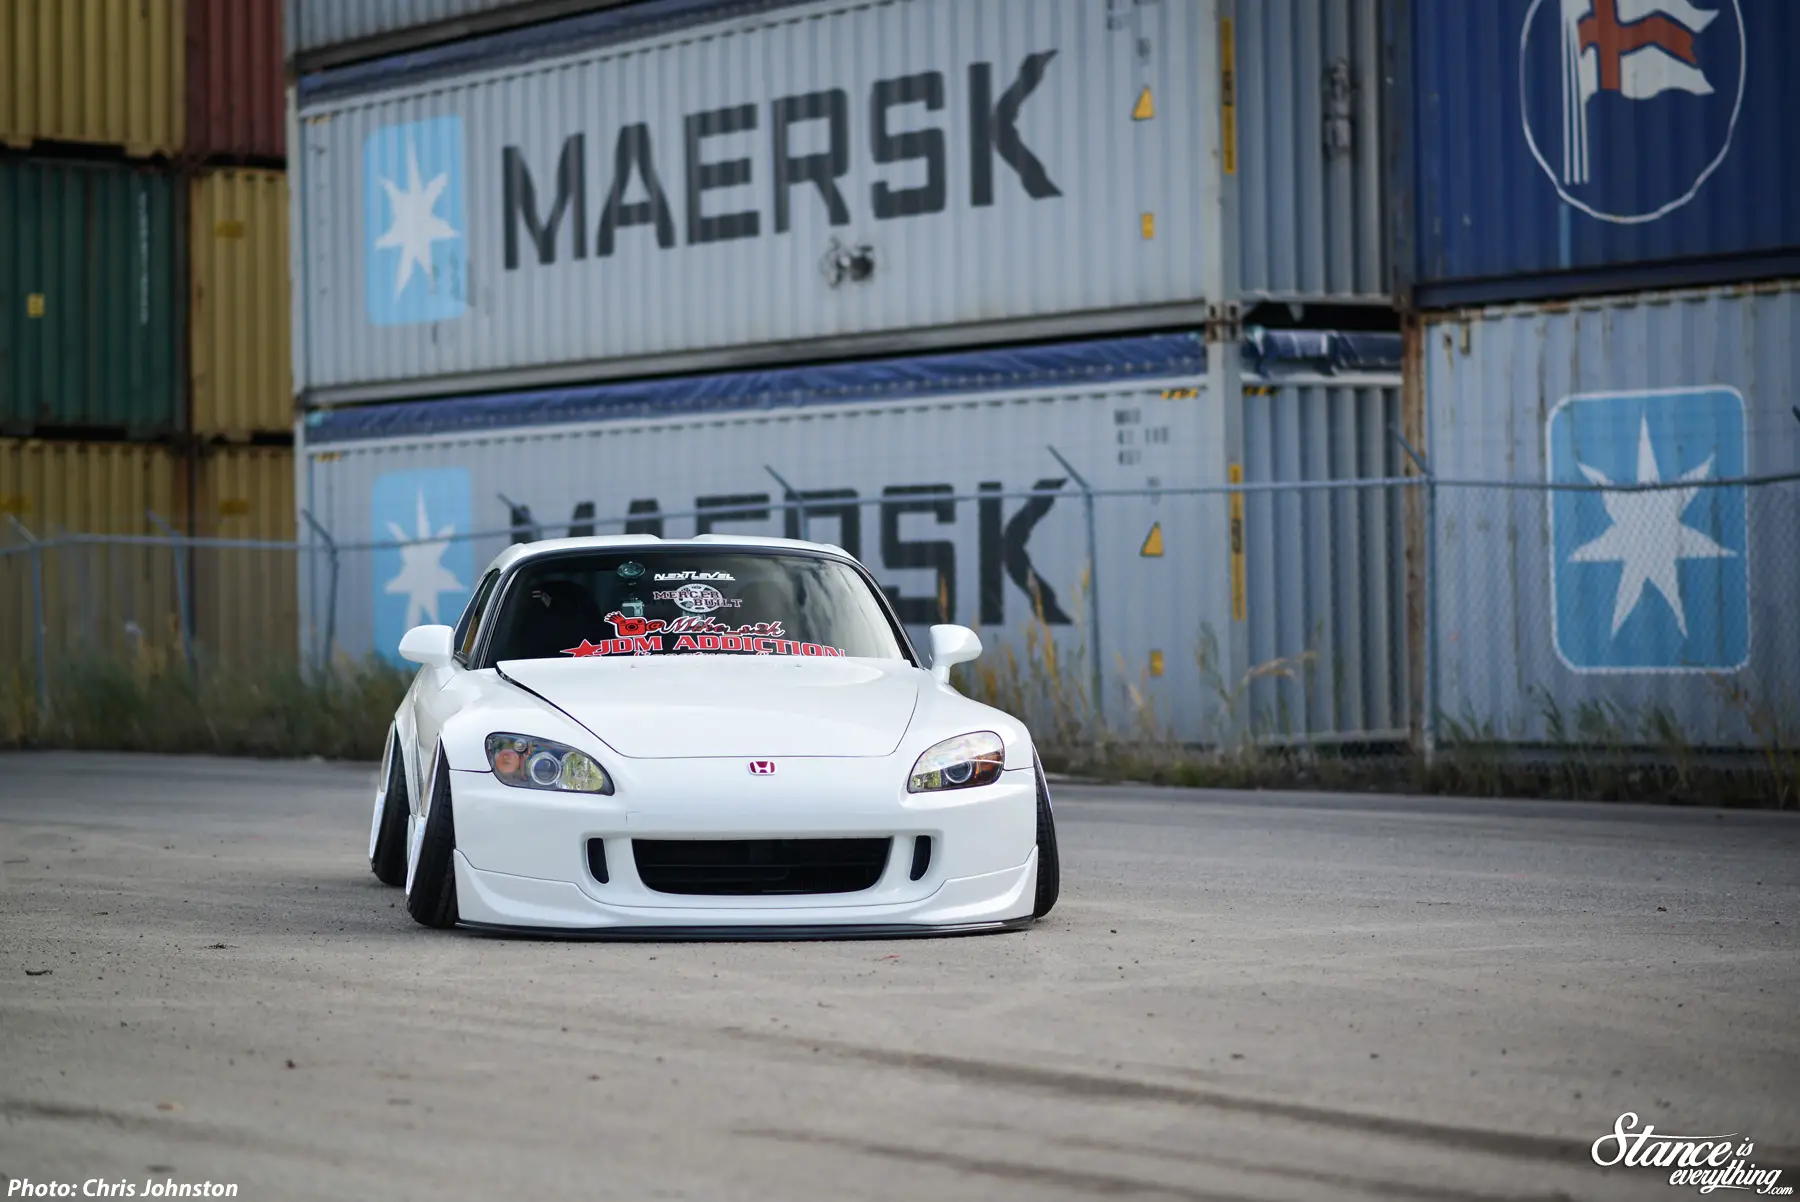

His car features K3Projekt Wheels, one of very few in Ontario (and I believe the only IND K37s) sized at 18×9 et 35 and 18×10 et 10 wrapped in heavily stretched 205/40 and 215/40 Bridgestone rubber.
Like Steve’s car Mike rides on air using Airrex struts paired with Accuair management.
Hard Race front upper control arms, Megan racing rear upper control arms and Buddy Club extended ball joints allow Mike to run the camber he does without the suspension literally pulling itself apart.
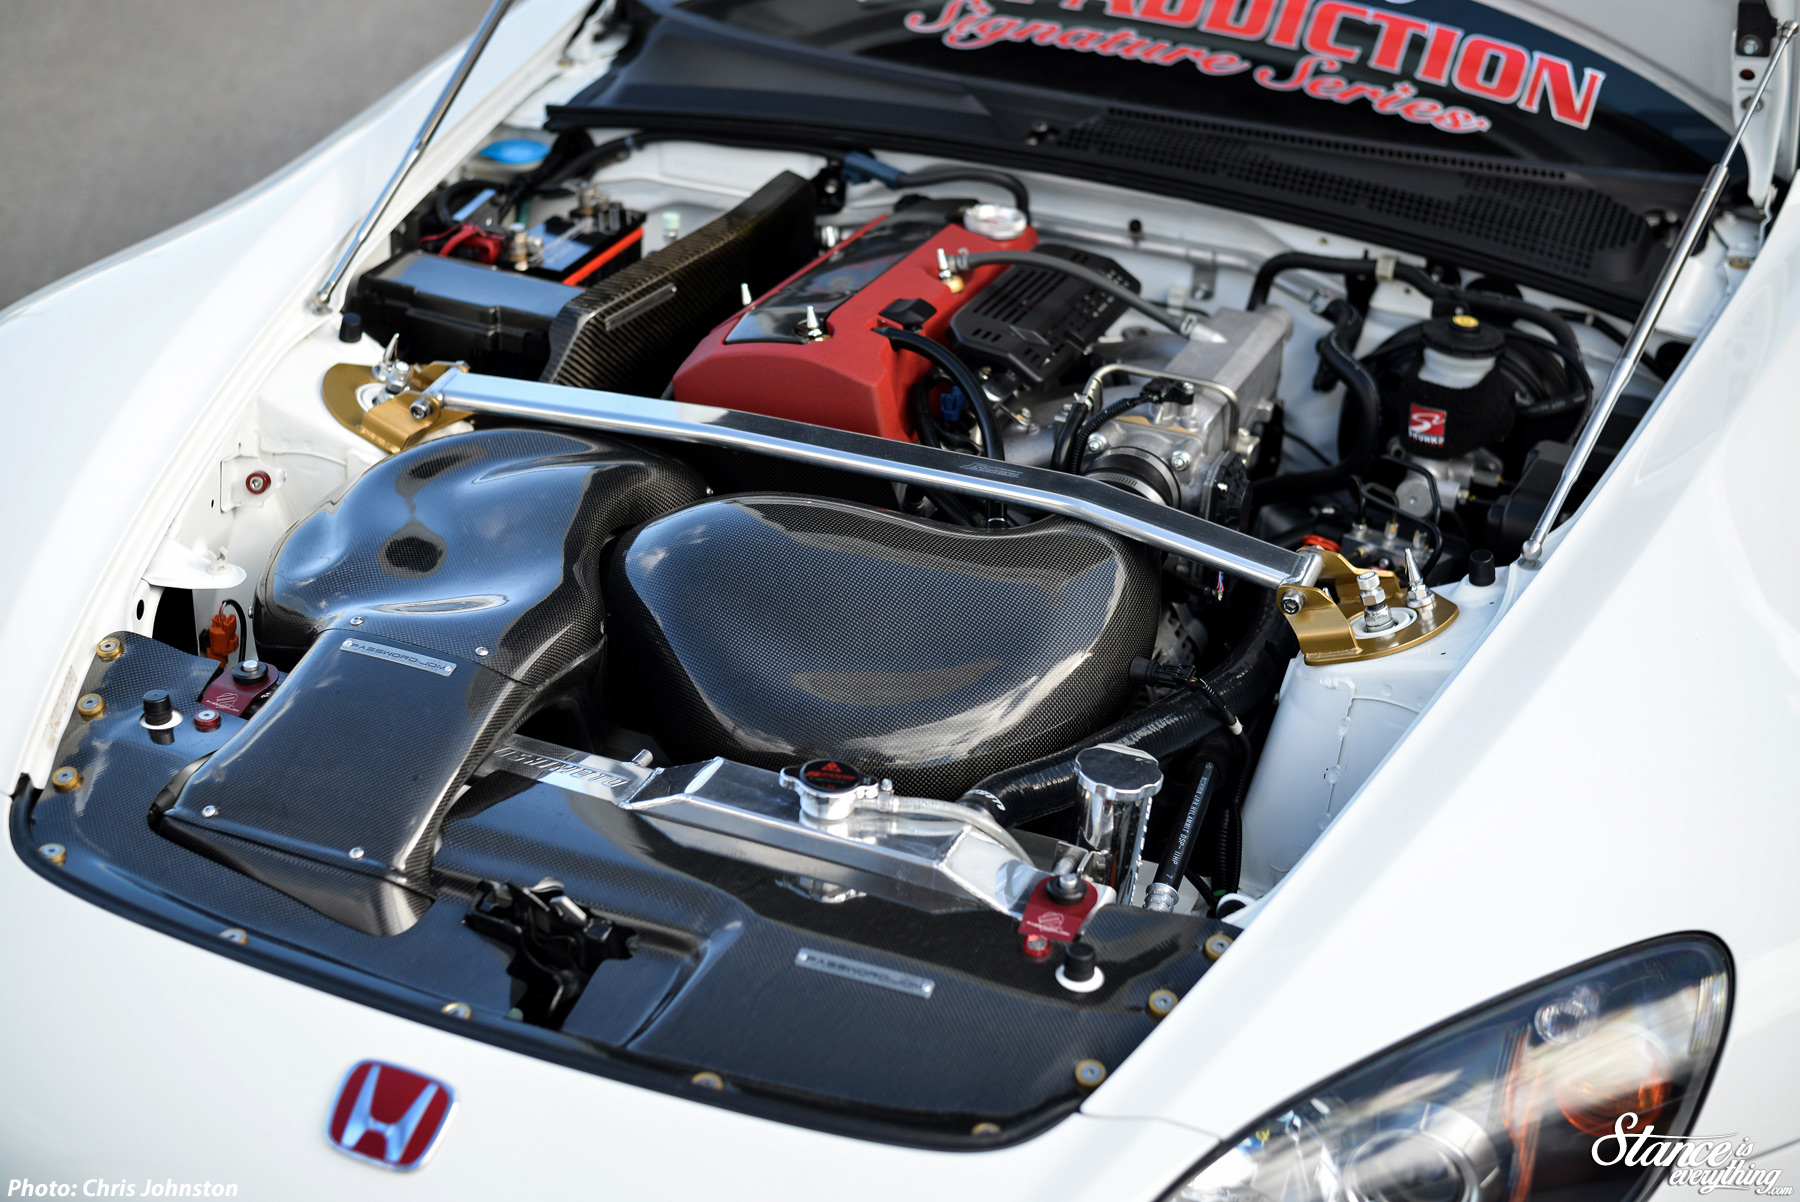
Under hood most of the Password JDM catalog has been used from Carbon Fiber heat Engine shield all the way down to billet aluminum battery mount. Non password JDM under hood products include Downstar bolt boys baby spikes, a J’s Racing Strutbar, and Science of Speed Hood Dampers.
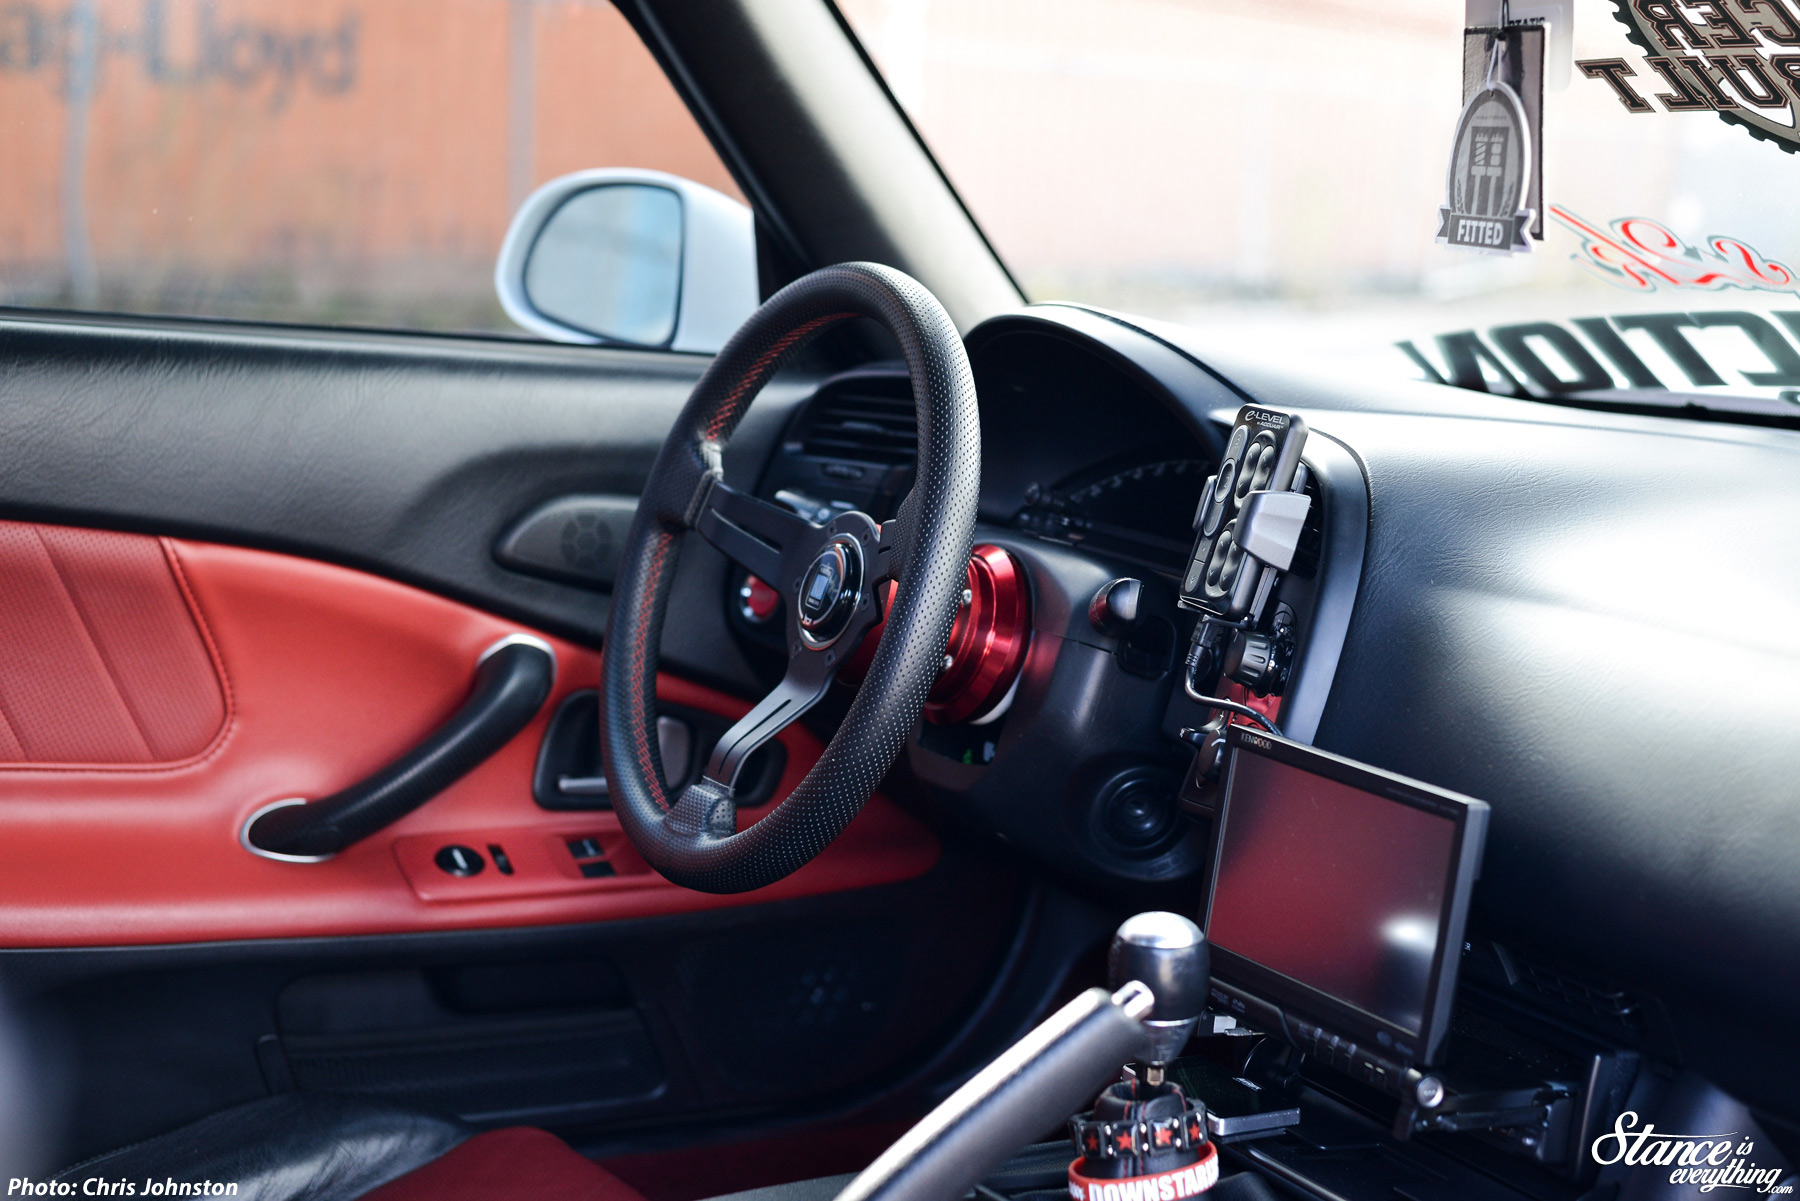
Interior Mike’s got some tunes as well, but with less trunk space than Steve he’s kept things pretty civil with one 12″ JL W3 sub-woofer. He’s also added a Nardi wheel, flip out screen and red stitched shift boot to match the factory red door panel inserts.
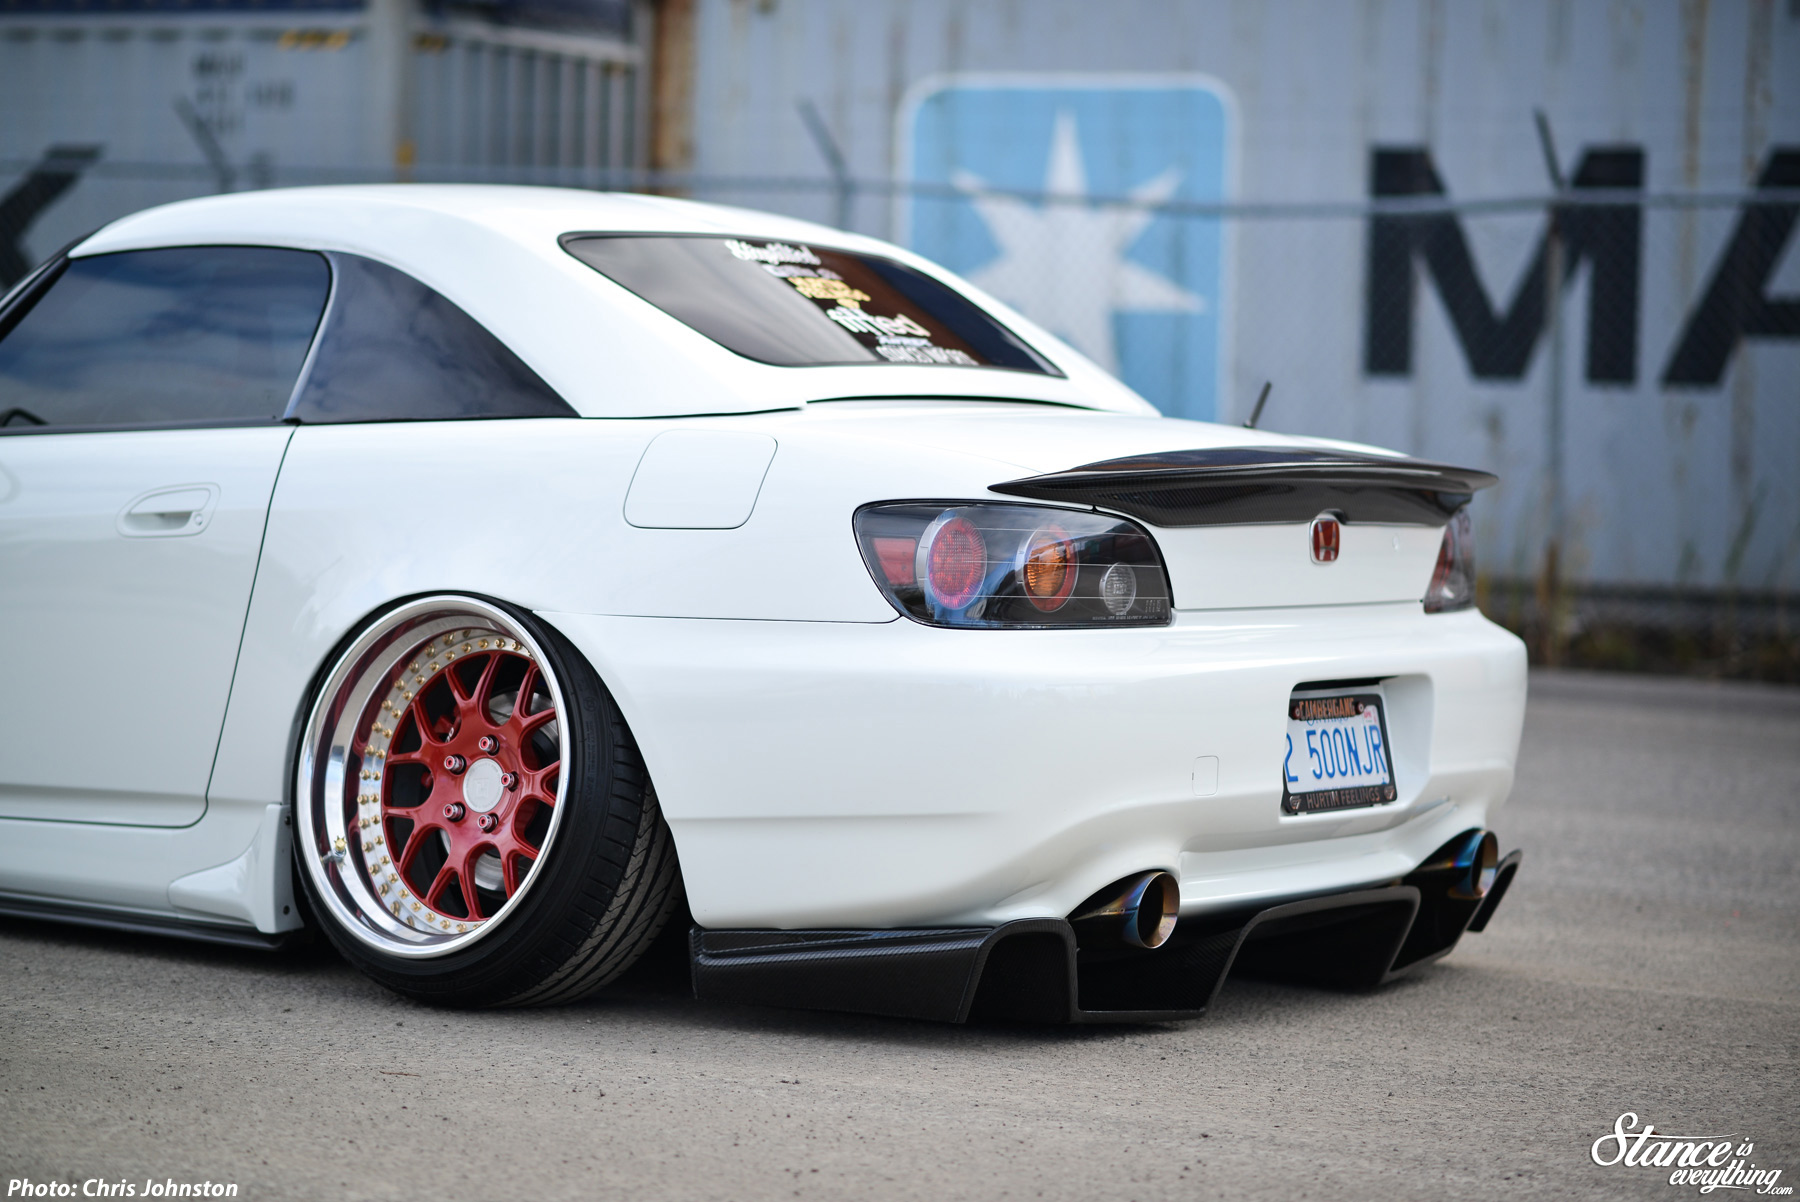
The sheet metal of the car is stock, save for the fender massaging to get the wheels to fit and subtle additions are an OEM Style lip, Downforce splitter and side splitters and a Spoon rear diffuser.
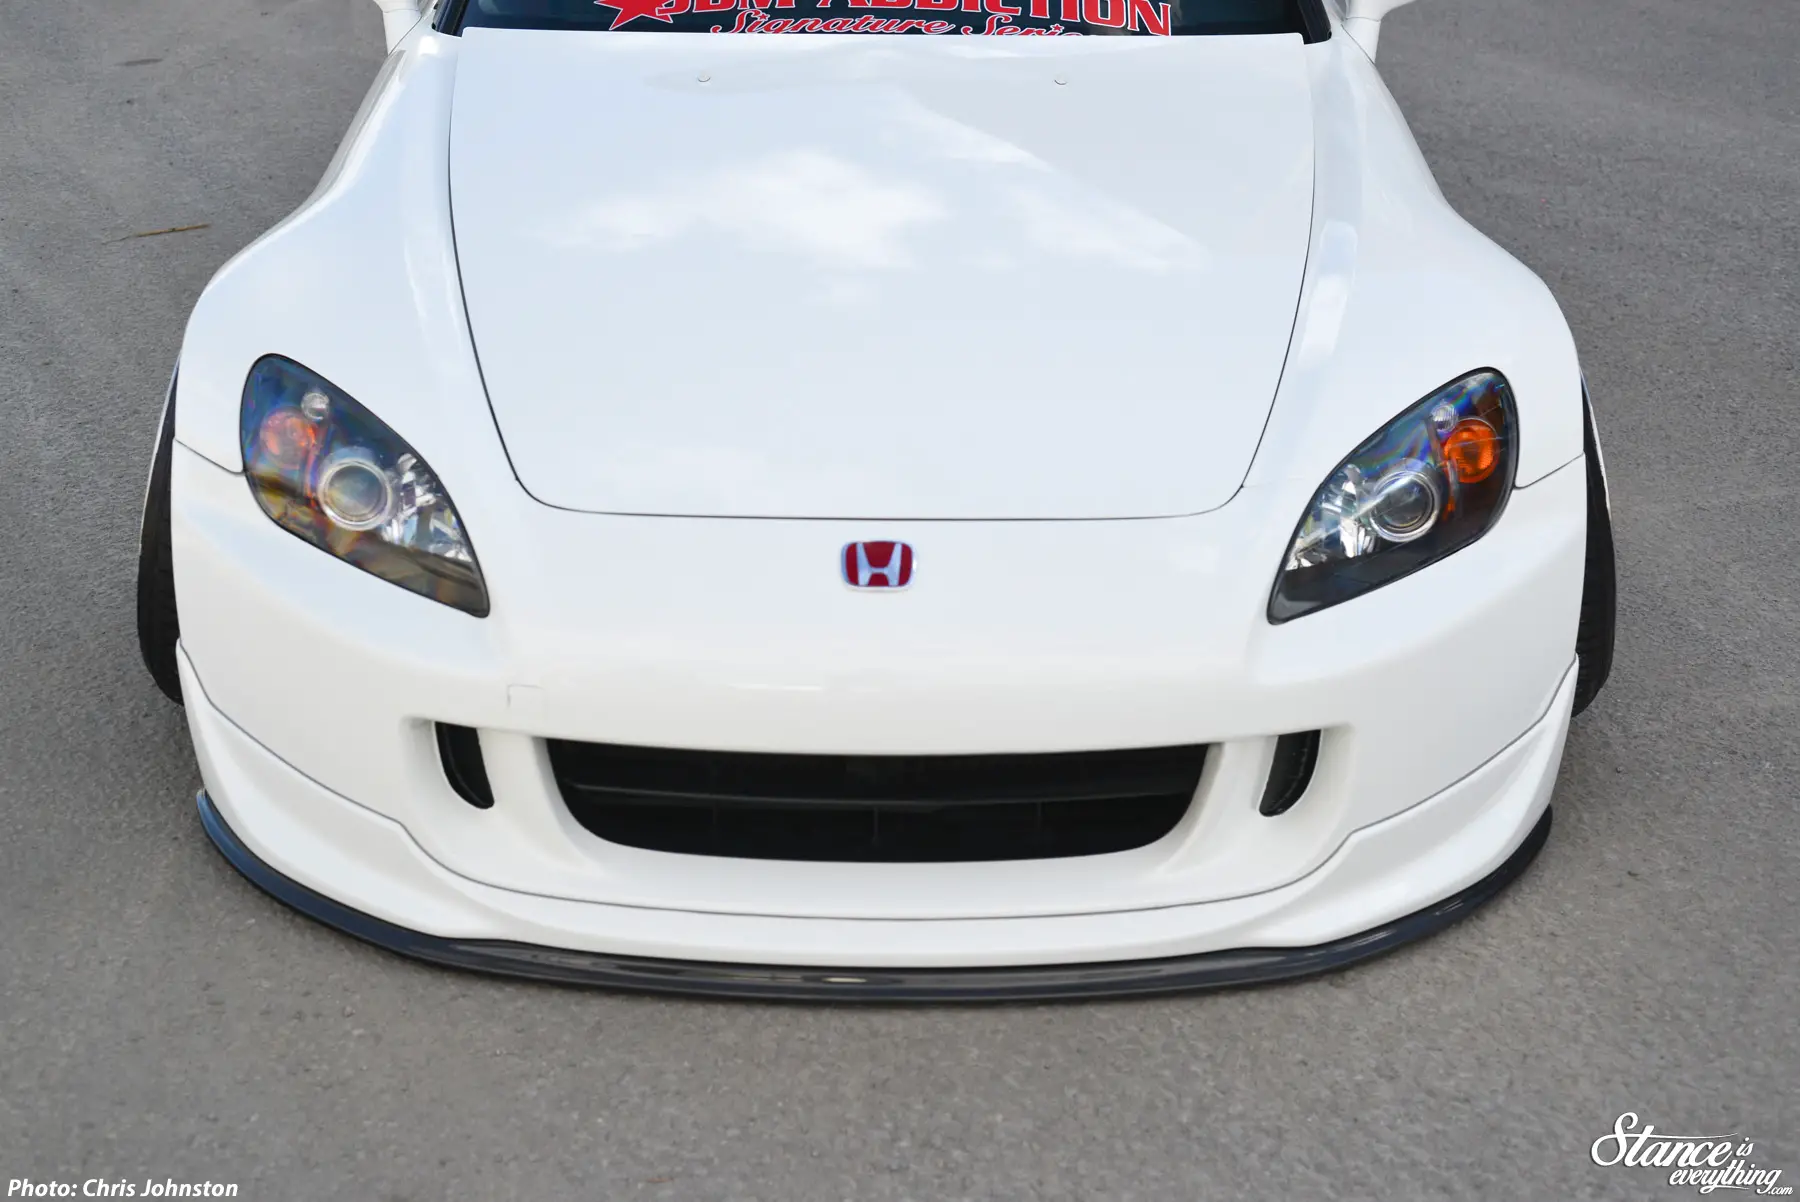
Rounding out the exterior are JDM red Honda pages, smoked side markers a BYS spoiler and the Mugen top that makes having the roof up for these photos excusable.
With fitment that isn’t for the faint of heart and sure enough to give any alignment tech a headache both Mike and Steve’s cars are sure to be causing double takes for a few years yet. The only question left now is what’s next

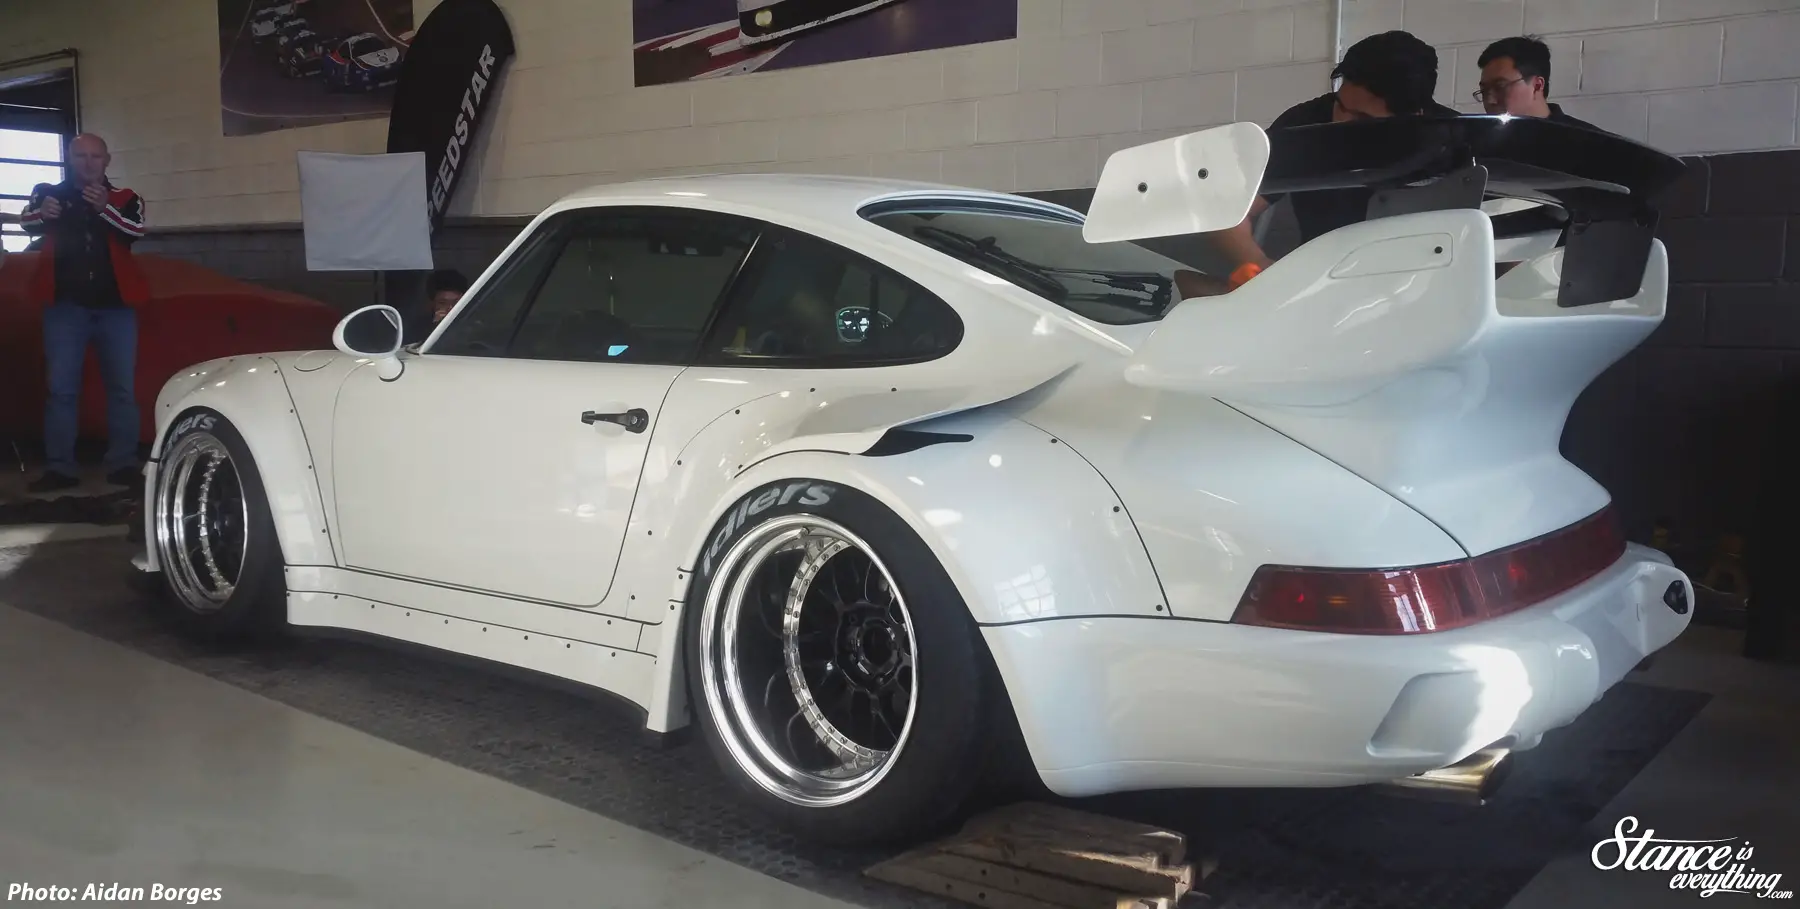
What really is there left to say about Nakai-san and his now famous brand Rauh Welt Begriff? Roughly six years ago RWB could have been considered a niche brand known only to those obsessed with, or living in, Japan but today RWB is a house hold name among enthusiasts.
Behind some of the most popular Porsche builds in the past three years the work of Nakai-san and RWB has been featured several times over both on-line and in print bringing the Rough World aesthetic to people around the globe.
Just like his reputation Nakai-san too has travelled the globe, meeting up with his kits at their destination to perform the conversions himself. In the past two years he’s found himself the UK, Thailand, America and here in Canada.
Everyone knew that he would eventually make it to Toronto –after getting pretty close with trips to Montreal and Quebec respectively– it was just a question of when and last week was that ‘when’ arriving mid-week to Speedstar Automotive located just outside of Toronto in the city of Markham.

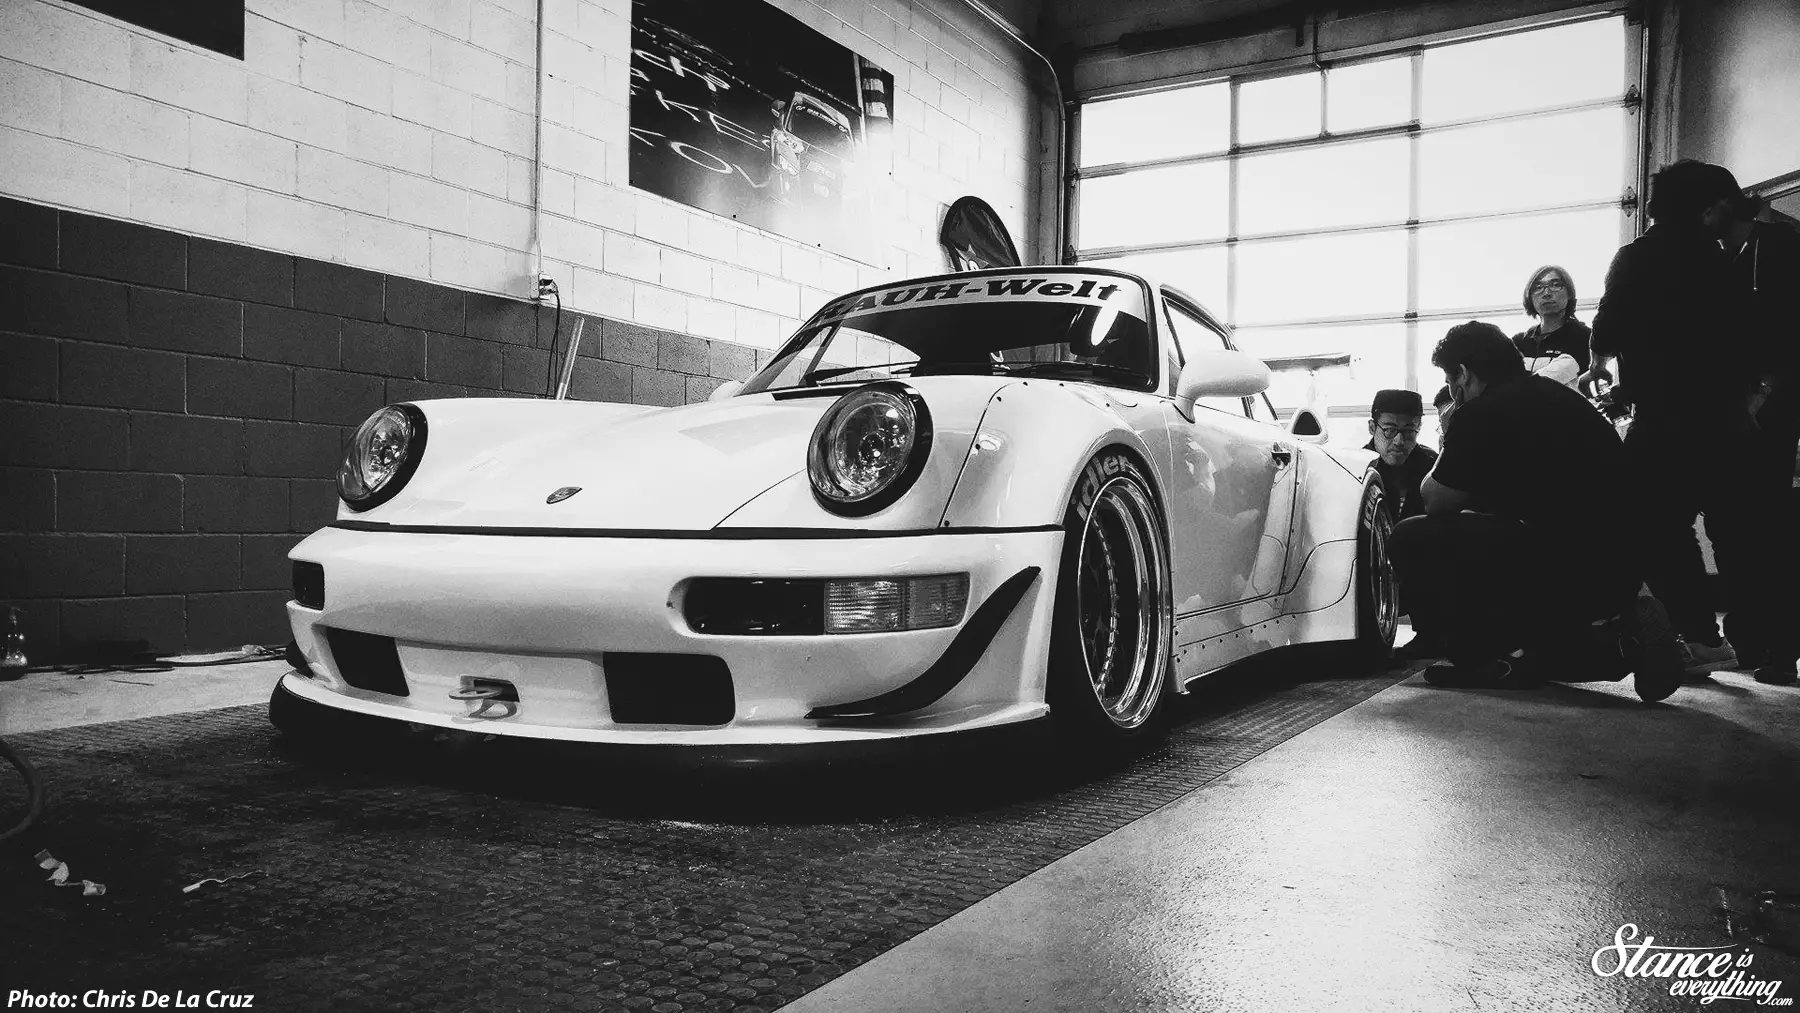
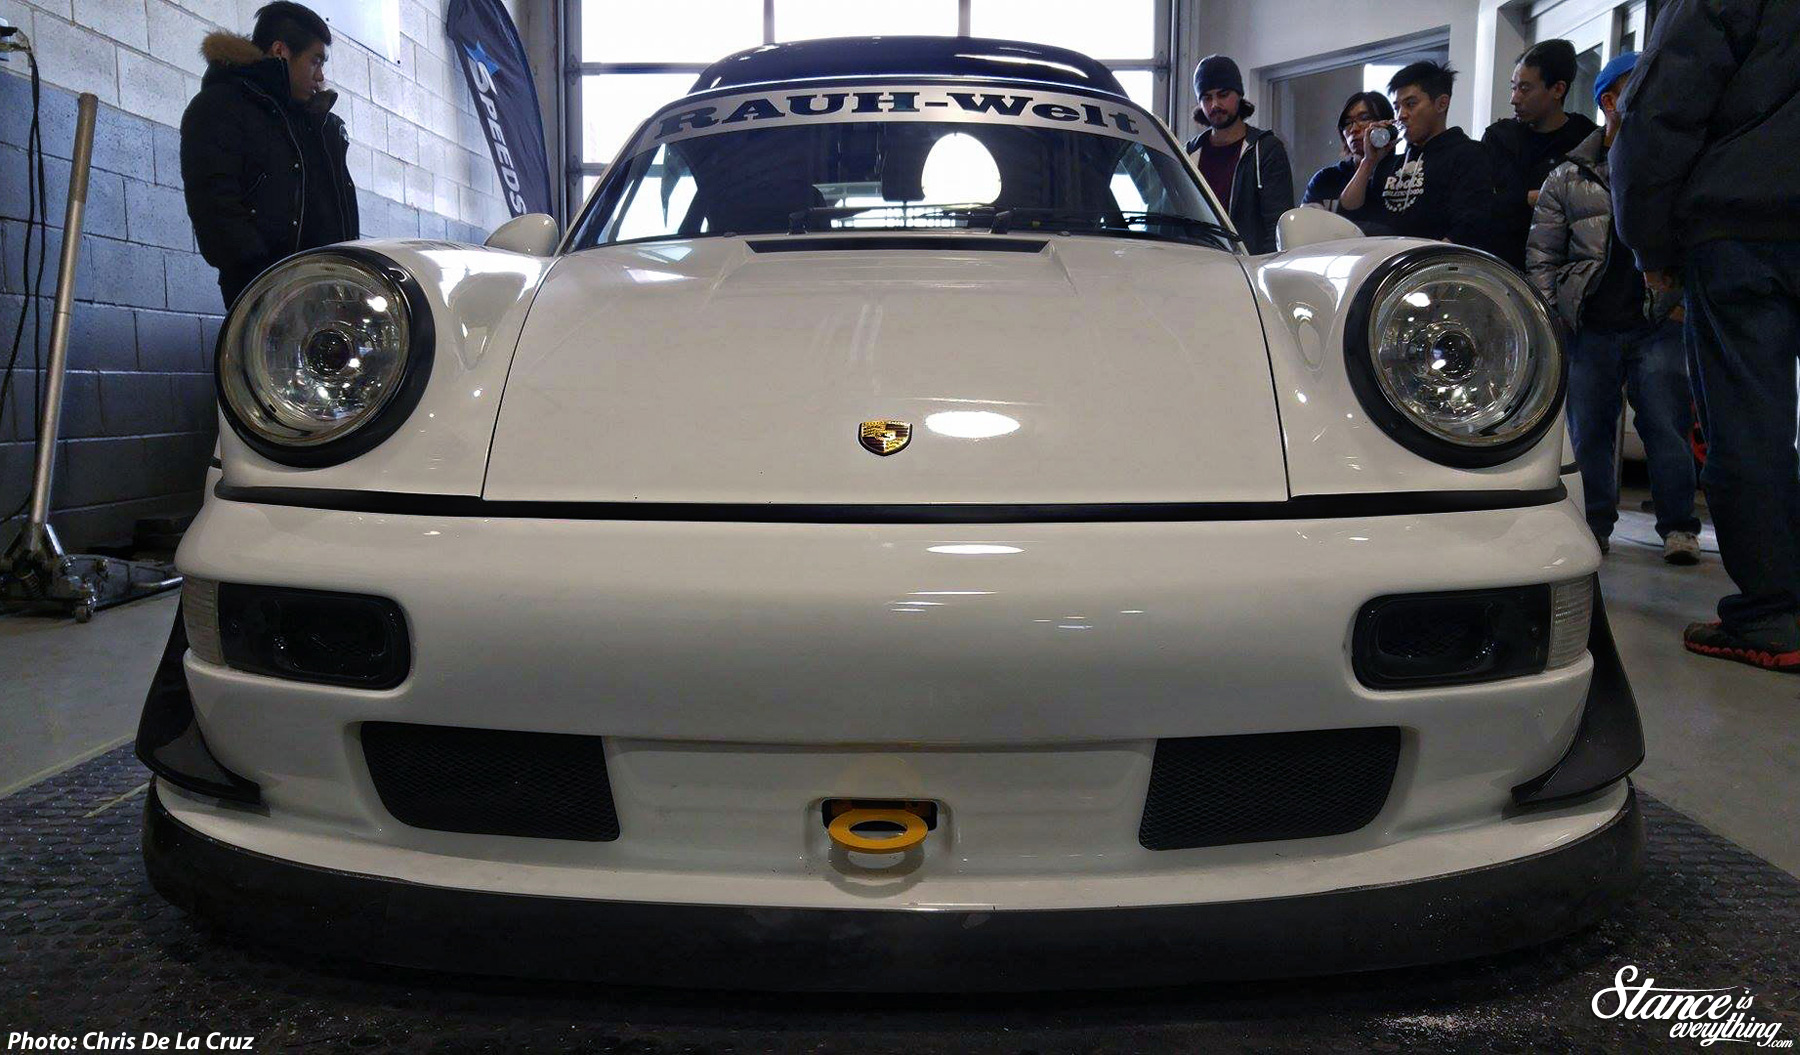
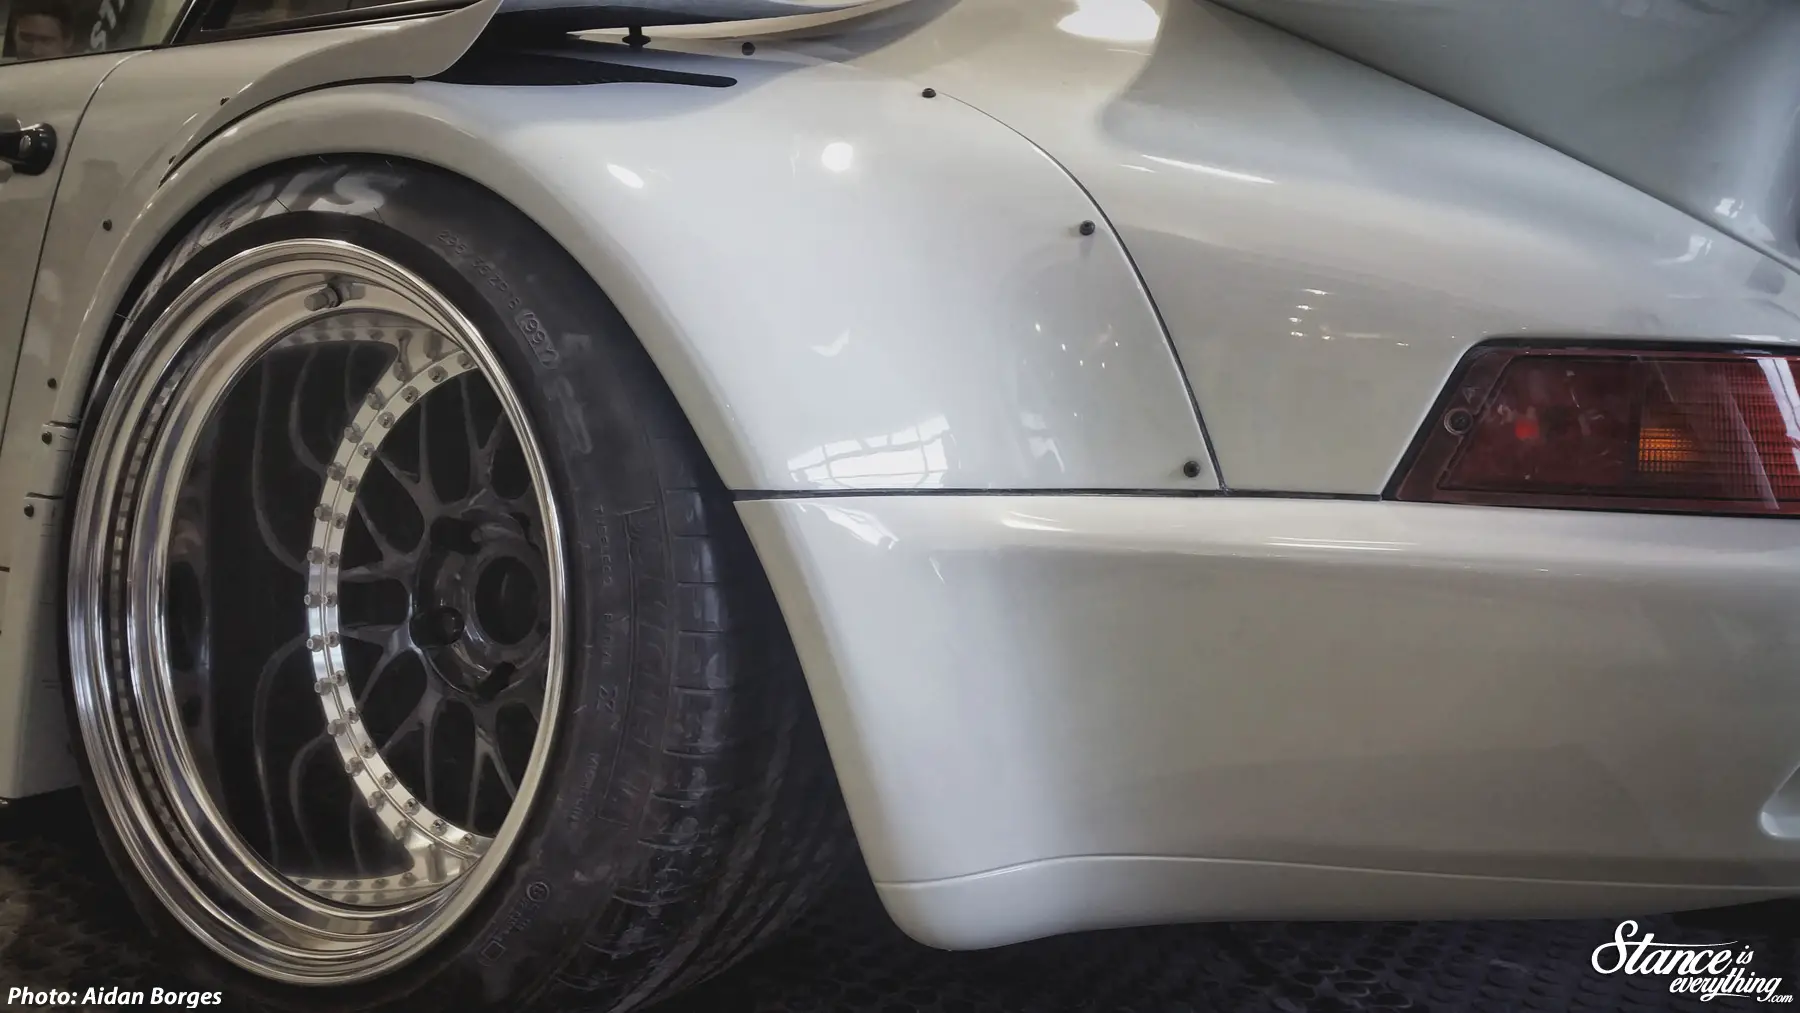
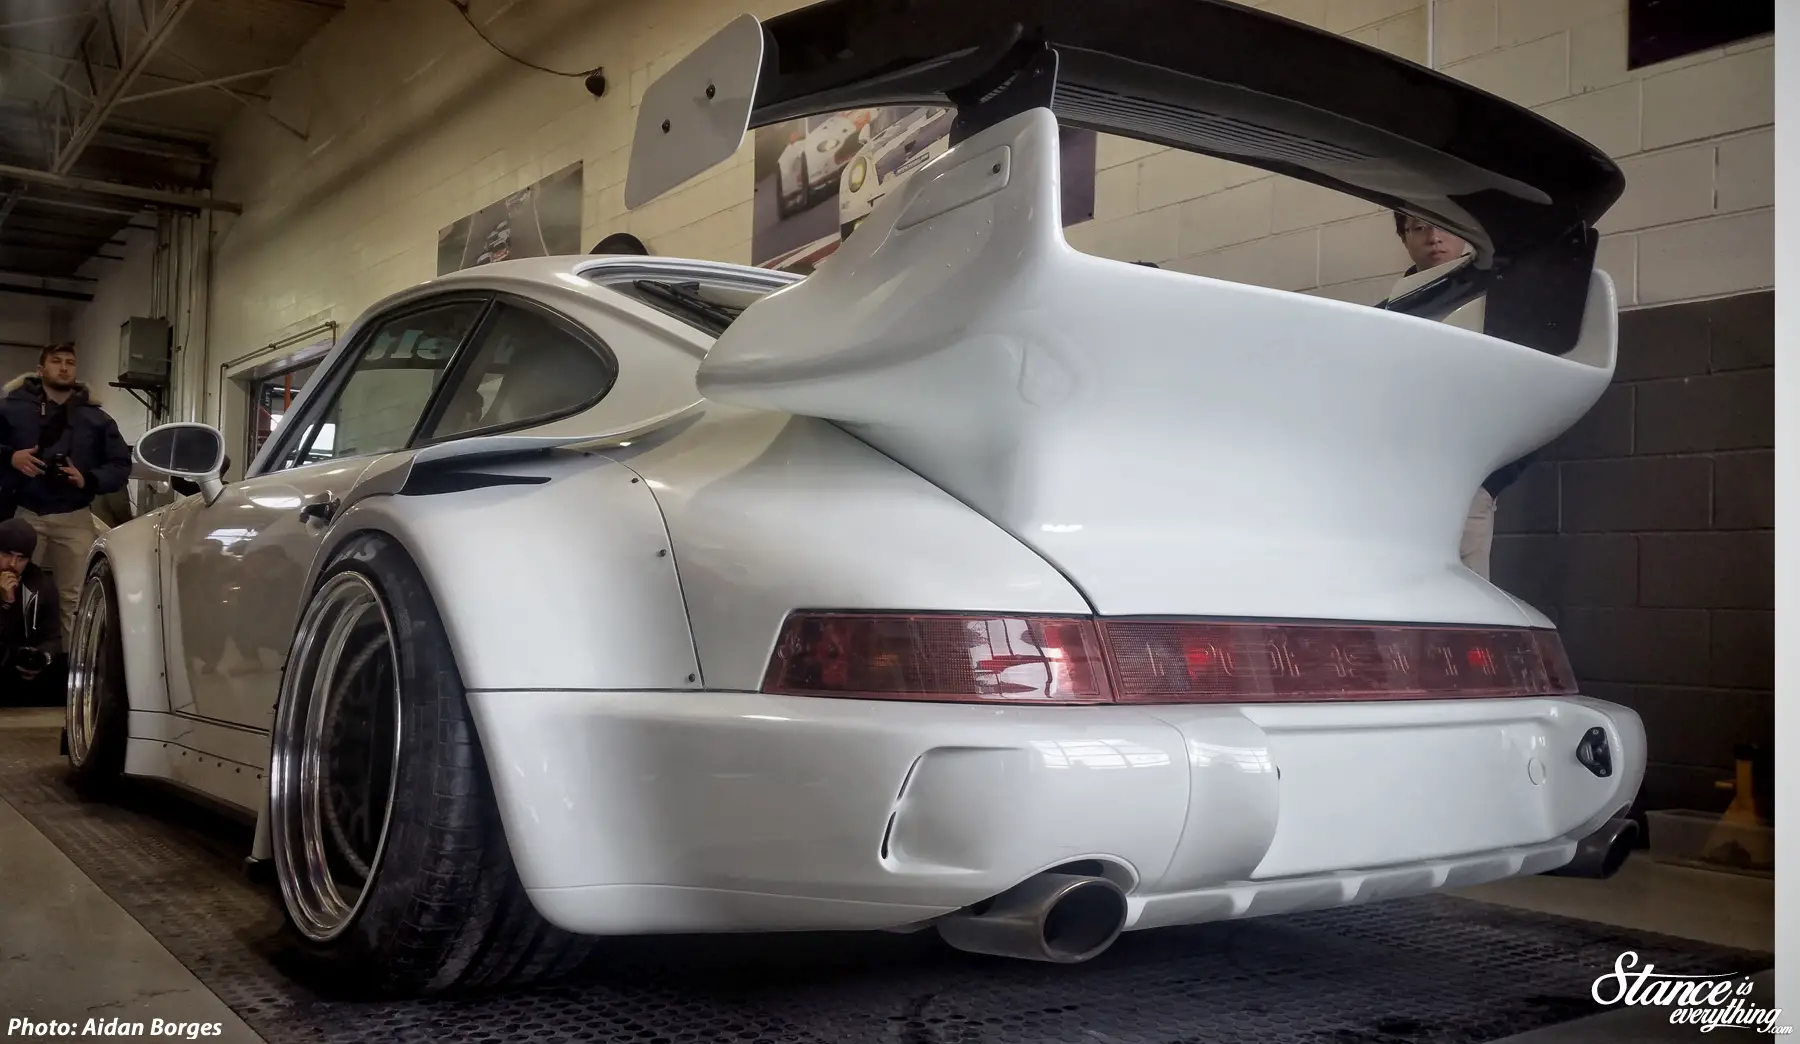
Flying in on the 4th of February and out again on the 7th Nakai-san left himself just a few days to perform one of his famous conversions to a white on black 964.

Assisted by the mechanics at Speedstar Nakai-san knocked off most of the hard work prior to the weekend, where Speedstar opened its doors to scores of people who wanted to check out the legend at work.
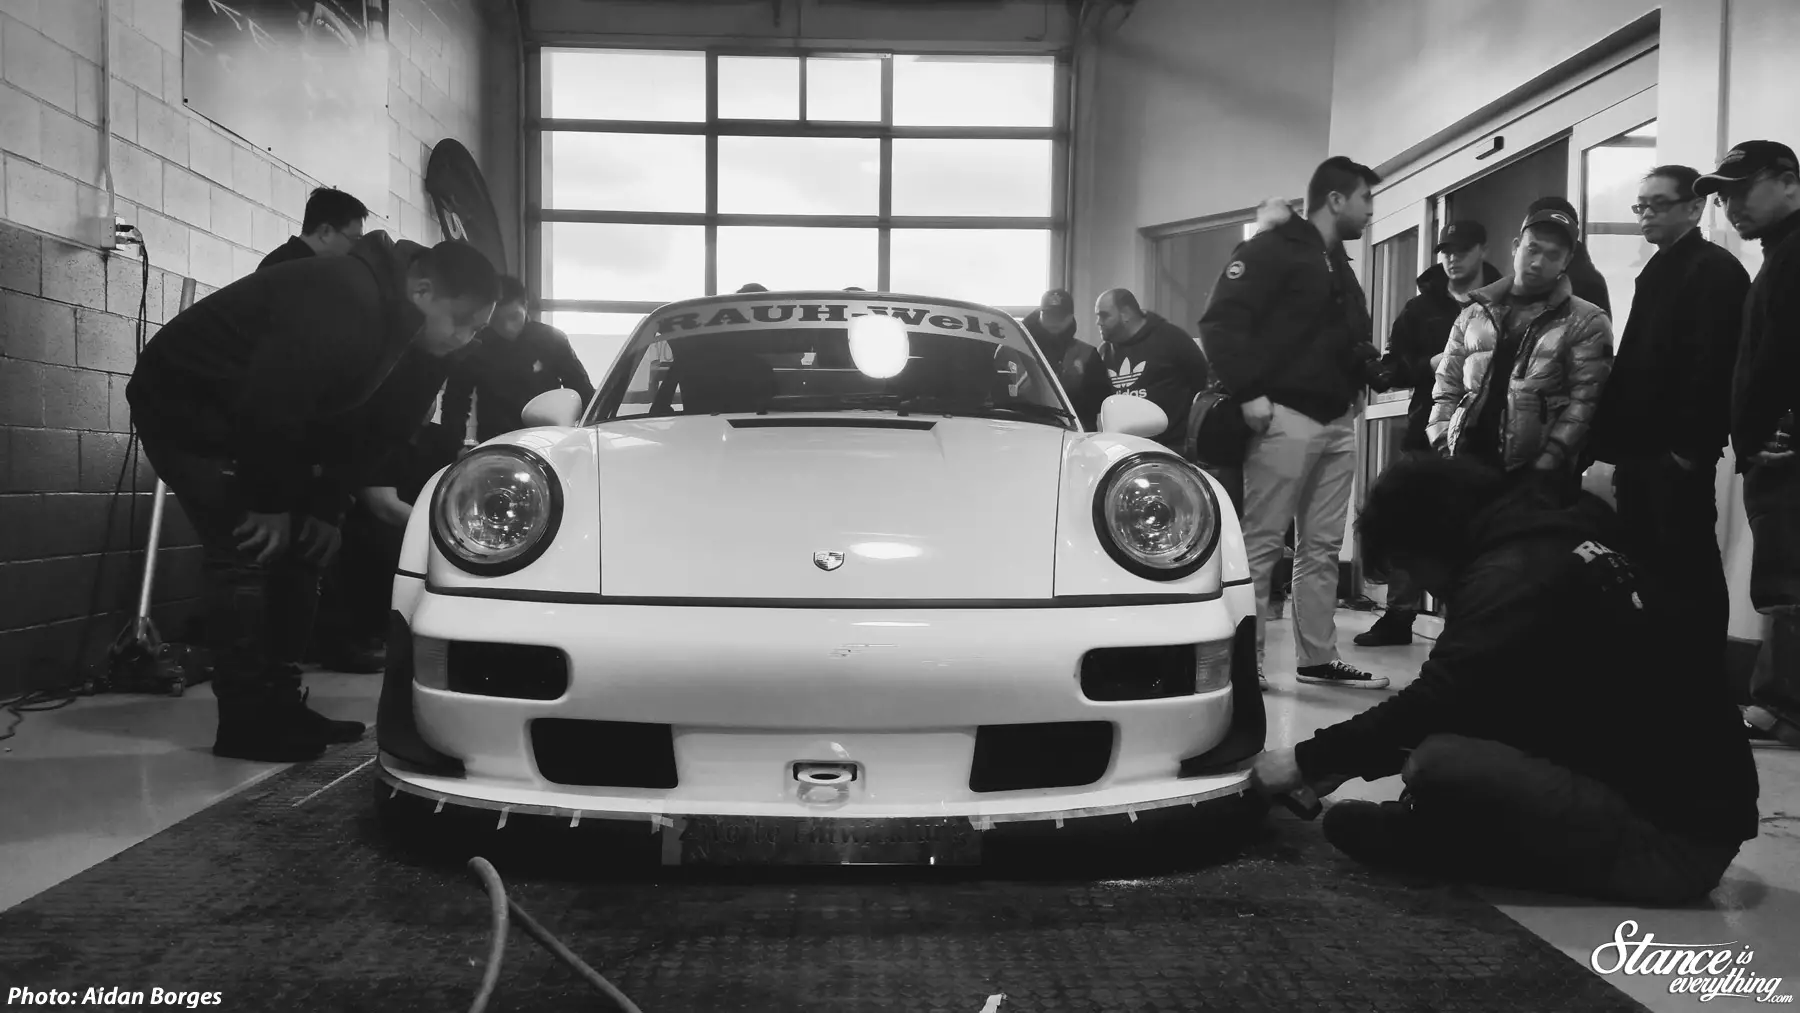
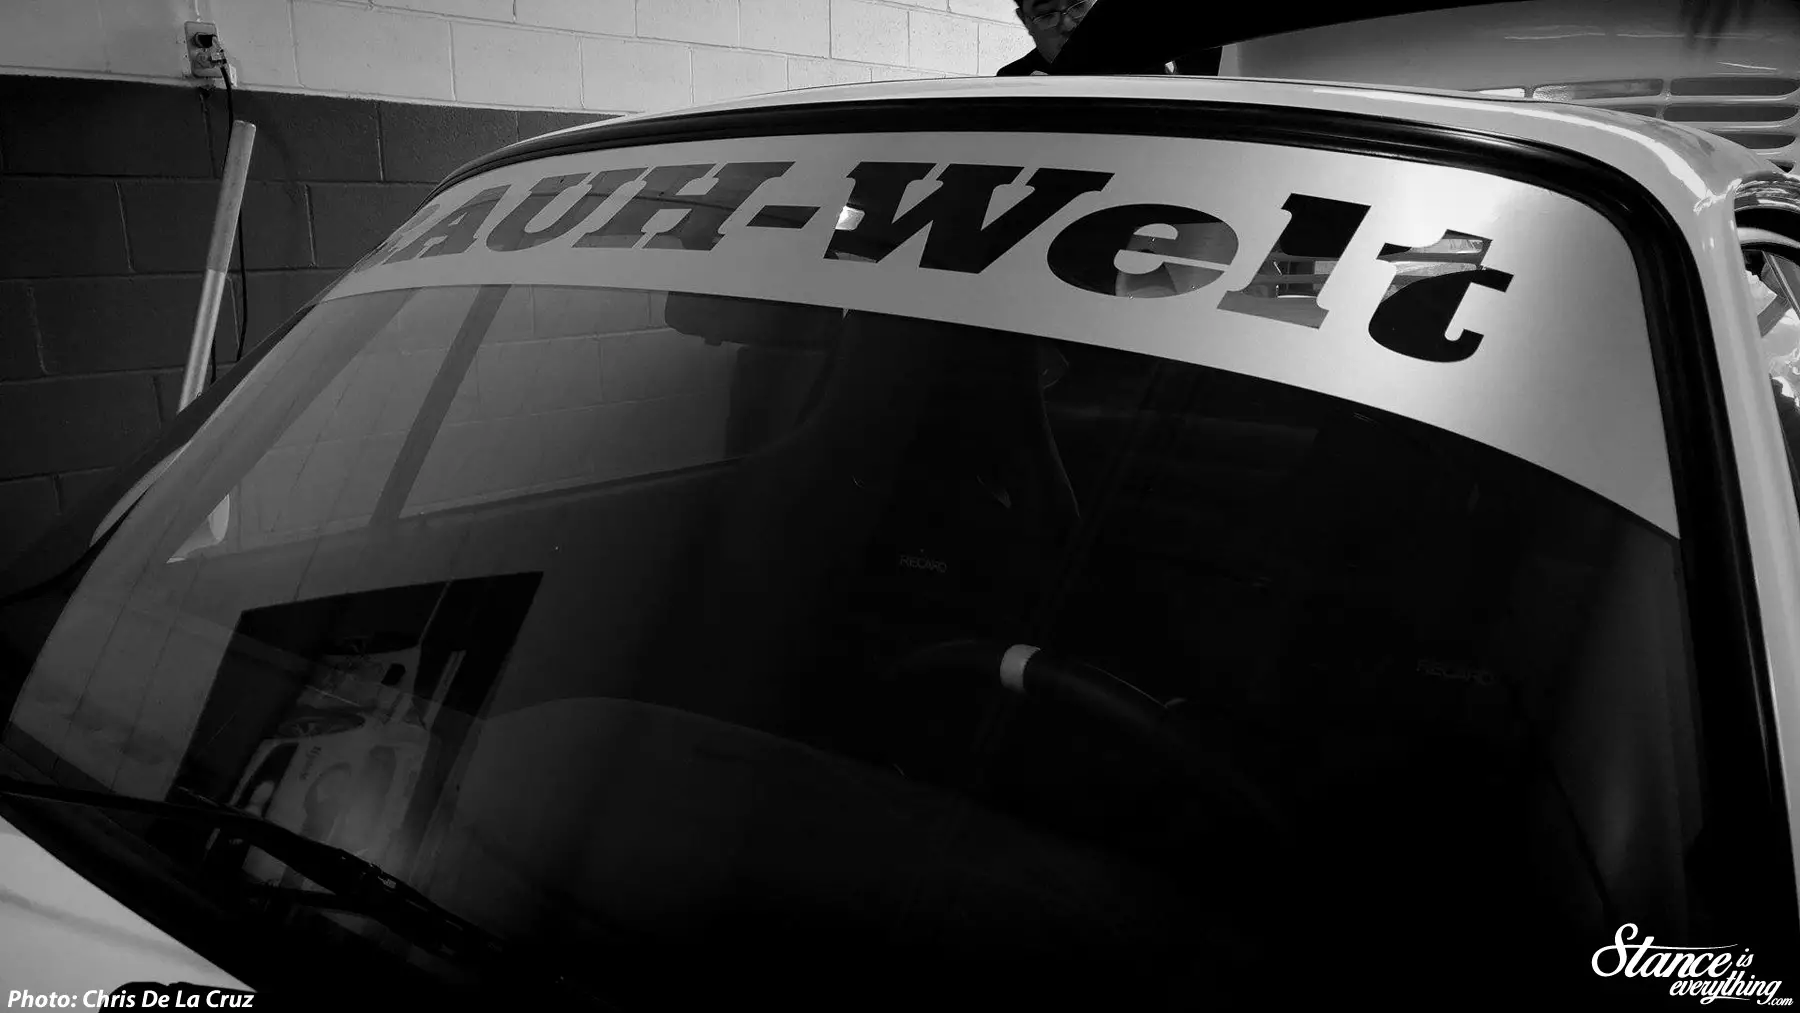
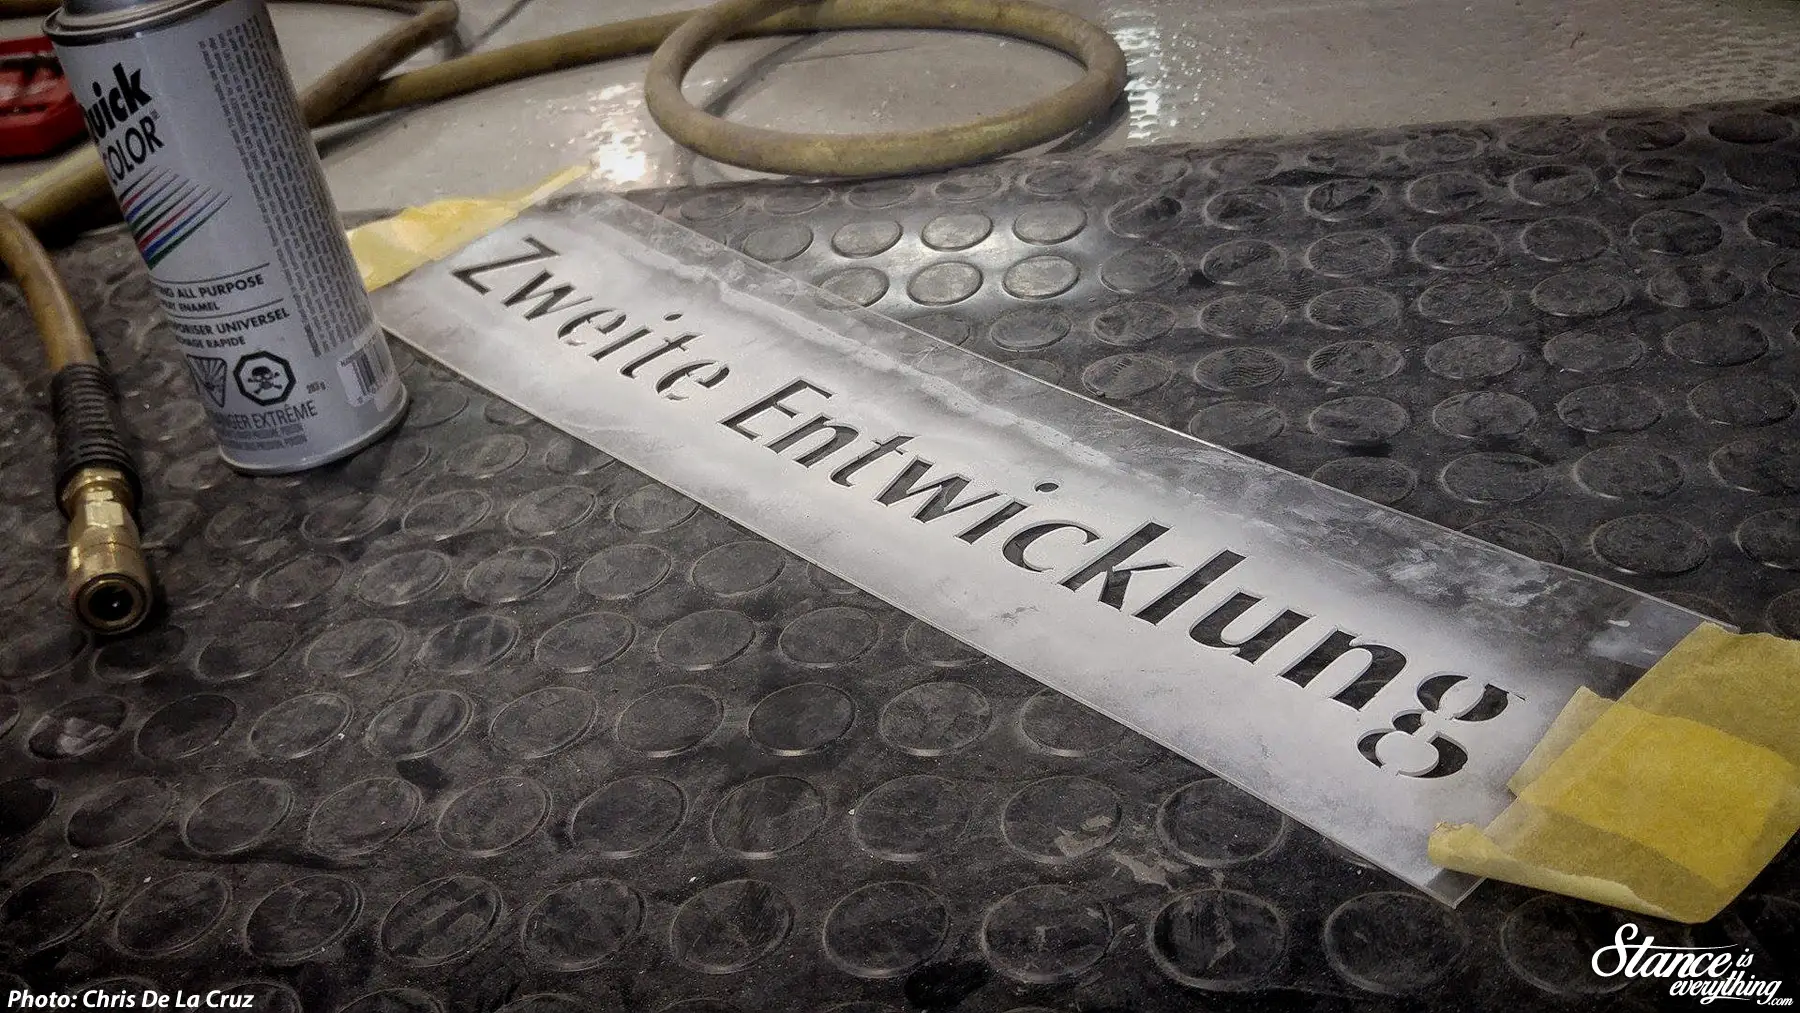
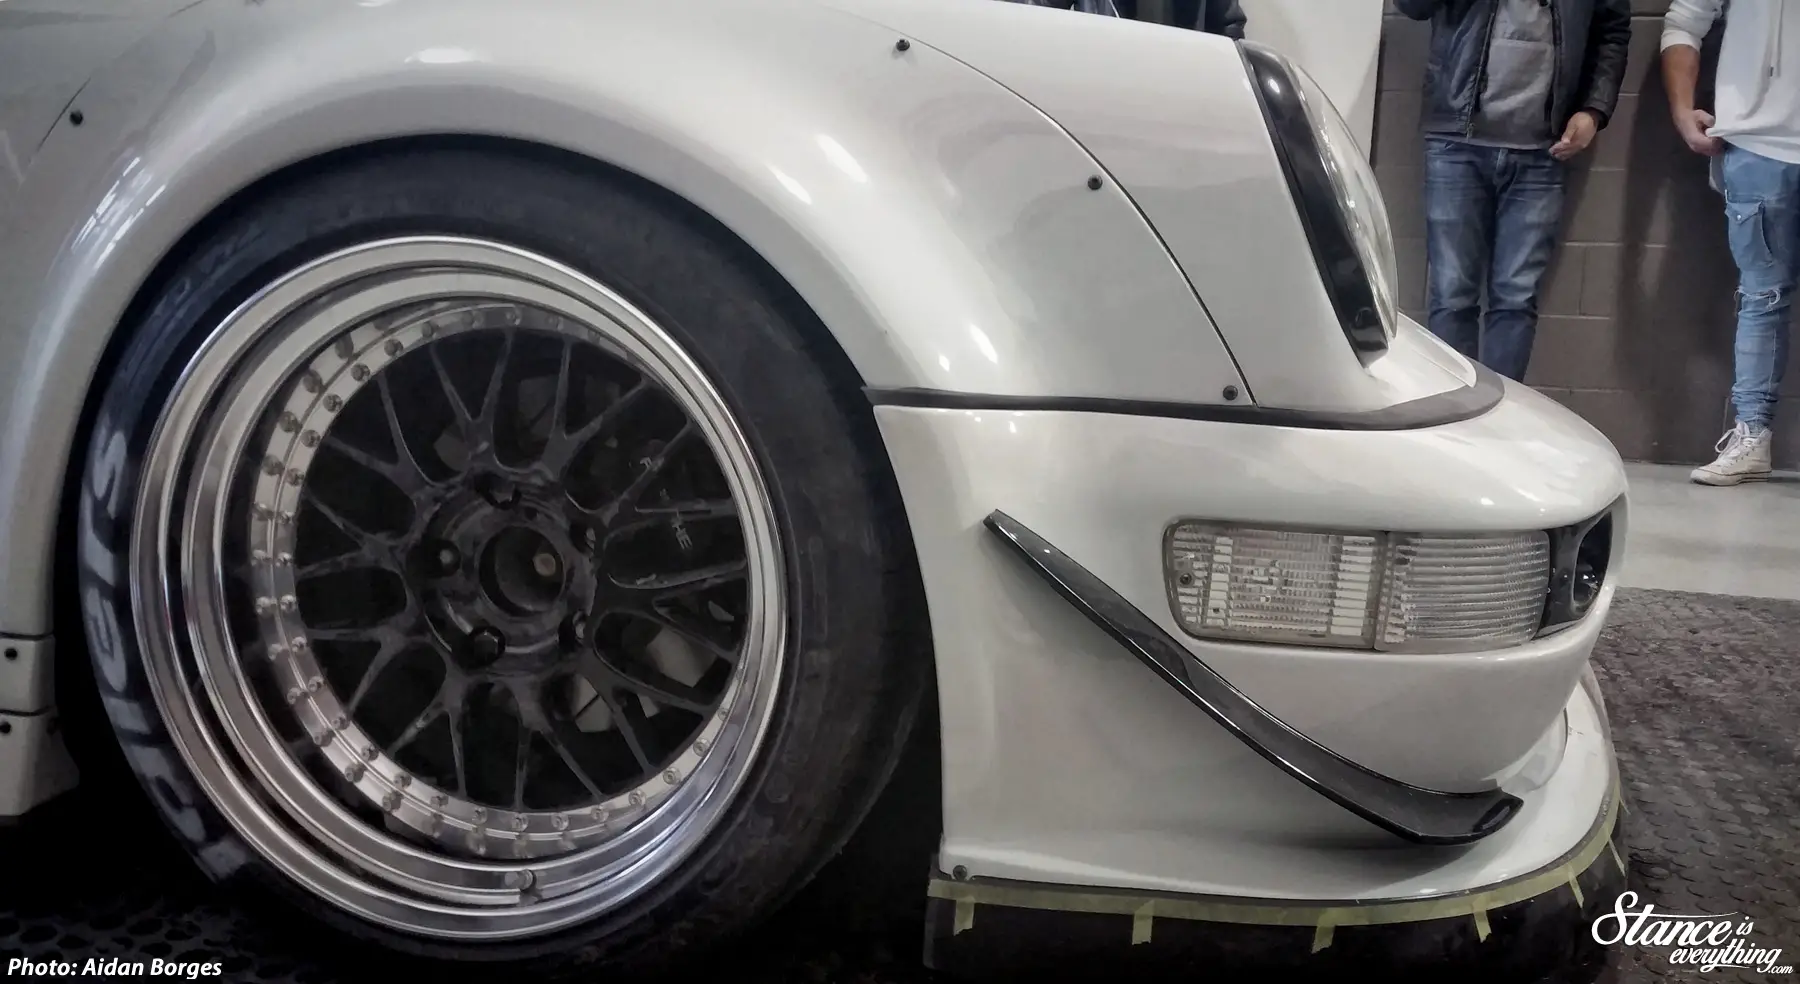
Left to be completed on Saturday was the final fitment of the 265F and 295R tires wrapped around huge Work M1 3P wheels, the application of the notorious ‘Idlers’ stencil, the famous street sweeping RWB lip, the Zweite Enticklung inscription and of course the equally famous and necessary Rauh-Welt wind-shield banner.
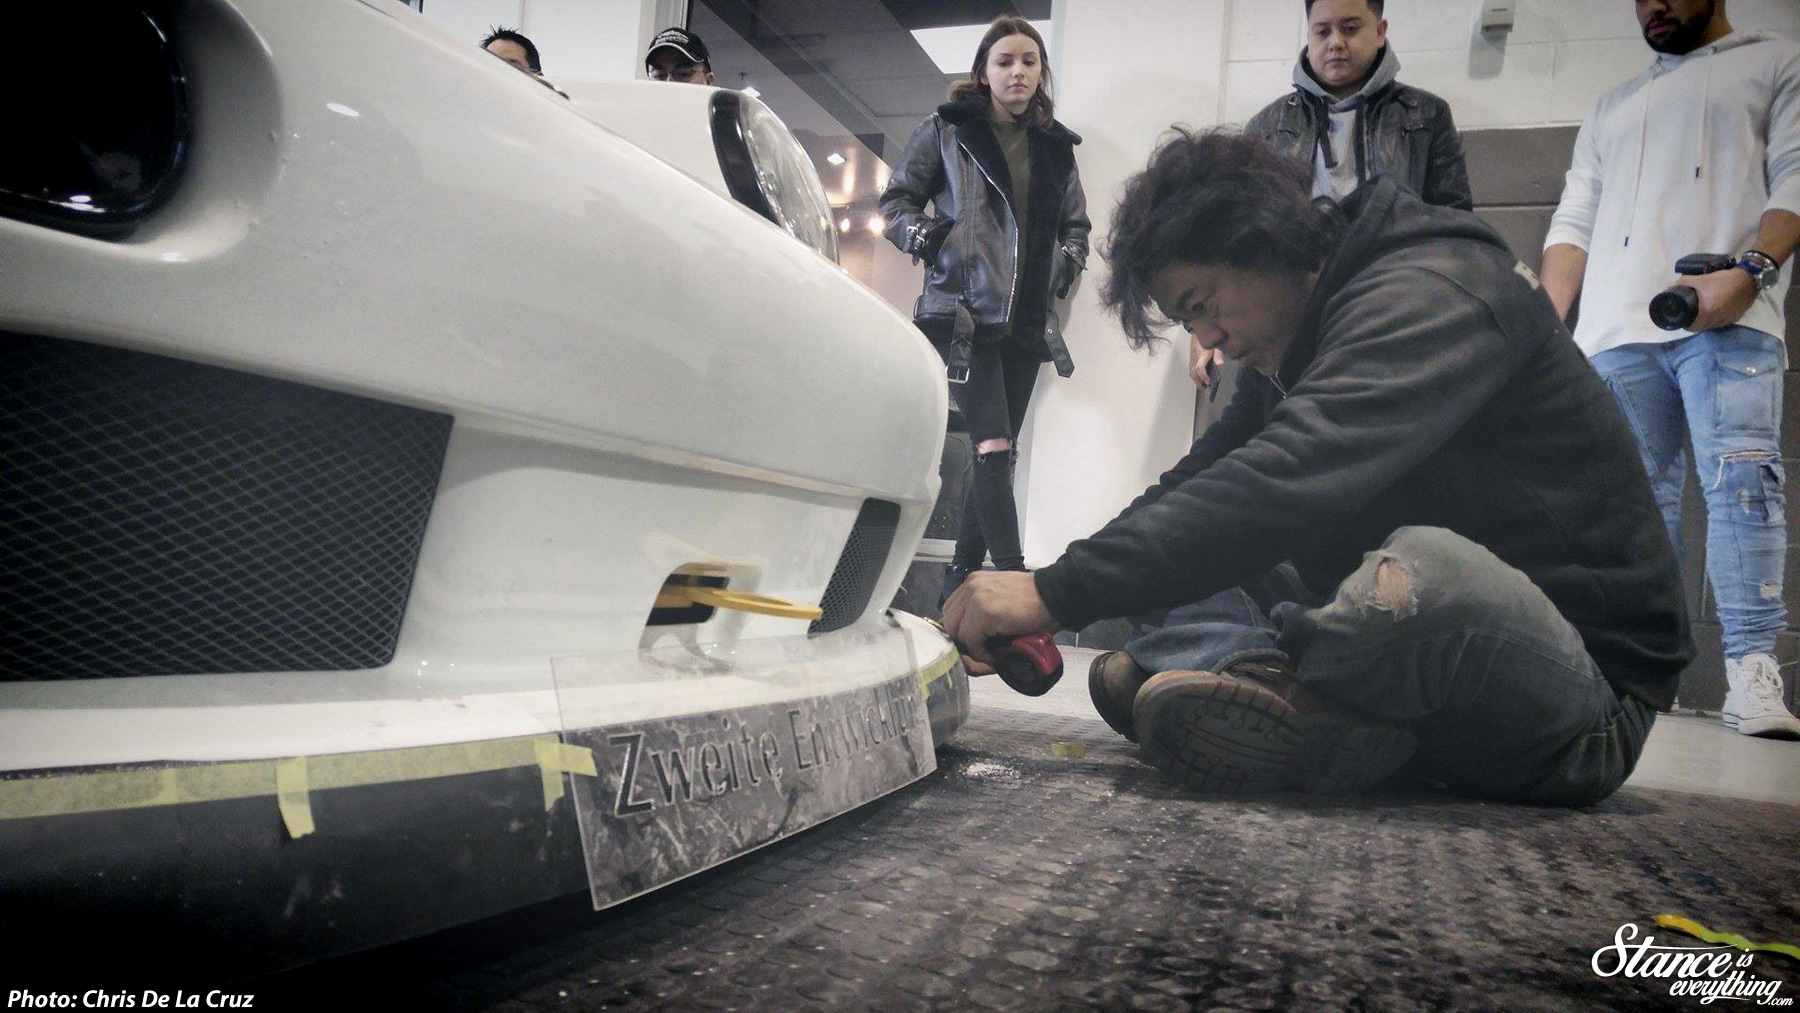
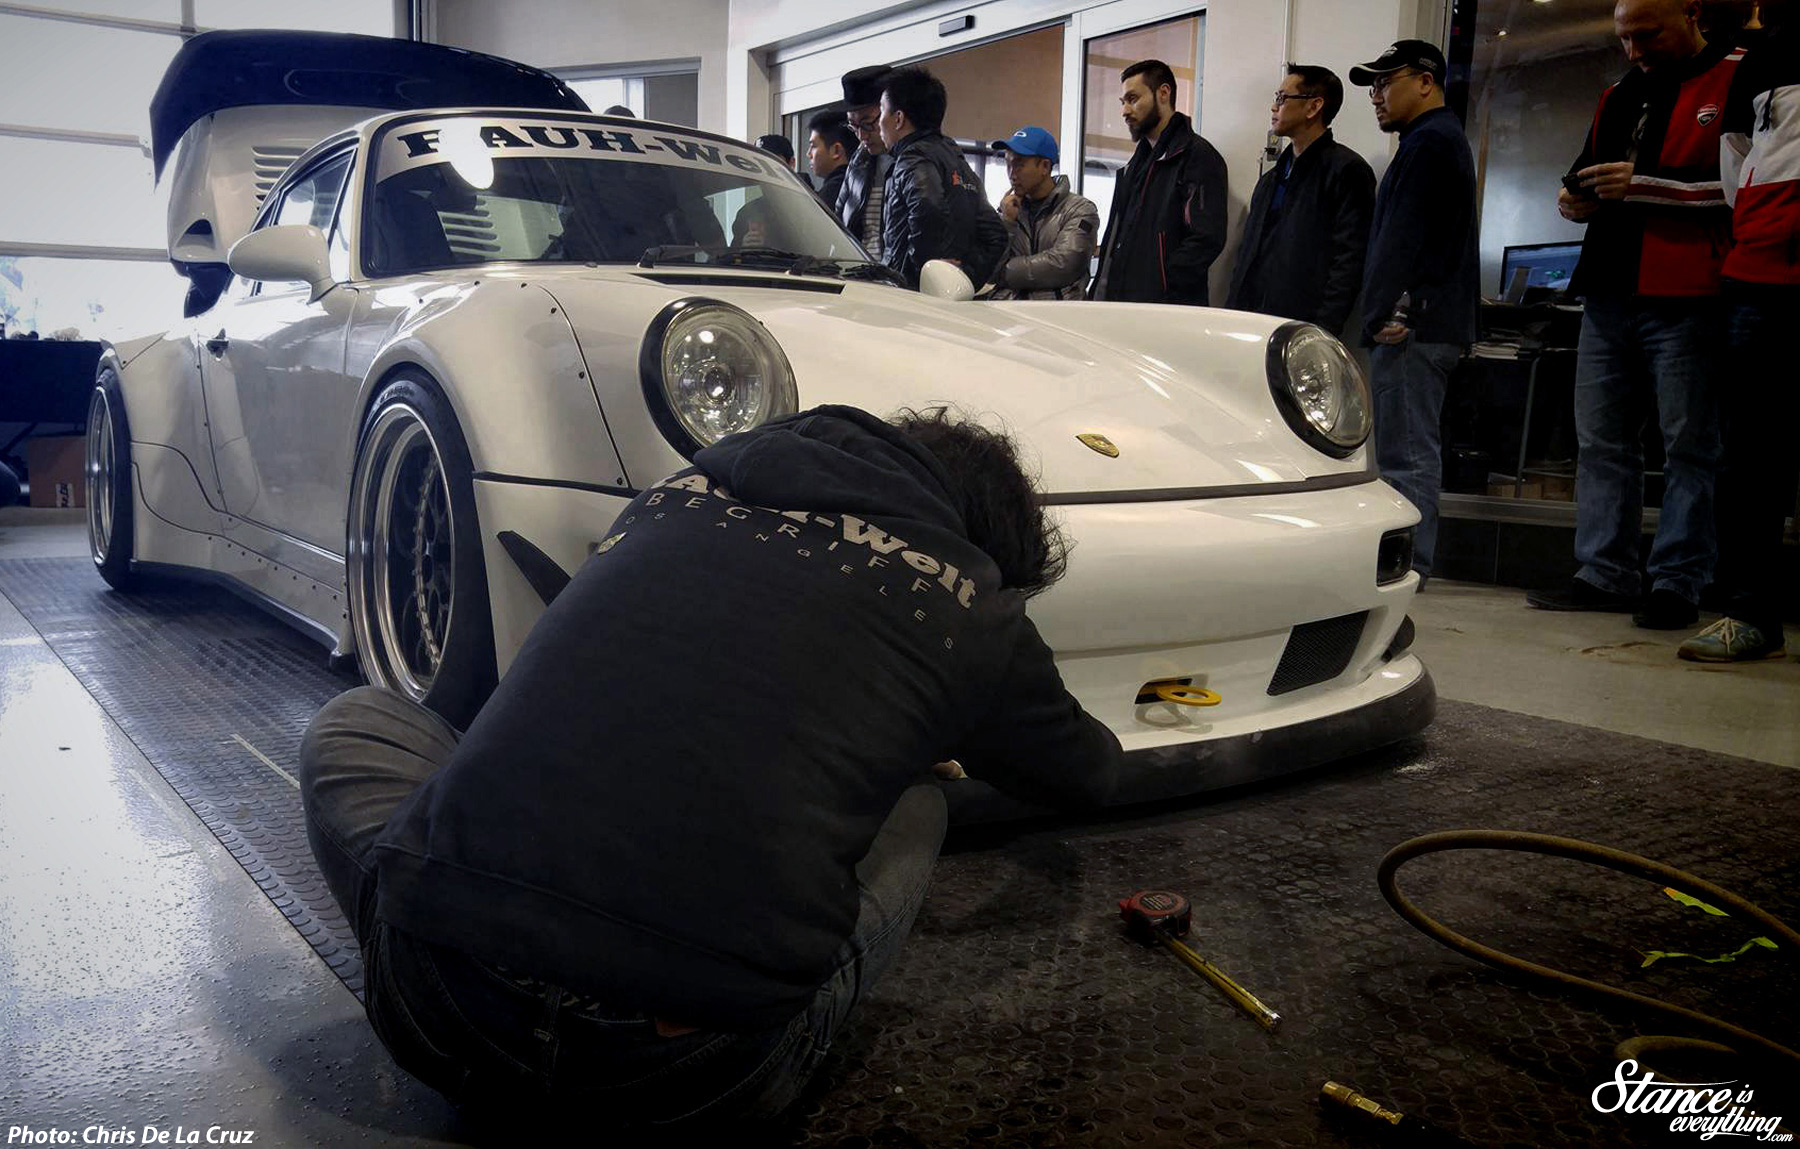
Working quietly and diligently while everyone snapped photos Nakai knocked off all of these tasks one by one before taking the car out himself personally for the first test drive.

Now on his way to his next build, the evidence of Nakai-San’s visit to Toronto will no doubt be spotted several times over cruising the streets and at shows.
I can’t wait to take a look at it myself in person, and a huge thanks go out to Aidan Borges and Chris De La Cruz for the photos of it today.

There’s really no good time to have your daily driver wrecked, but right after having minor paint issues fixed, redoing the air management, and detailing the car bumper to bumper has to rank up there with one of the worst. Unfortunately for me that’s the exact point my last car was written off via the blight of everyone’s daily commute, the dreaded Toyota Corolla.
Luckily I’ve made a world of awesome friends through this blog who were able to help me get that car put back to stock before insurance took it away preventing me from losing much more than just the shell.
Left with a pile of parts –thanks to an epic one day tear down at Miltowne Auto Collison— and a not too insulting pay out, the challenging task of quickly finding a reasonable daily driver on a new dad schedule lay ahead of me.
Budget, along with a request from my wife to not buy a car older than my last, meant I didn’t have a lot of options for practical and fun daily driver unless I made the false promise to myself that I would keep it stock.
While a van was the obvious choice to my not so car-centric co workers I avoided them like a plague and ended up test driving a MK6 GTI, a couple of Audi A3s, and a high mileage STI before sitting down and crunching the numbers.
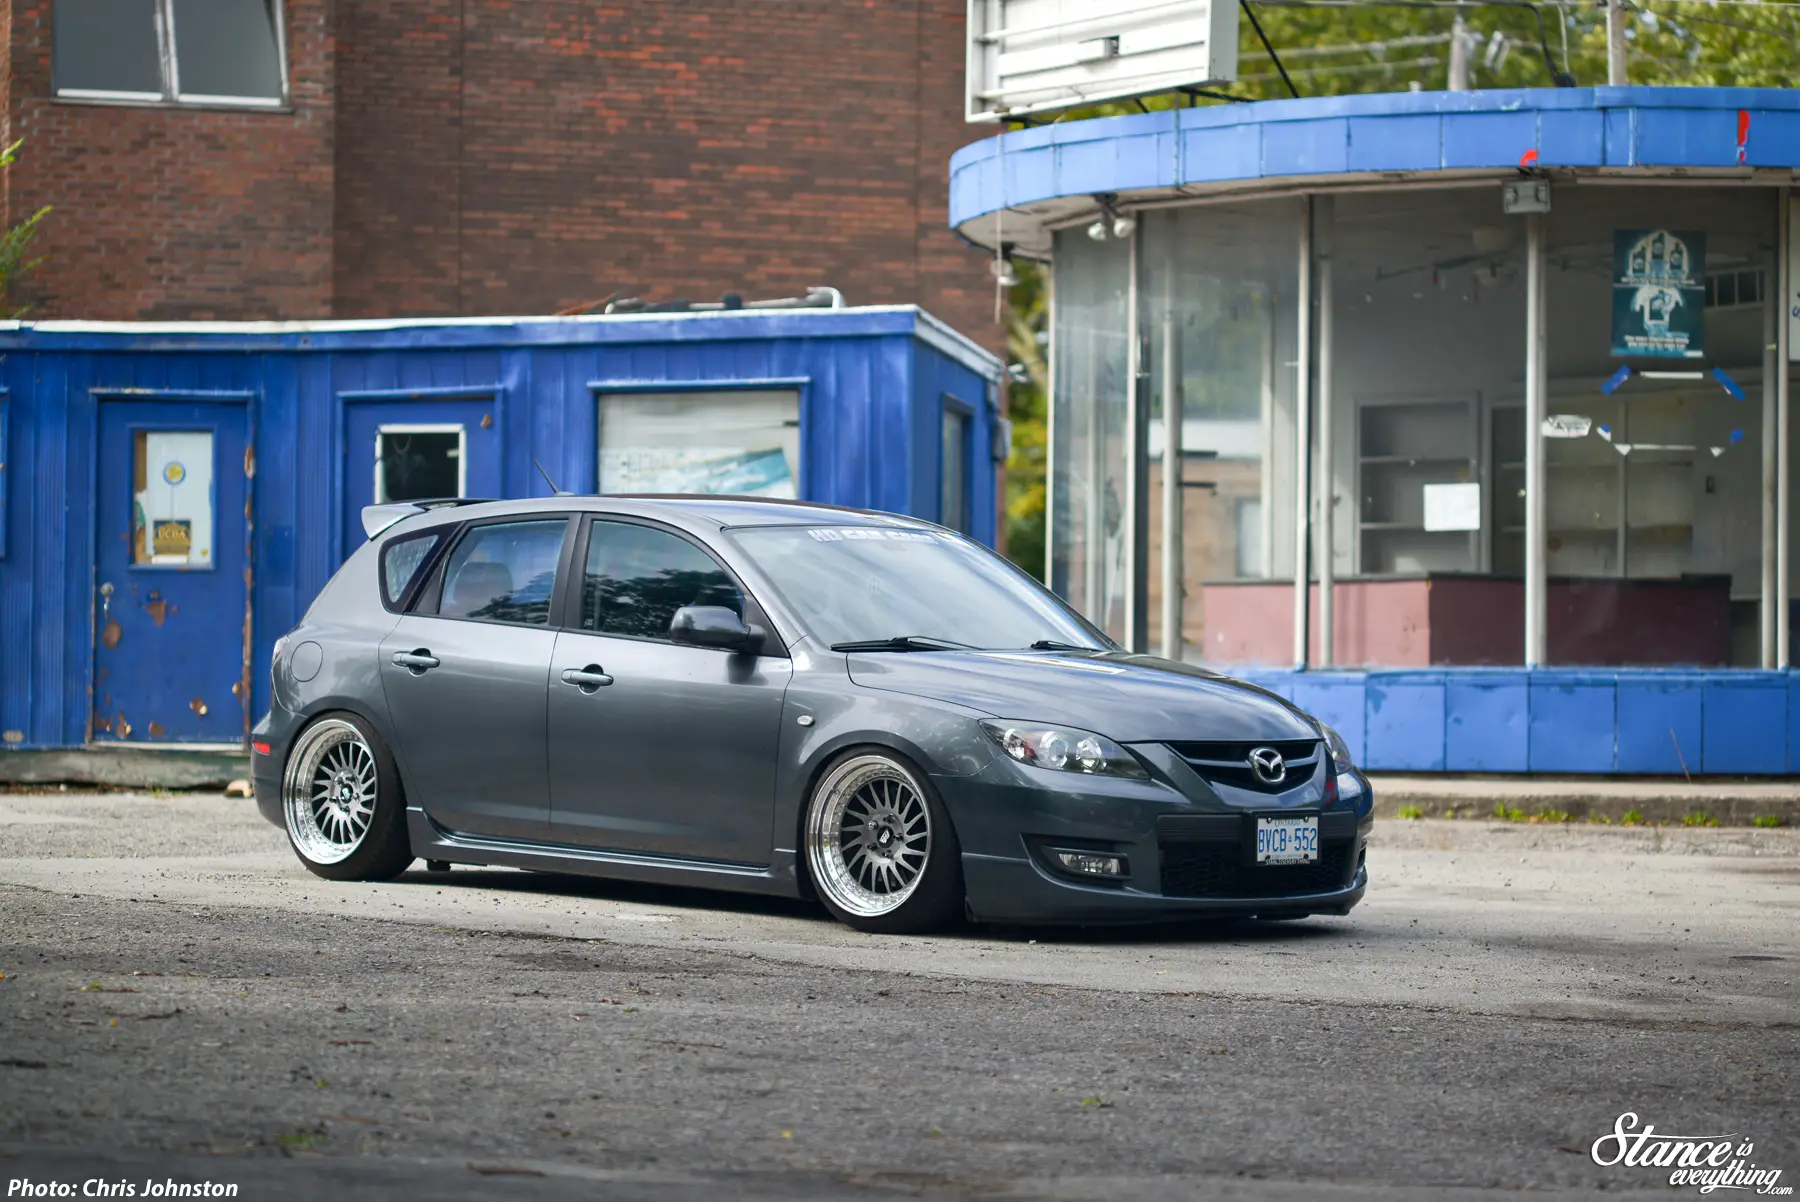
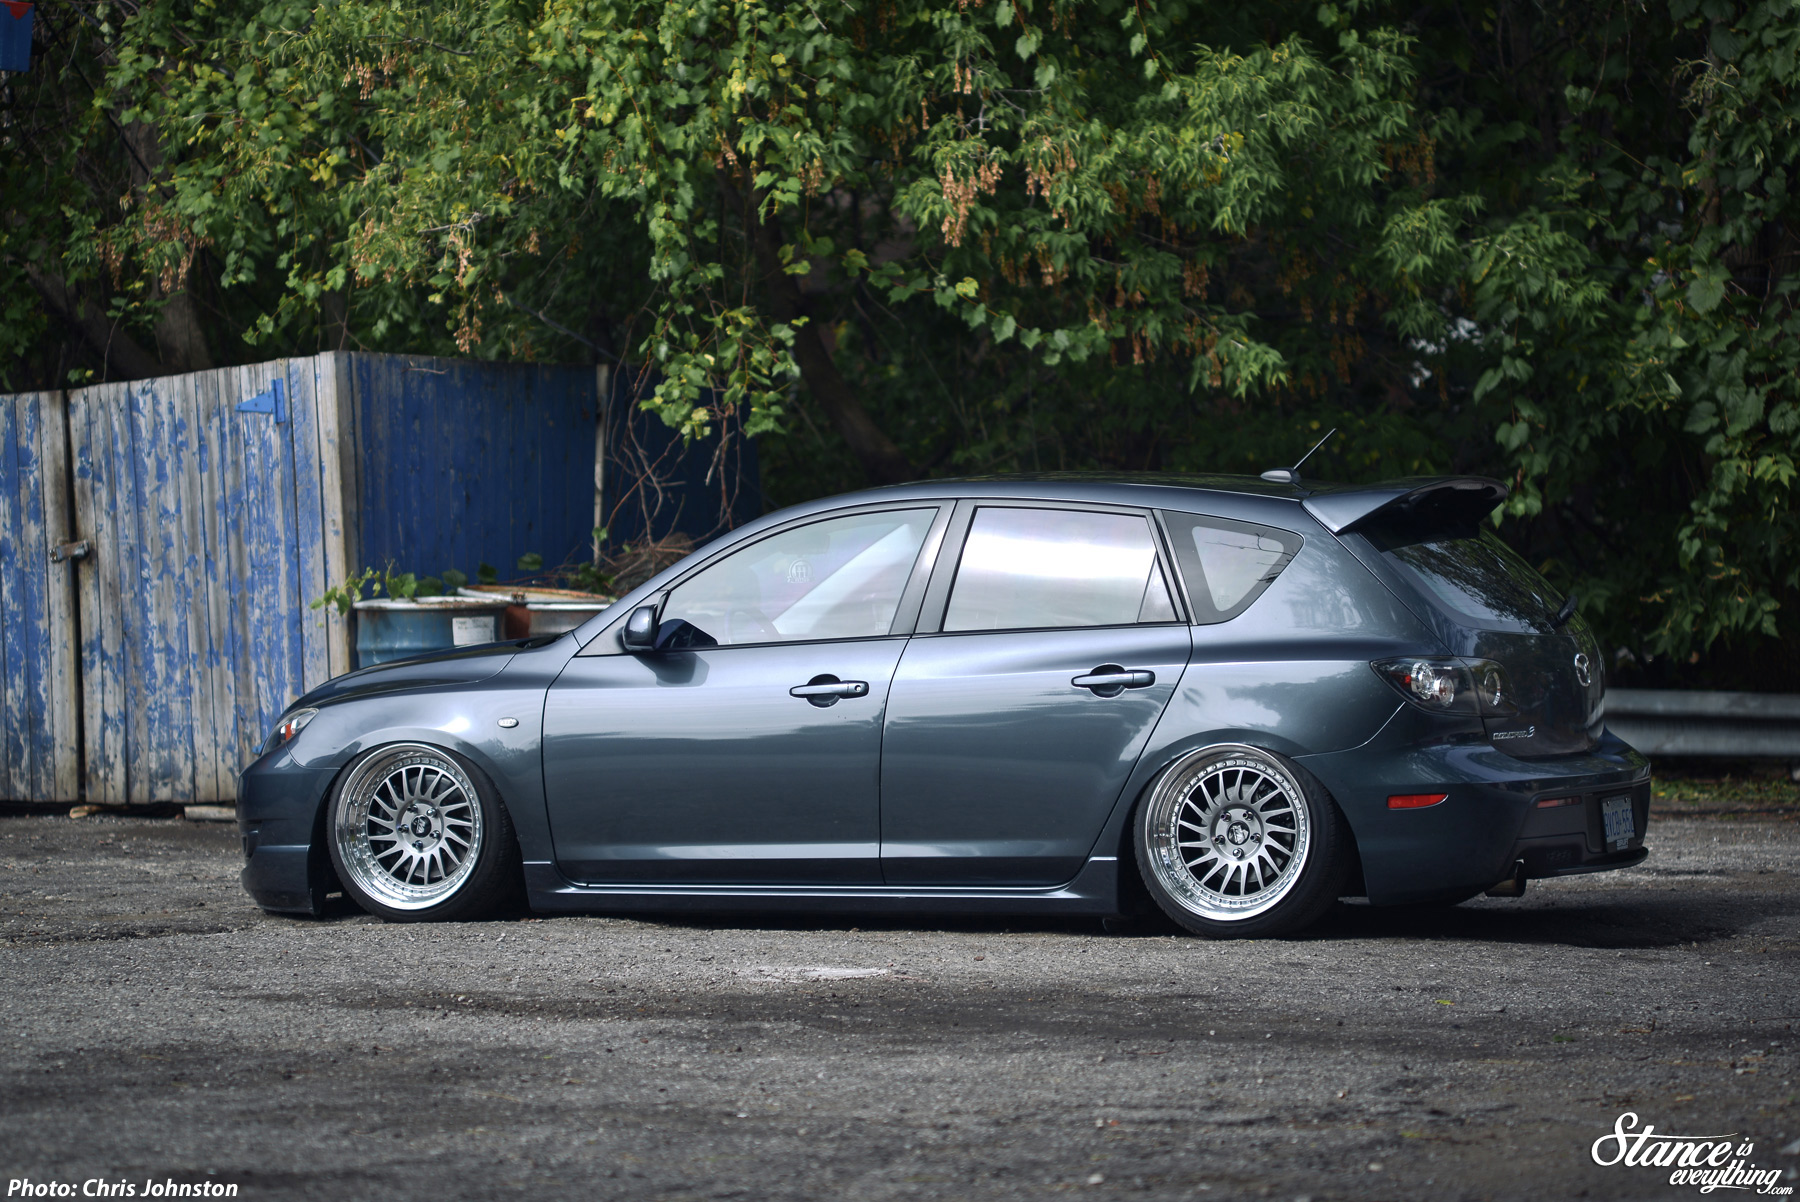
Yes I could have made a different car work but it probably would have pushed purchasing a project back six months or more so I ‘compromised’ with a reasonably low mileage, well maintained, 2009 Metropolitan Grey Mazdaspeed3.
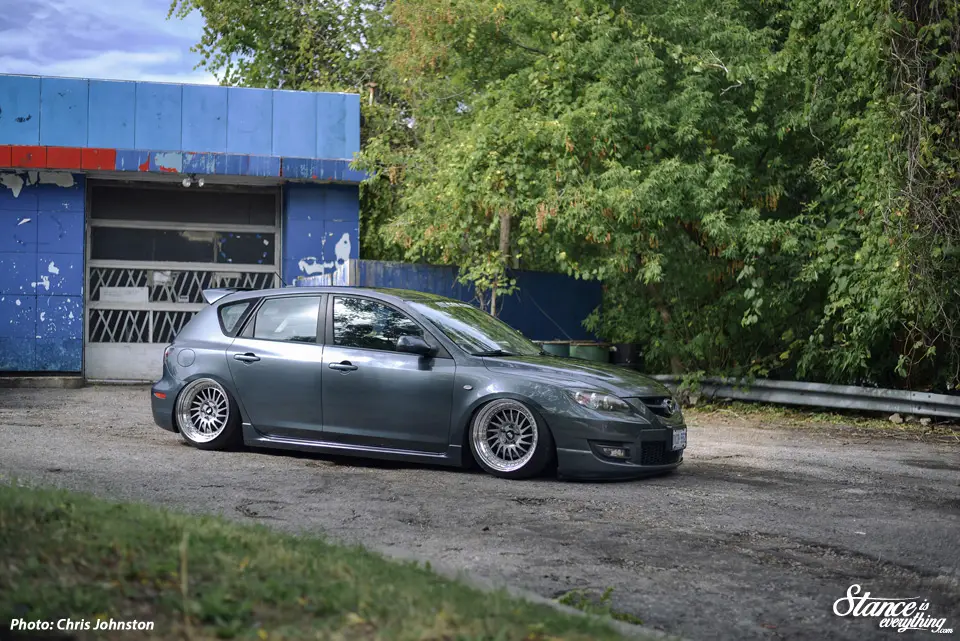
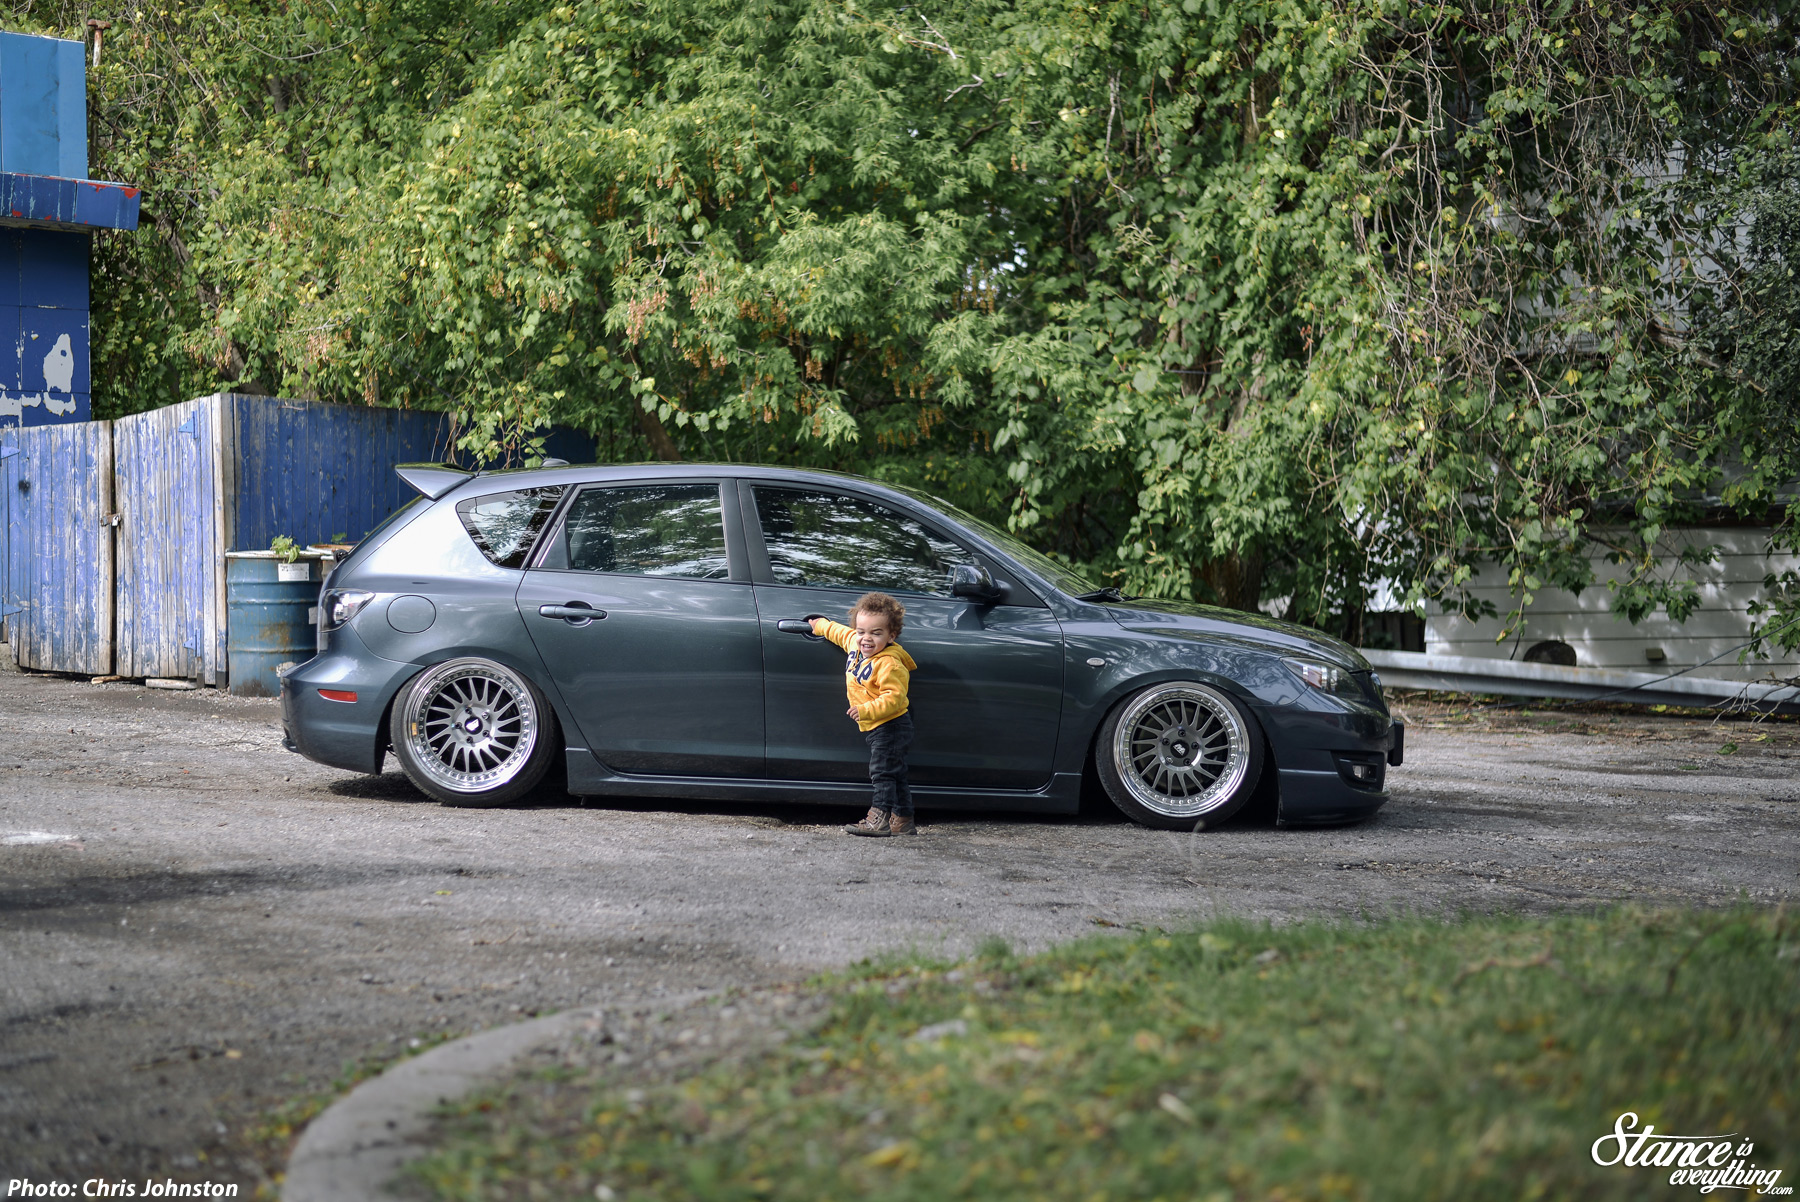
After a surprisingly refreshing six months driving a completely stock car –there’s something to be said for flying below everyone’s radar– my initial plan was to install the air ride and put a 9″ wheel on it at about 40-45 offset. Though somewhat conservative paired with a 225 or wider tire a set up like that would allow me to split the difference between function and form right down the middle.
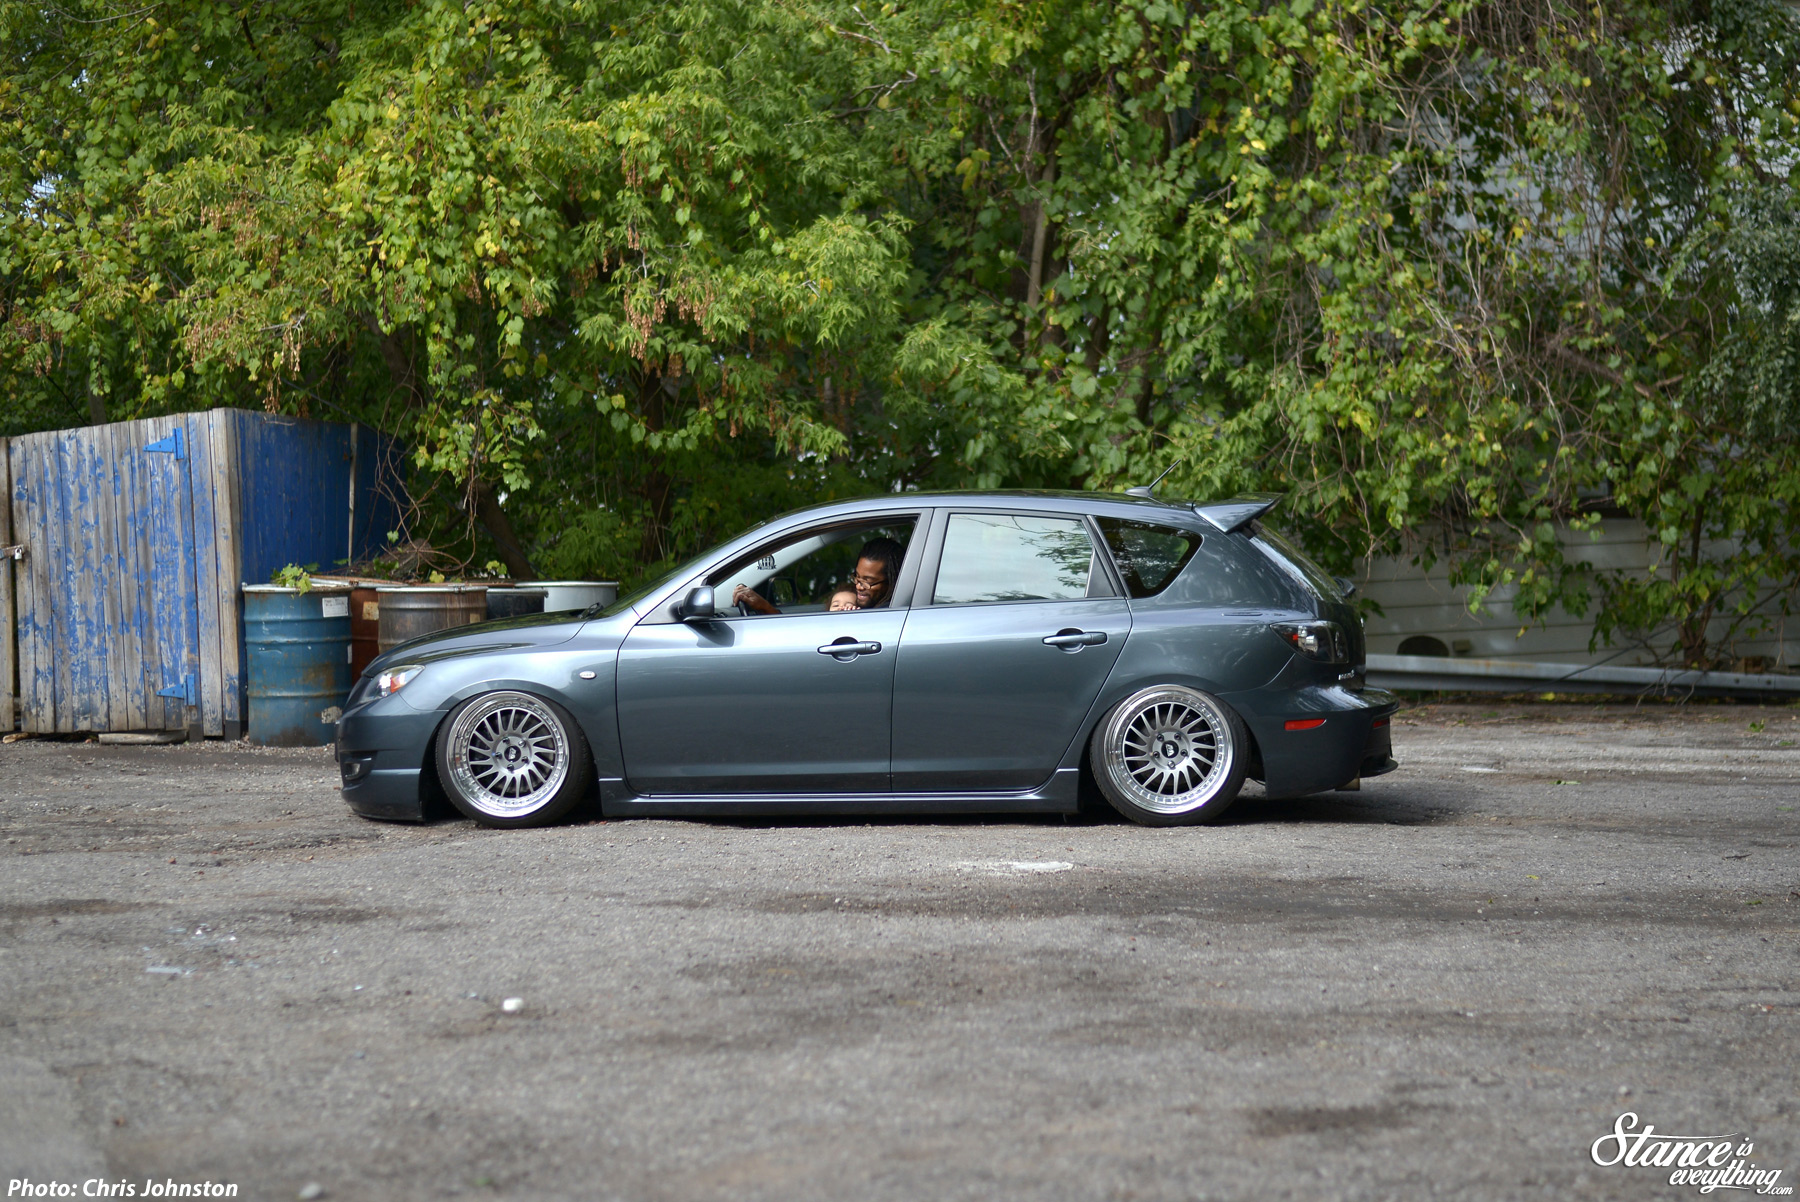
Of course that all went out the window when I started talking to Mtechnica’s Chris Bernado who pointed me to an extremely reasonably priced set of used 9.5″ et30 Mtechnica Directional wheels that we both agreed I needed to own. After selling a few of the salvageable parts off my last car, and my beloved Work Equips said wheels were on their way to Canada from California.
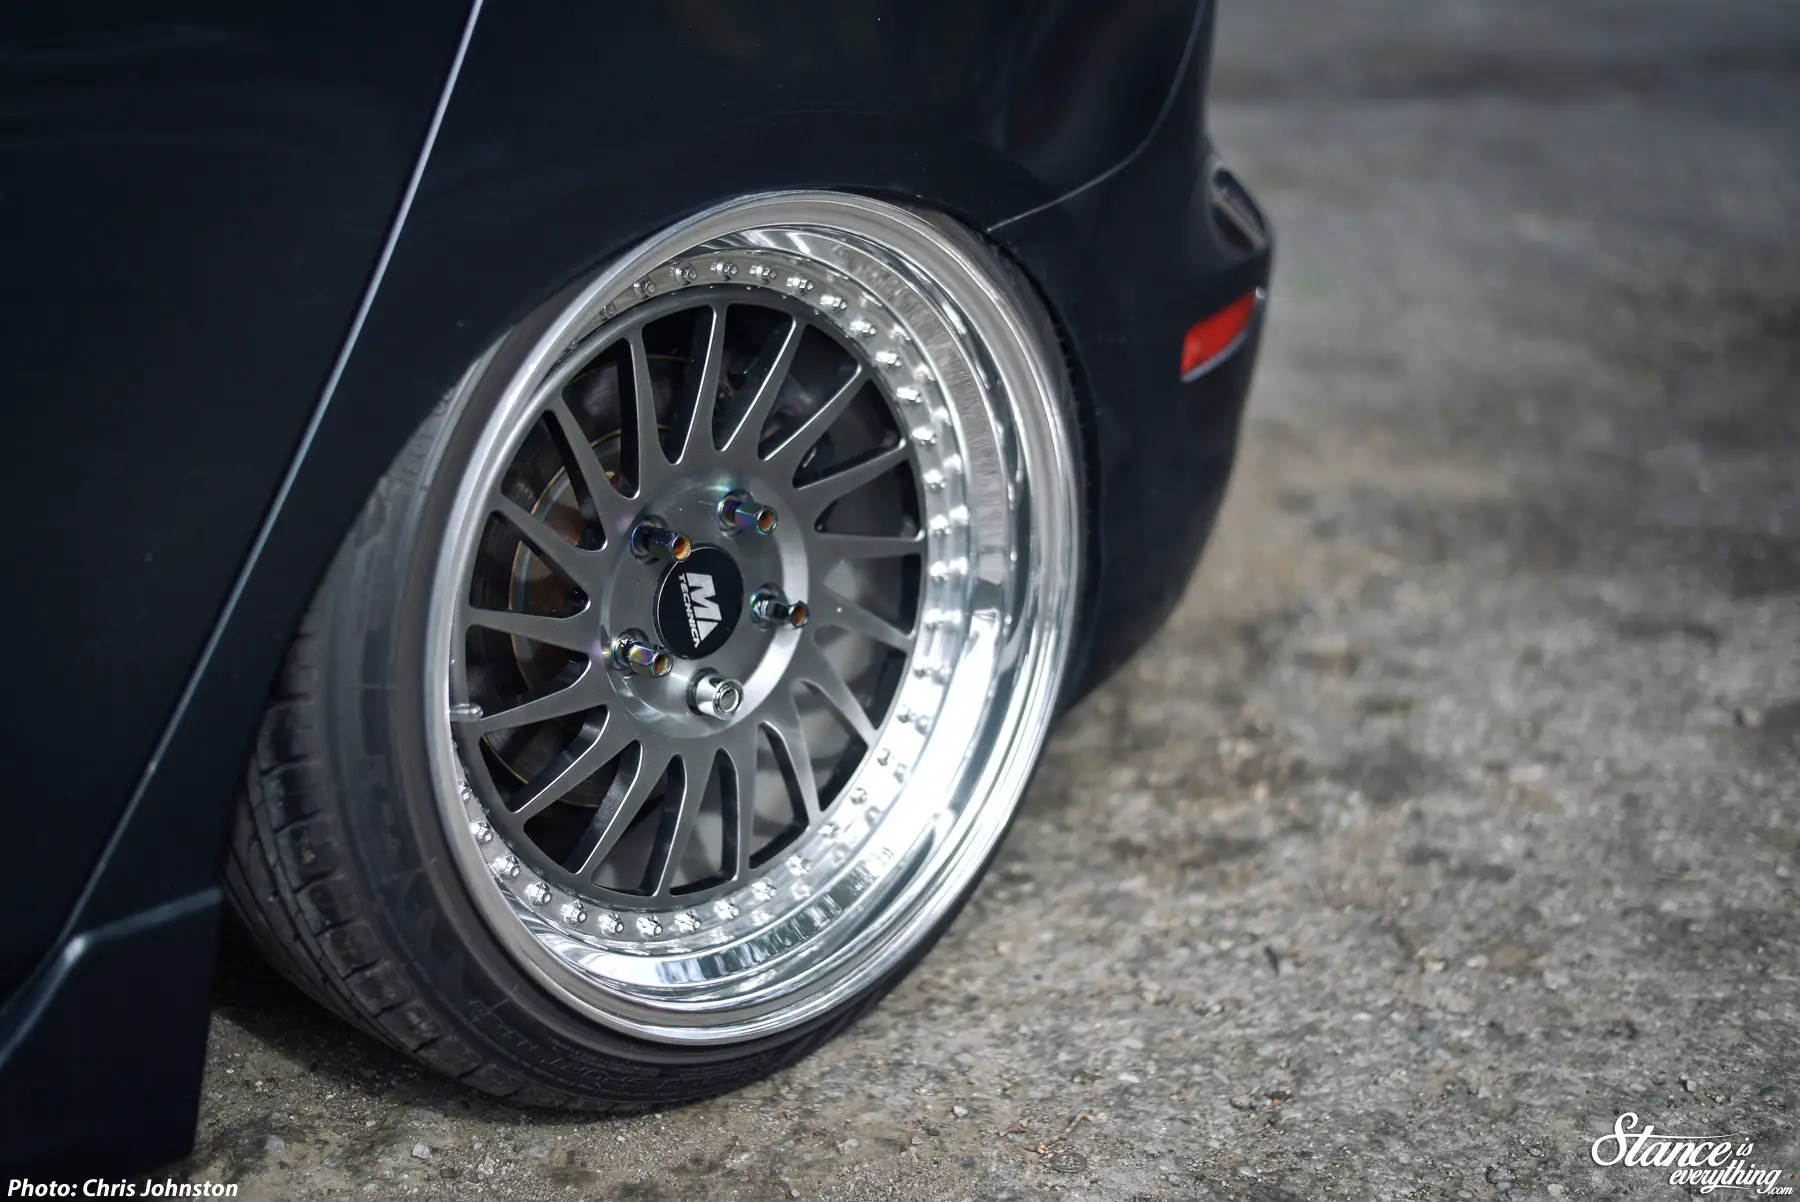
A quick installation of my air suspension set up at Taylor’d Customs and fender roll by Righteous Garage and the wheels just about fit.
Generous amounts of heat, modified fender liners, a little clear bra on the inner fender lips for protection, along with a hair over four degrees of camber at ride height and I was able to get the car to sit down fender to lip in my garage.

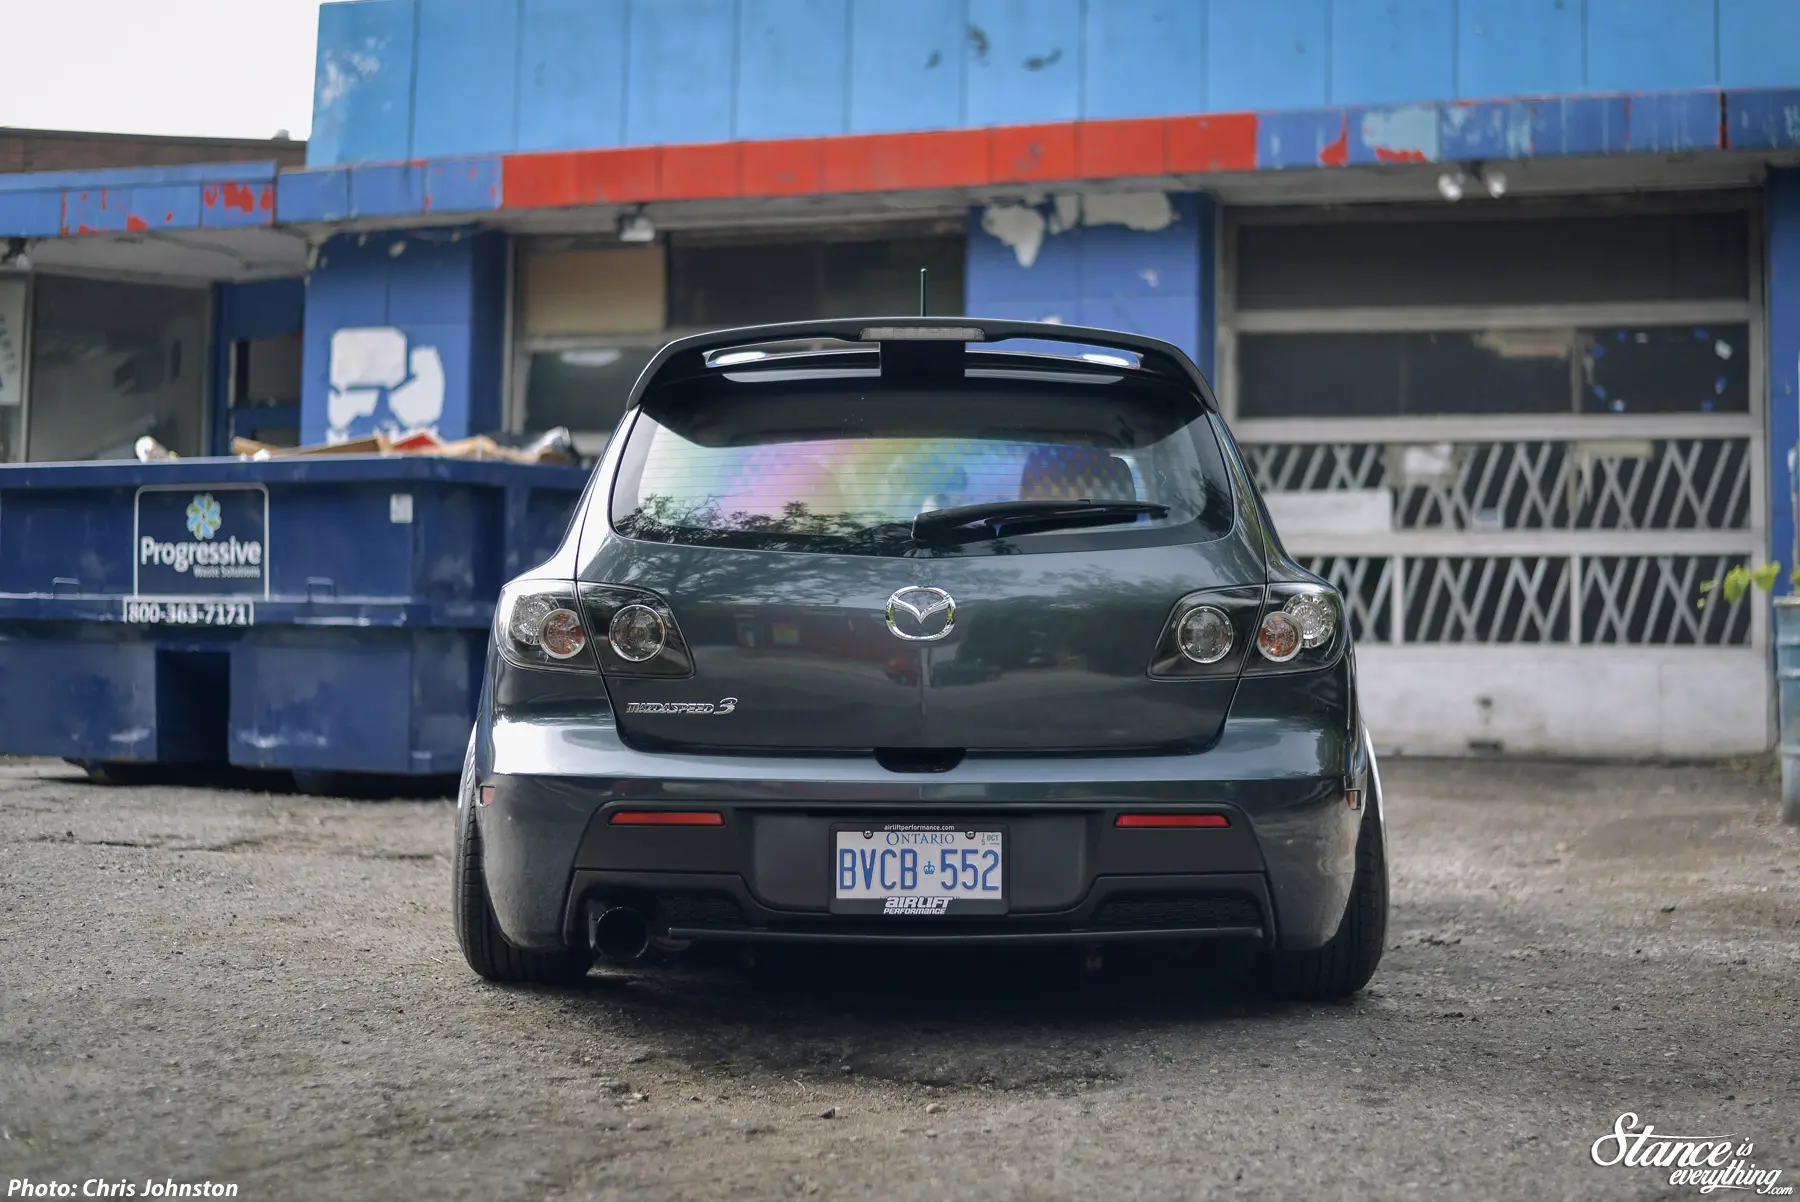
The 215/40 Nankang tires that came on the wheels do protest a bit at when I find myself deep in the loud pedal, but I’ll sort that out once they are burnt out with a better set of rubber, or, a more drastic/costly approach of lipping the wheels down a half-inch.
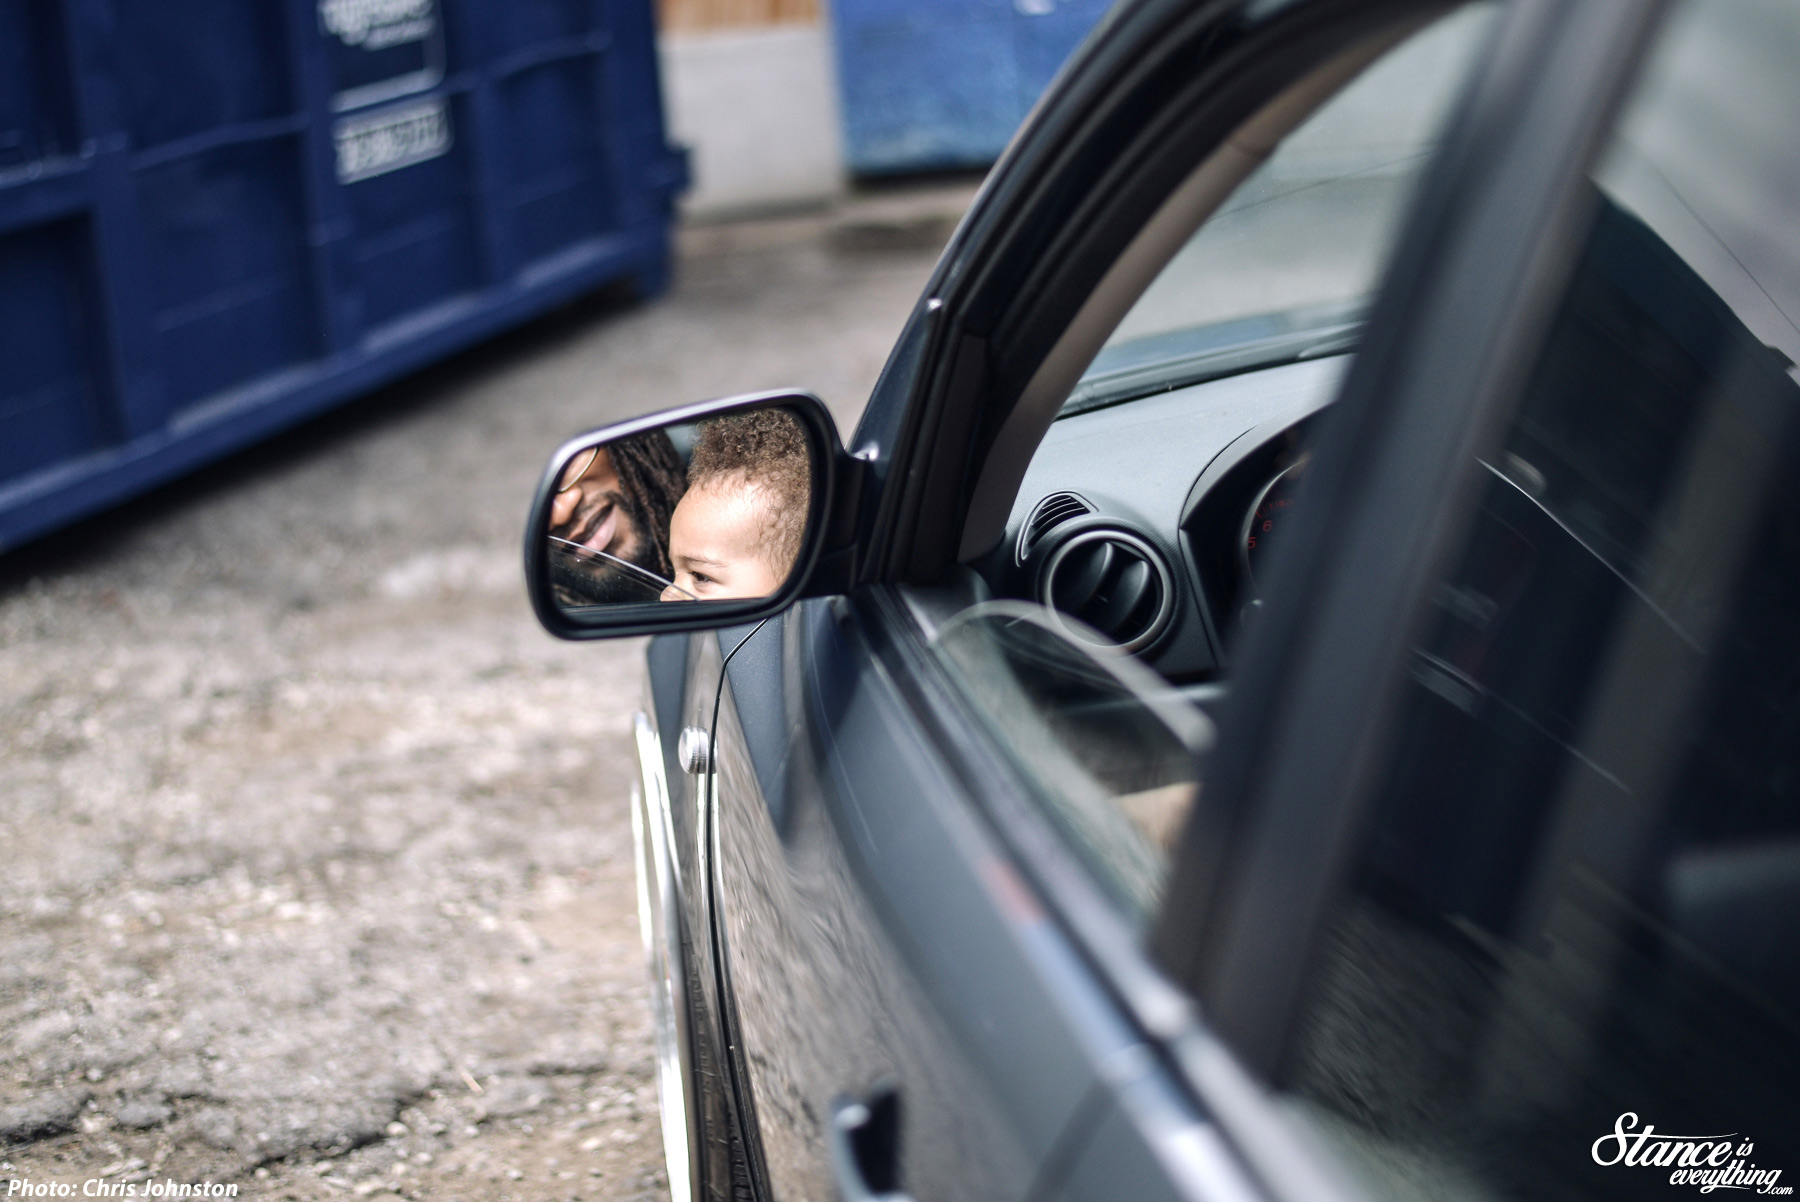
However the car is still far more usable than one might assume at the ride height in the top photo for everything I put it through including it’s most important duty as ‘Daddy’s Car’.

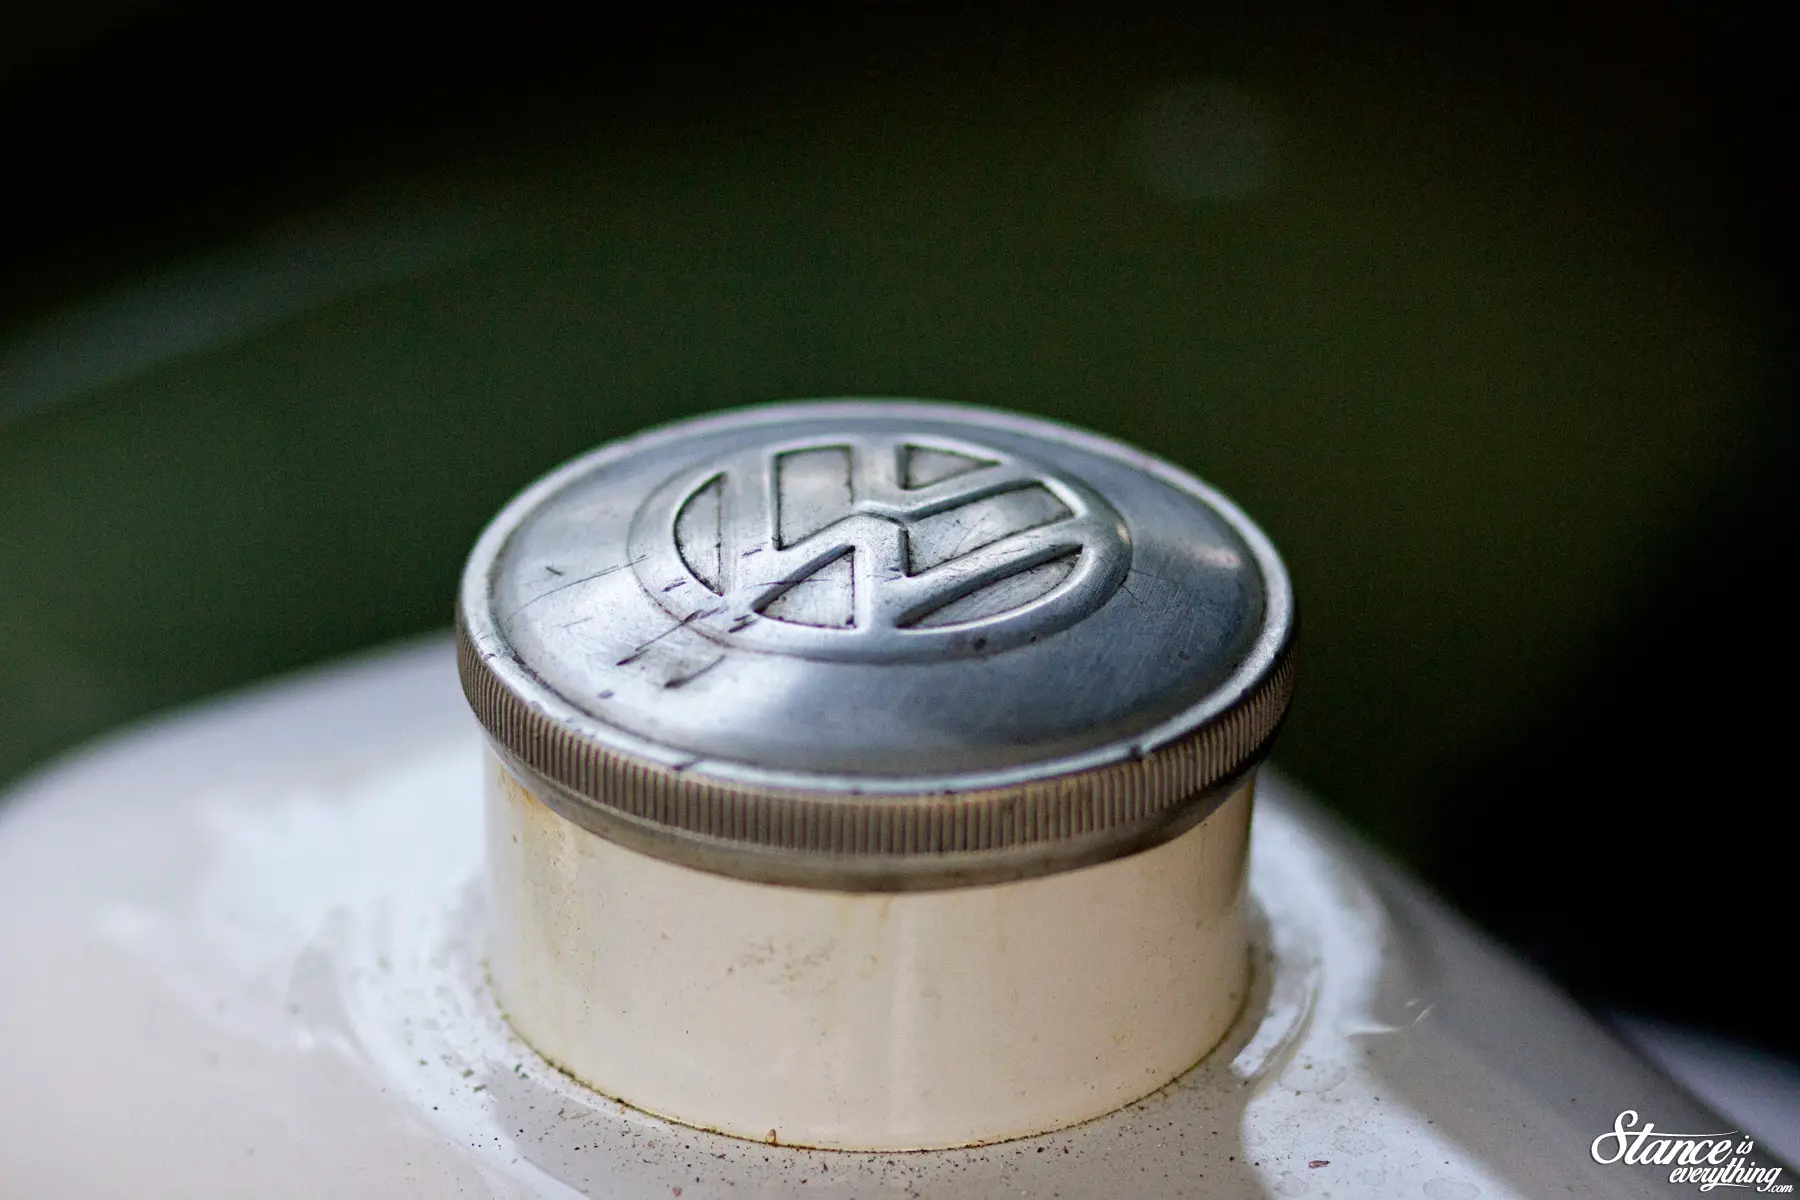
On my second go round doing the hatch install I was able to shave one inch off the overall stack height which means the factory floor is only raised half an inch in total allowing me to use the hatch like a hatch when I need to, and take off the covers and show off the hand painted tank when I need to.

Project Why Wait consumes most of my vehicle resources these days, but this car should see a few bolt on modifications as the years tick by and I get the itch for a bit more get up and go.
For now the HKS intake, TWM short shifter, and motor upgraded mounts I have to install will keep me honest.
Part of me will always wish the story of the white car ended differently, but here’s to many more years with the replacement.
There are some people who make building a car a very public spectacle. I’m not talking about those who share their builds in order to benefit others and get help along the way, I’m talking about people who tease endlessly and boisterously make claims that their project is going to ‘kill the game’ and ‘set the standard’.
Then there are enthusiasts who humbly put together cars outside of the public eye, and when the car is complete they don’t shy away from the spotlight but at the same time they don’t beg for it, or worse expect it.
Ken falls in the latter category. He’s been quietly building this car for the past two years and while he’s always down to talk about it –and any other car for that matter– he does so in only the humblest manner.

Born in Japan, but a Canadian resident from ten on, Ken has been a car enthusiast for most of his life.
Much like myself his passion for cars was instilled in him by his father who, despite not owning the most exotic of vehicles, thoroughly enjoyed the cars he did have and drove them in a manner we will just call ‘spiritedly’.

Once his family moved to Canada Ken’s passion shifted from four wheels to two, and for eight years he honed his flatland BMX skills to the point where he became a semi pro rider for SE Bikes Canada.
However once Ken got his licence and entered university memories of Japan, and his dad driving the Shuto kosuku, came flooding back and the 20″ was parked for an extended period of time.
Prior to the Celsior Ken owned a Civic EF, a BA Prelude, an EK Civic, very briefly a Nissan Altima and then finally a 2004 Acura TSX. After such a wide assortment of front wheel drive Japanese cars Ken felt the allure of a big body rear wheel drive sedan and decided to shift gears.


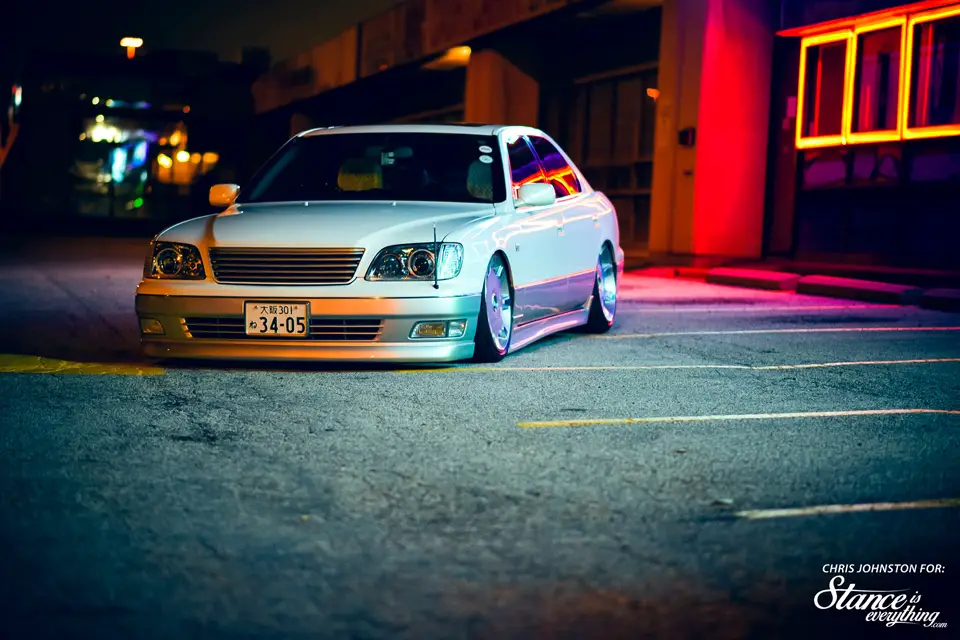
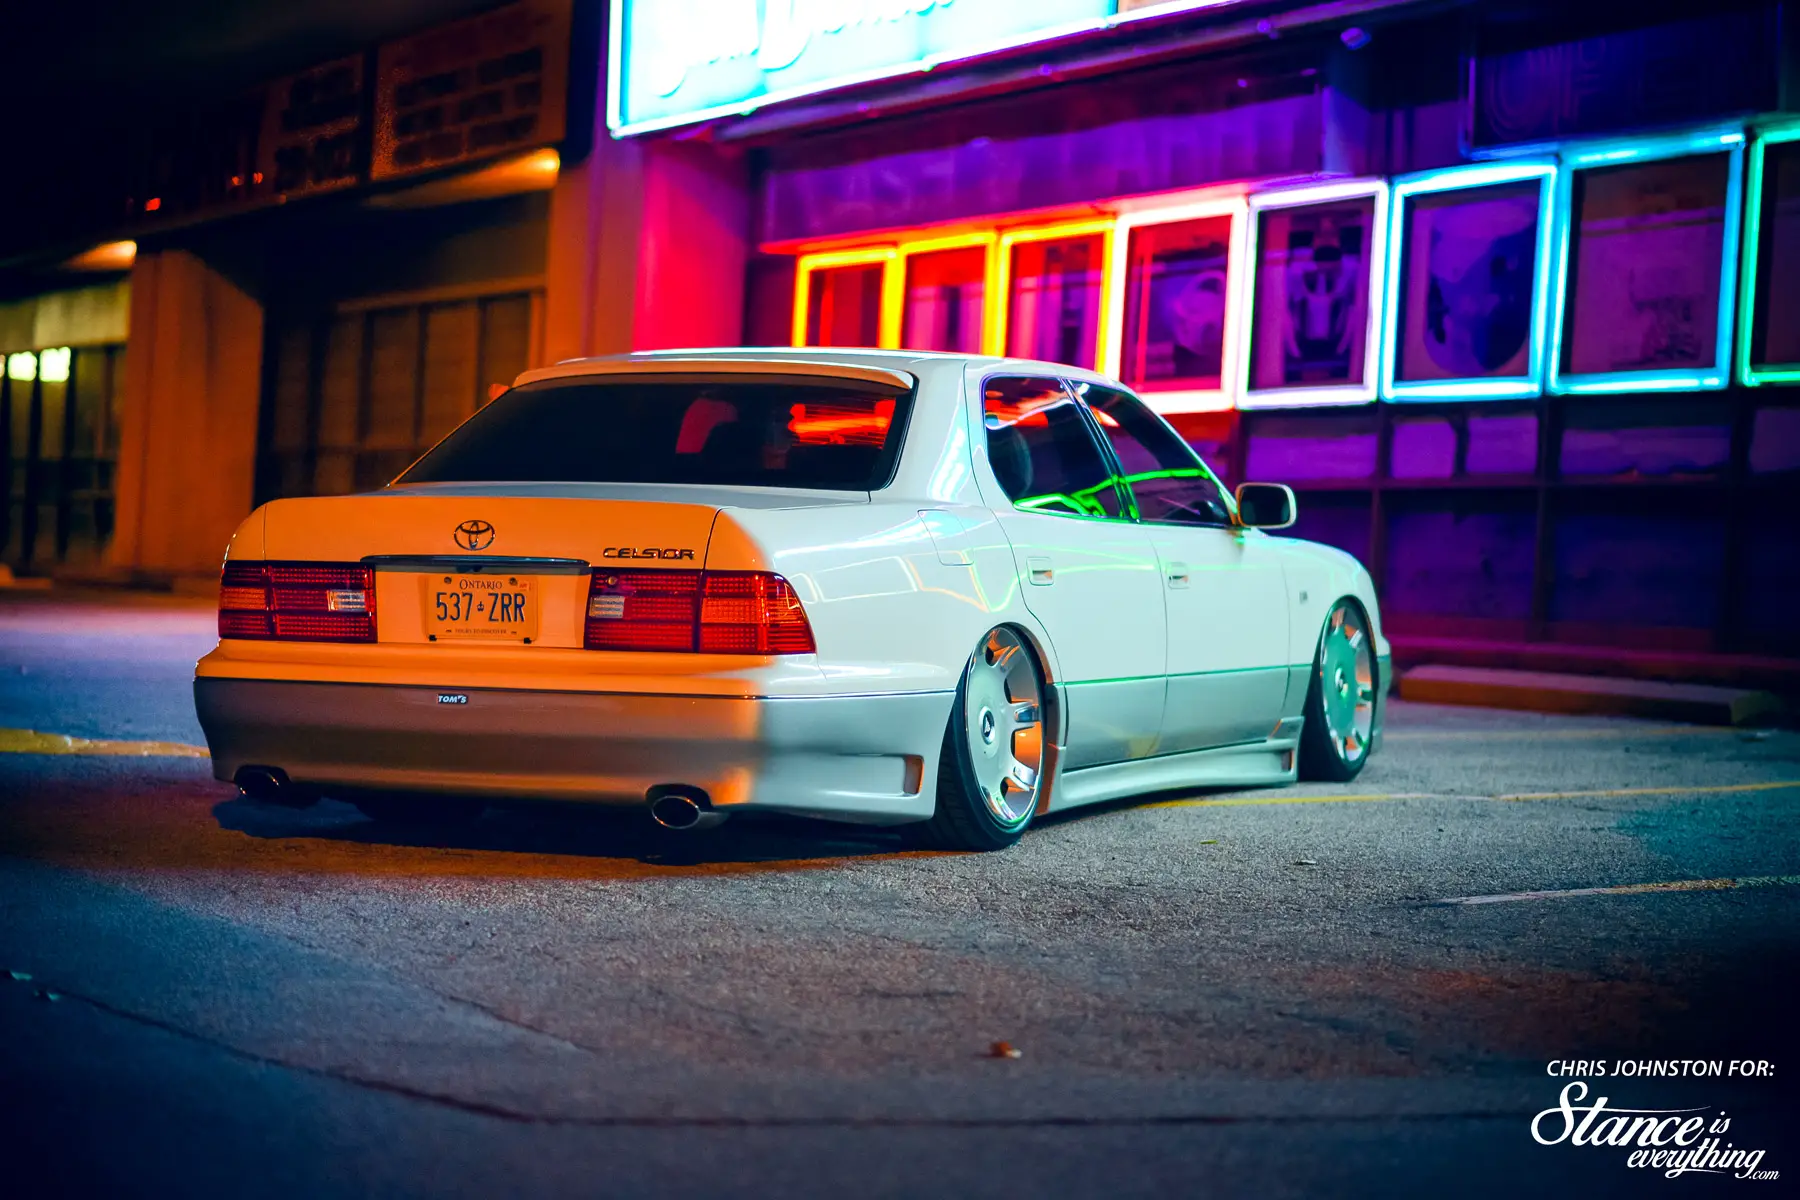
After being disappointed with the local high mileage and rust riddled Infiniti Q45 and Lexus LS400 selection a friend suggested he look abroad. Soon after looking at what his home country had to offer a 1997.5 UCF20 “eR” (euro tuned) model was on its way from Japan with less than 50,000km on the odometer and Ken’s name on the ownership.
Rolling off the Right Drive container bone stock Ken’s original plans were the infamous “wheels and a drop” we have all at one point tried to limit ourselves to.
One ride in his friends bagged Honda Accord and that all changed, UAS Aerosport bags were then fit over BC coilovers paired with Accuair Switchspeed management.

Drawn to unique modifications over go fast parts Ken took an approach similar to a traditional hot rodder when piecing the rest of the car together.
Where a traditional ‘rodder would attend local swap meets hunting for that special era correct part Ken spent his time on Yahoo Auctions and Up Garage looking for just the right period correct accessories.
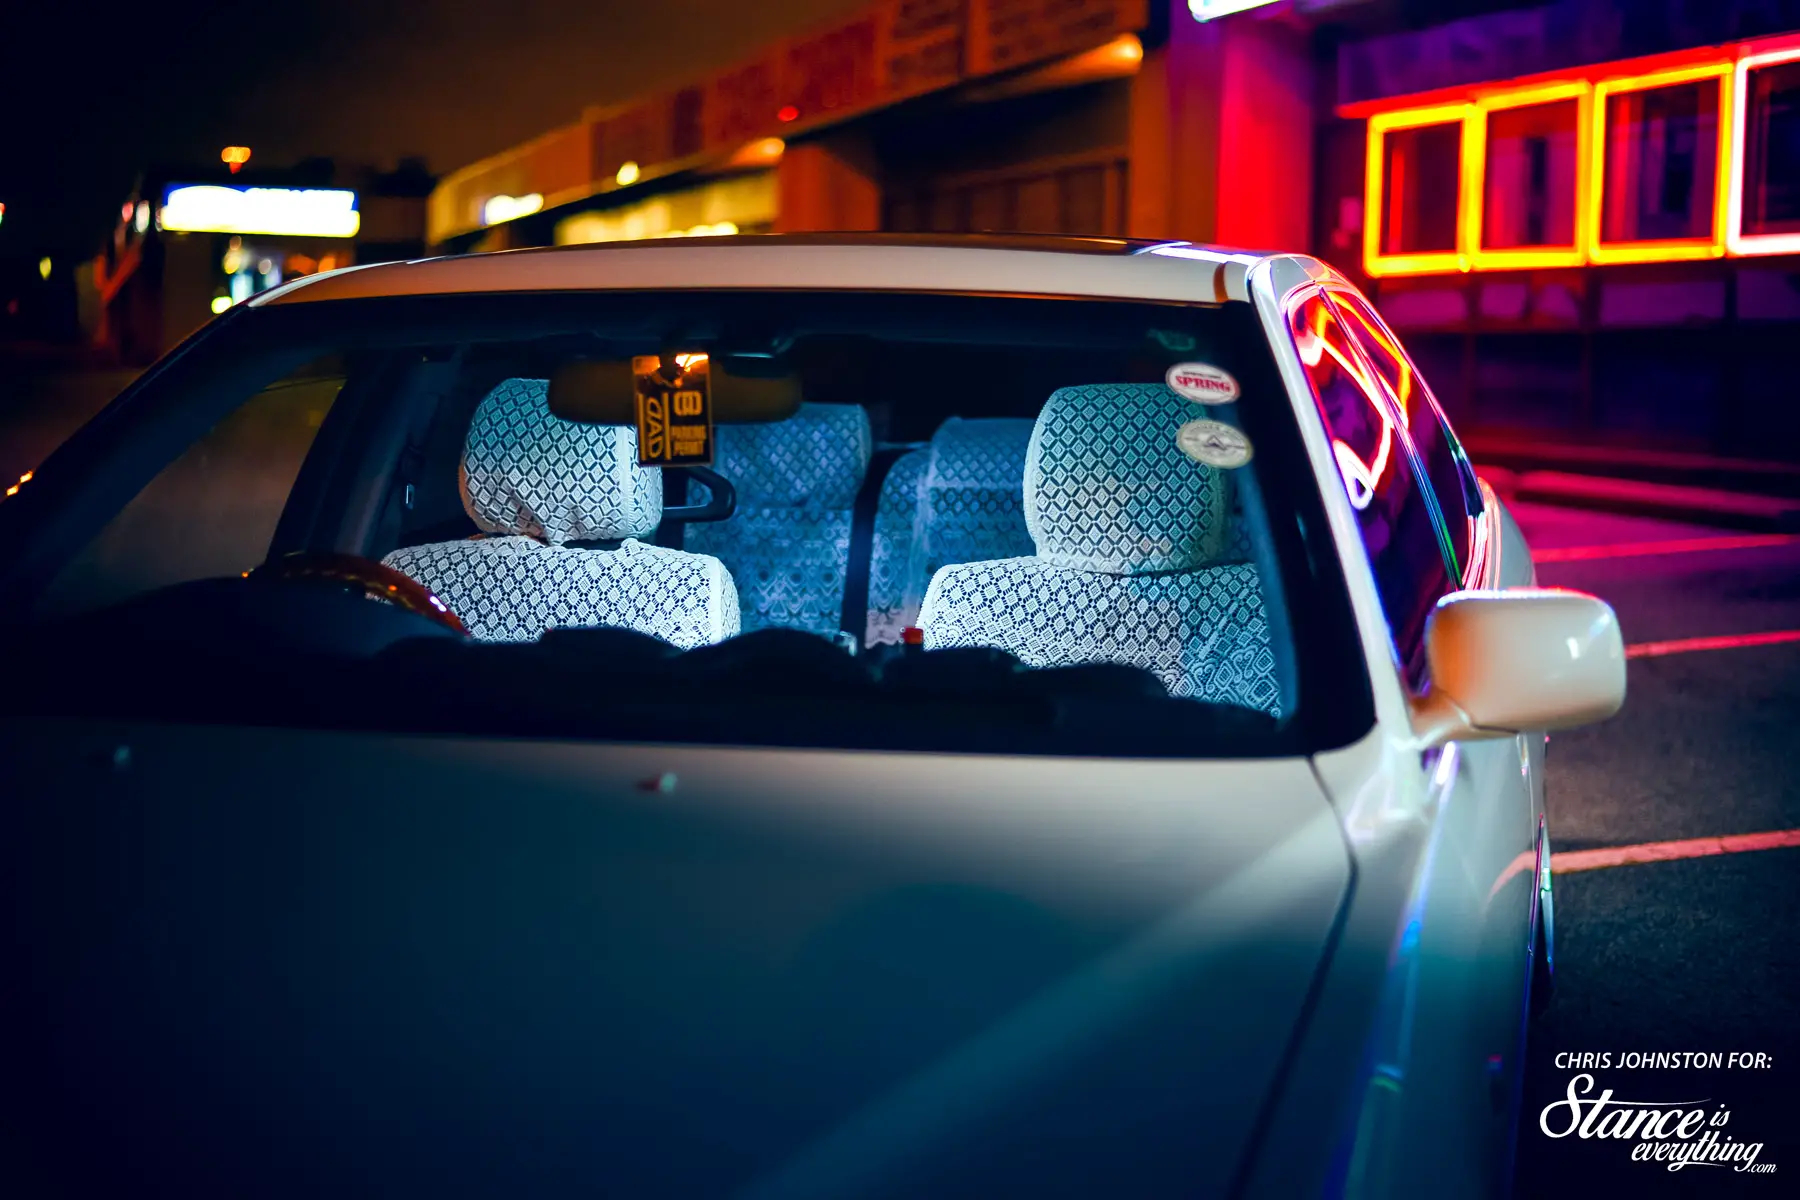
His treasure hunting skills are clearly well-developed because the interior of this car is one of the most unique ever featured on Stance Is Everything.
Garson DAD accessories exist throughout including but not limited to; dash mat, cup holders, rear seat console, cushions, slippers, and pillows.


For the classic VIP touch a Garson DAD table has been installed up front and Jaguar table has been retrofitted for the rear.
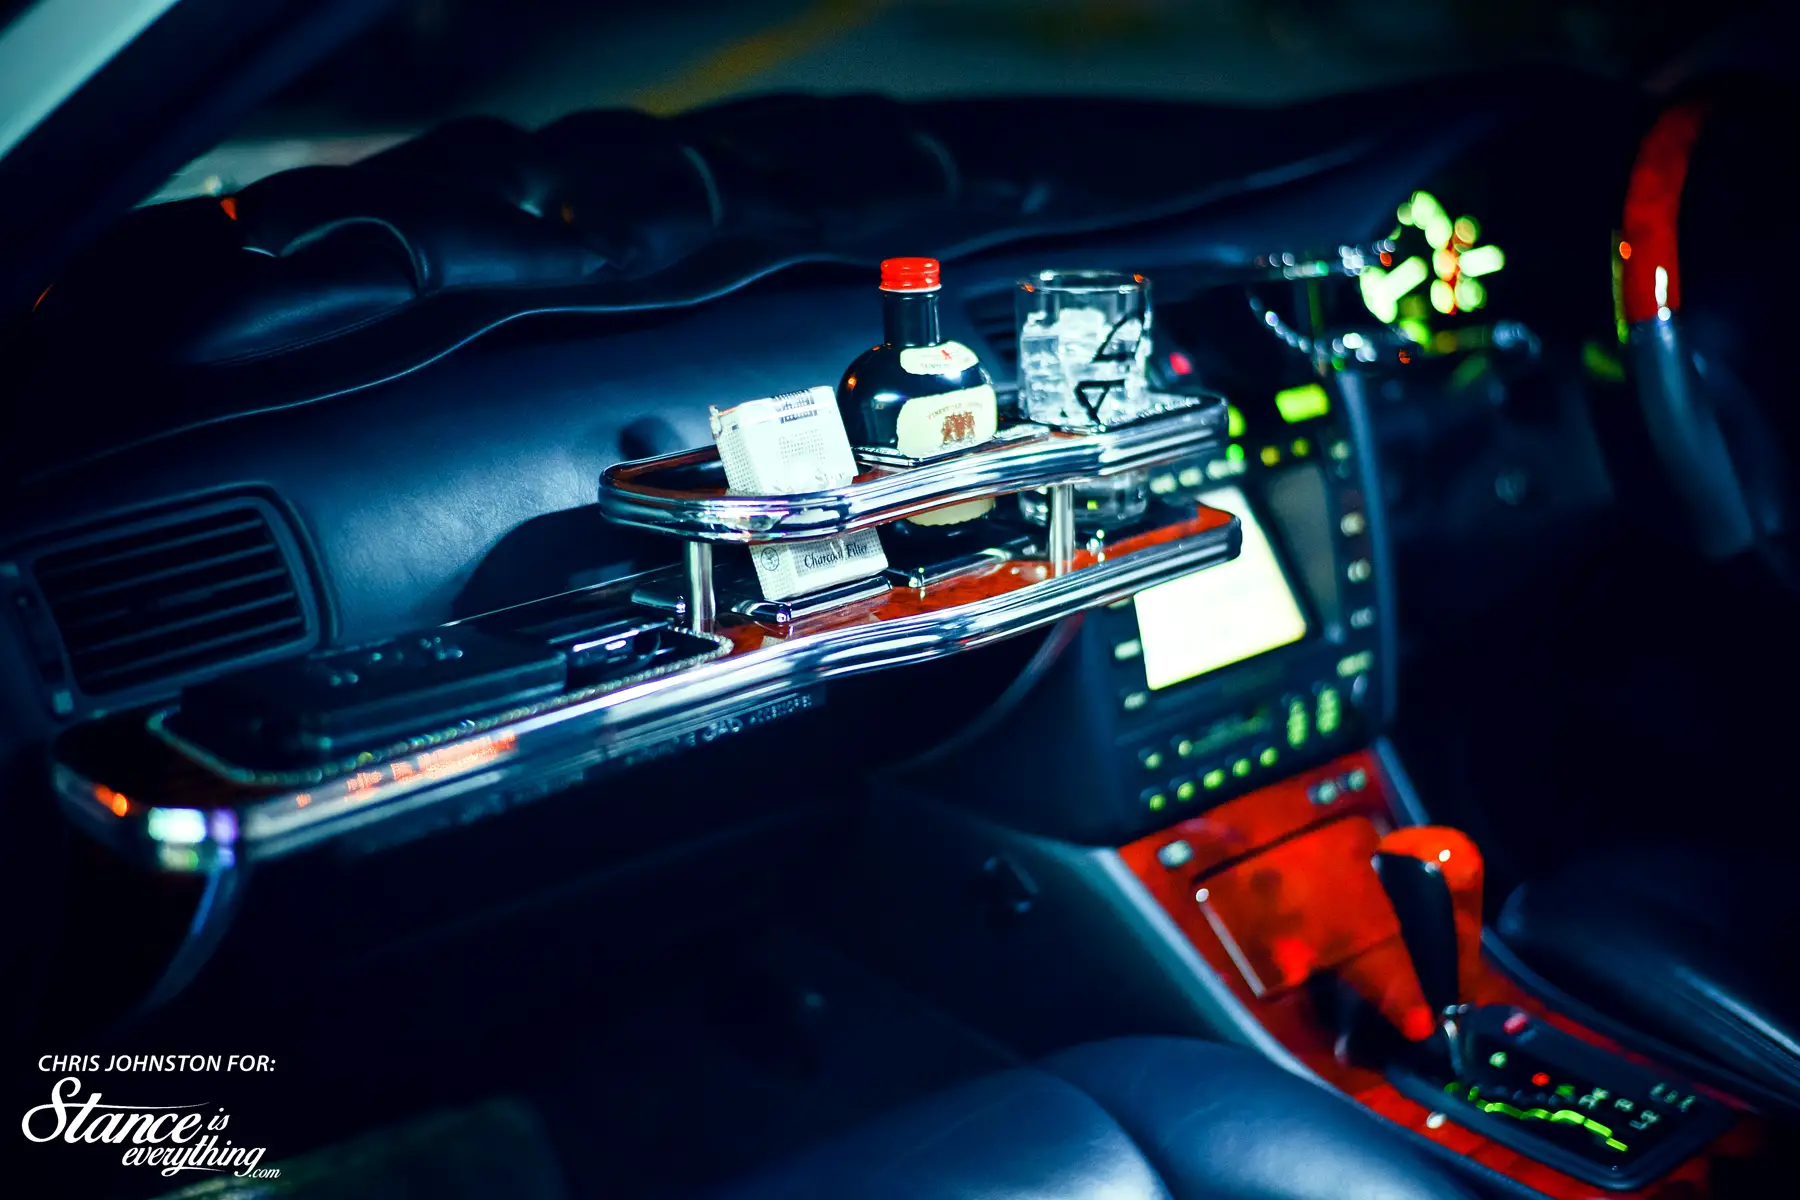
Putting the car over the top is Ken’s use of accessories from the OEM Toyota catalog. Did you know that rear ottomans were a factory option for this car? Neither did I, but Ken has them in addition to illuminated Celsior door sills and a factory accessory seat hanger.
The lace seat covers are also, almost unbelievably, a rare factory option as well.


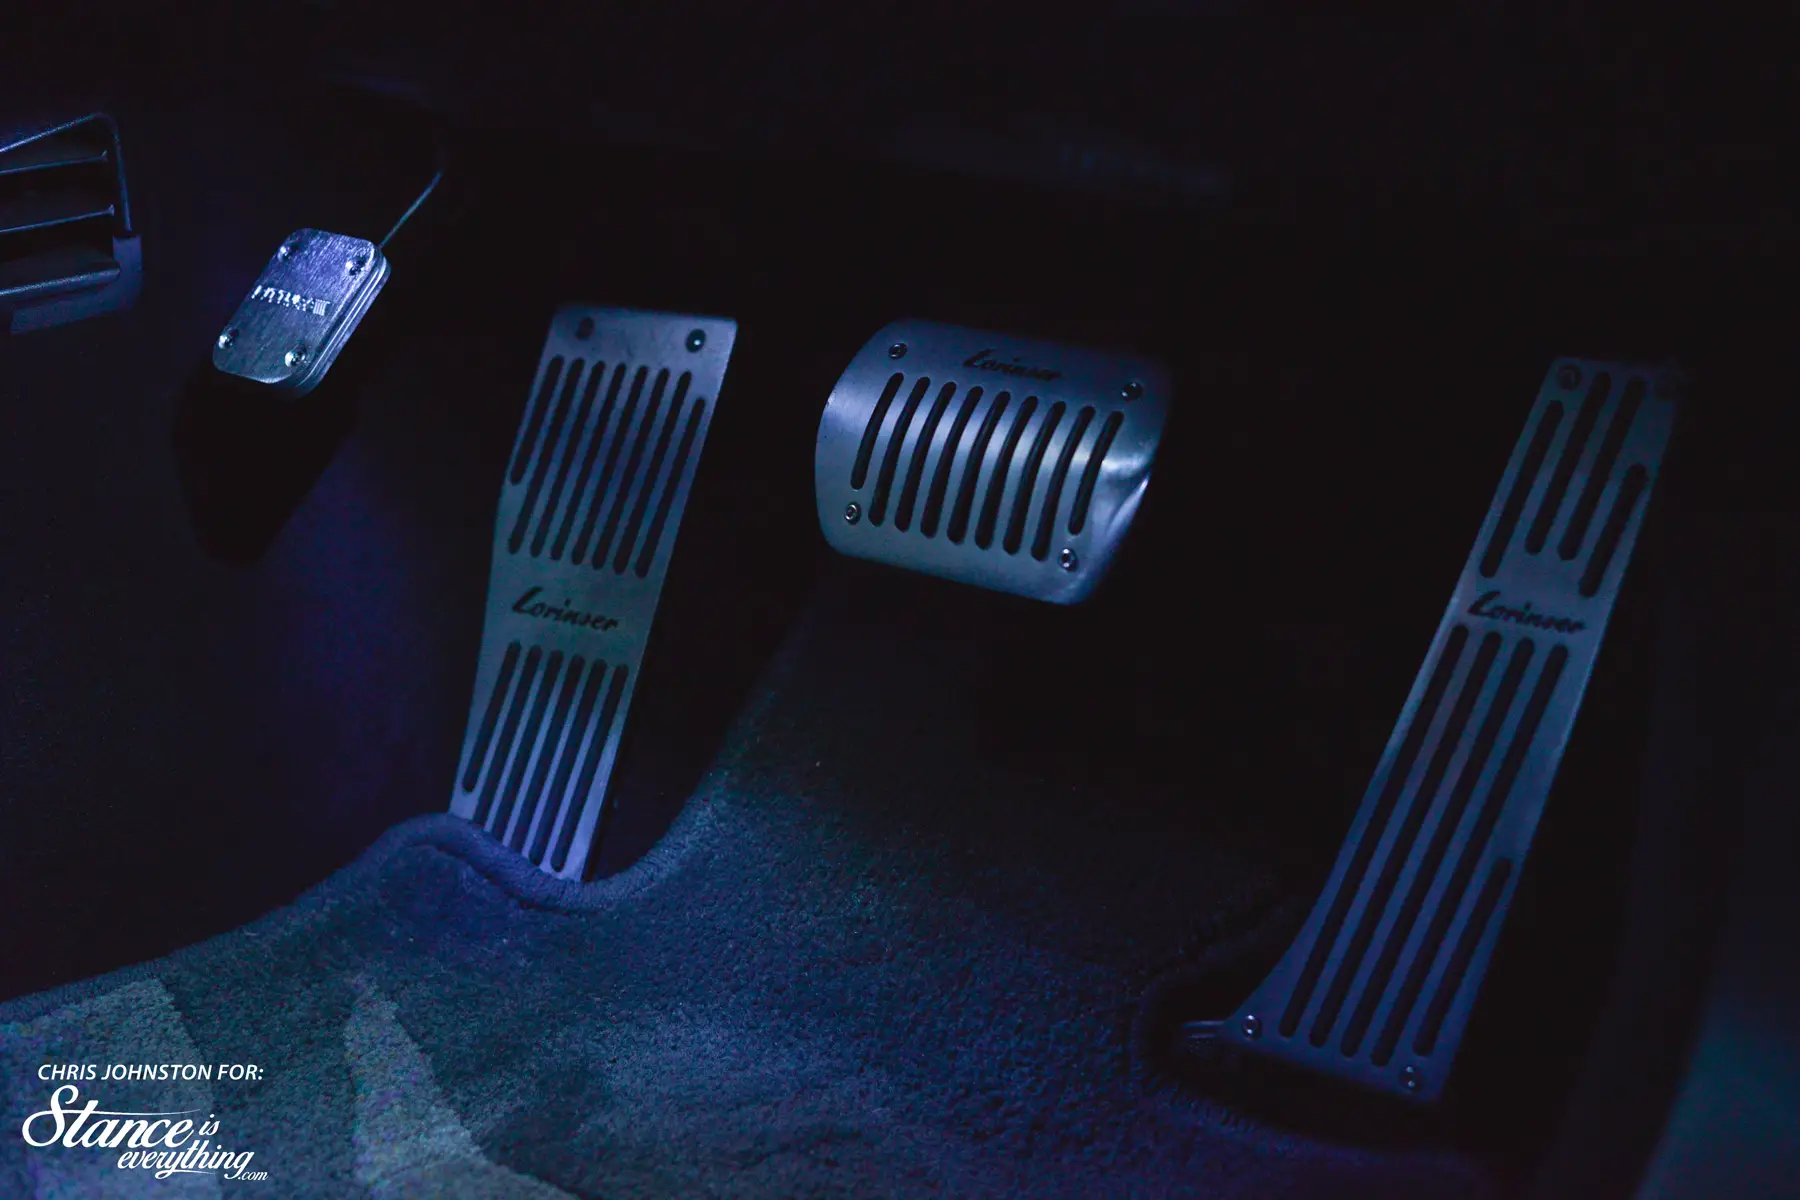
Despite the fact that he literally steps on them every time he drives Ken also paid mind to the cars pedals.
Lorinser pieces cover the dead, gas, brake pedals and a Pittura unit covers the foot actuated e brake.
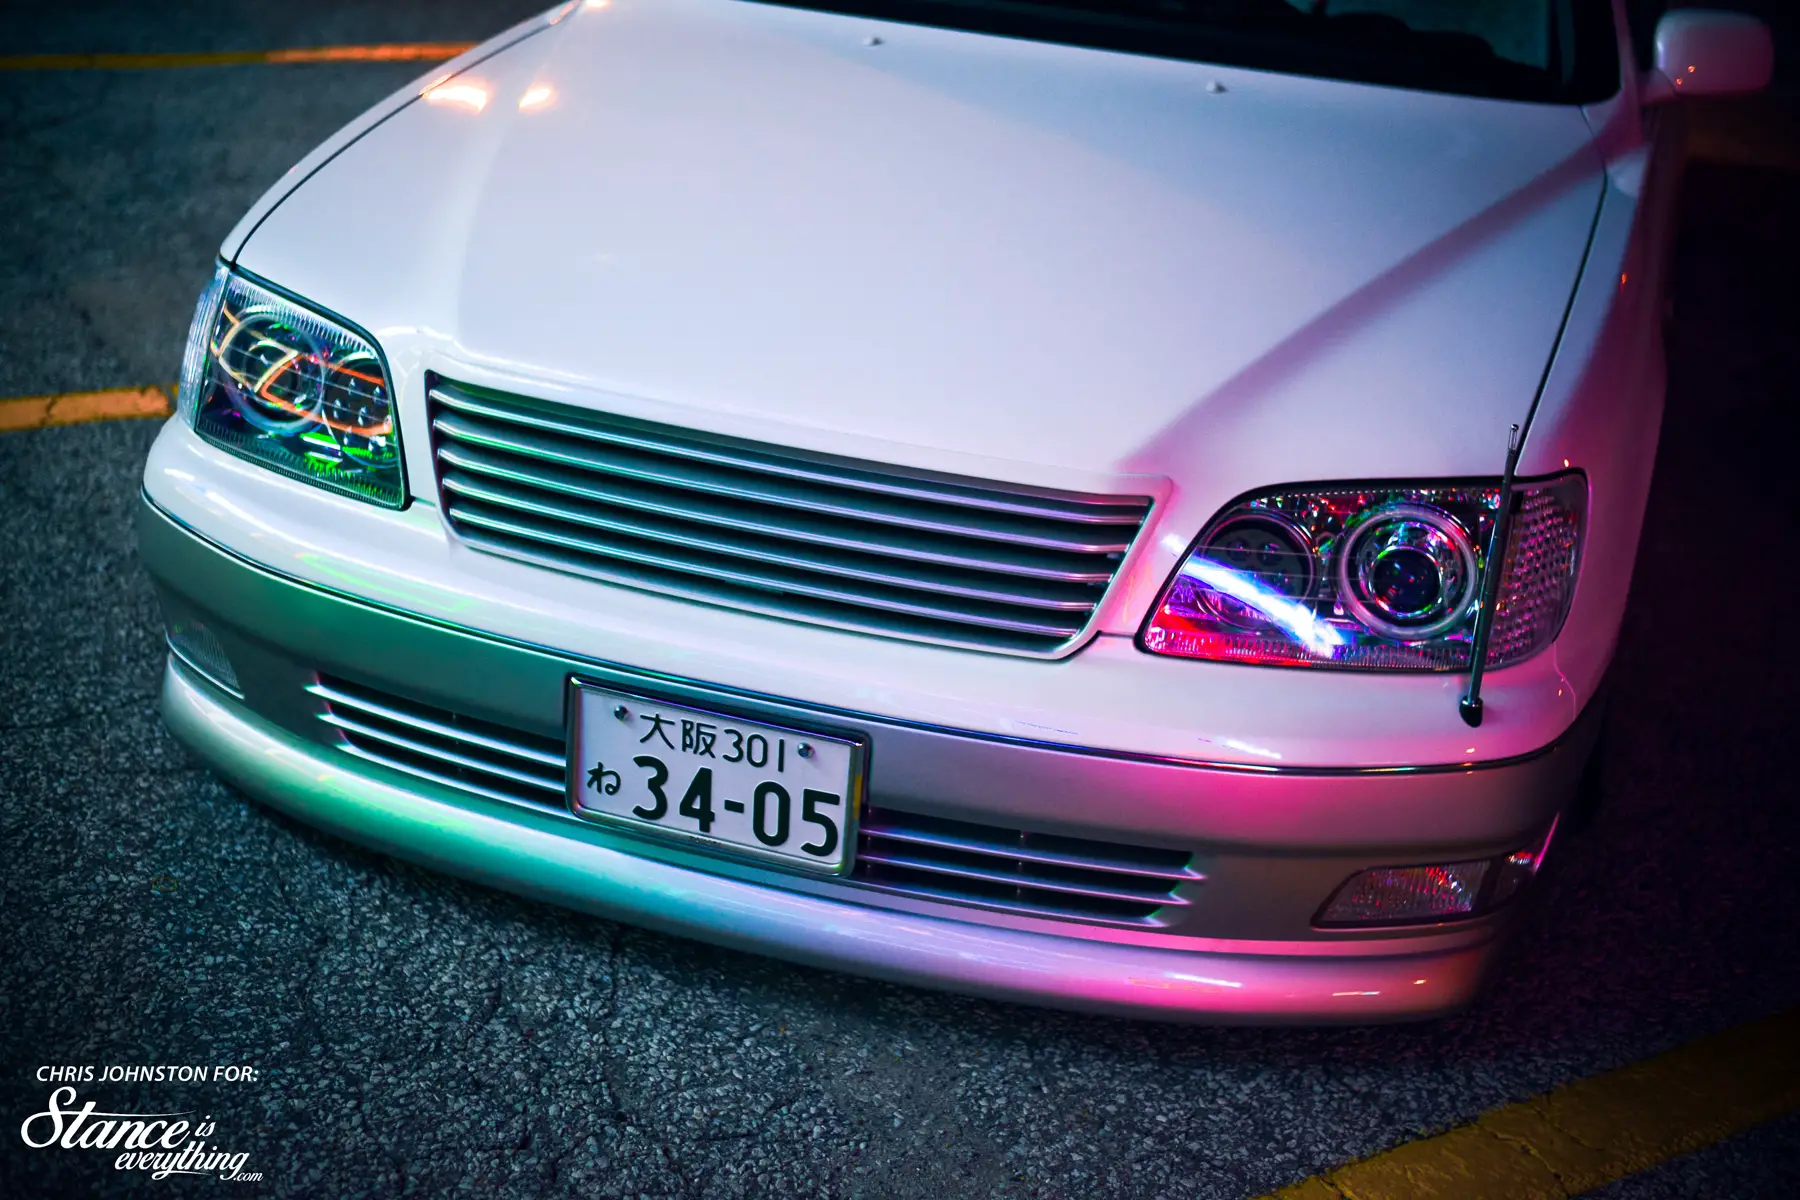
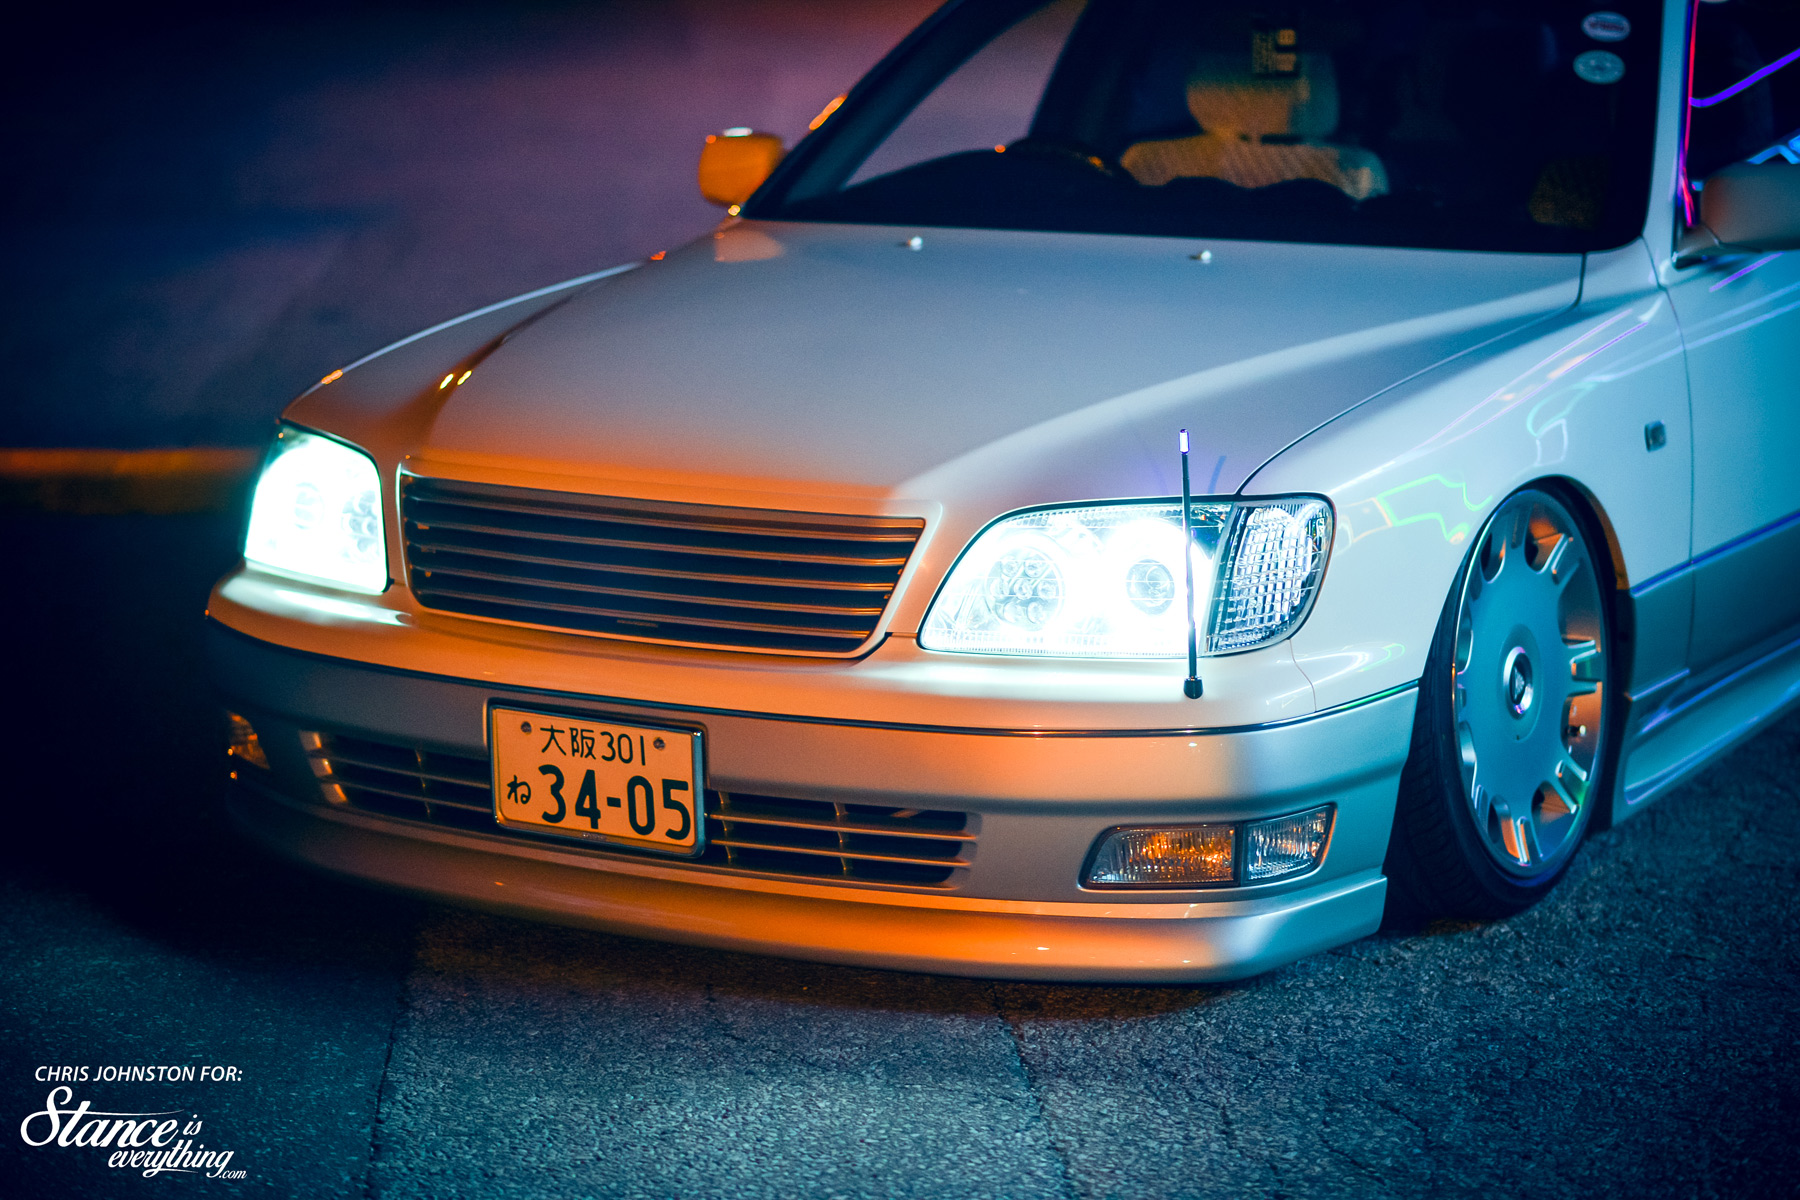
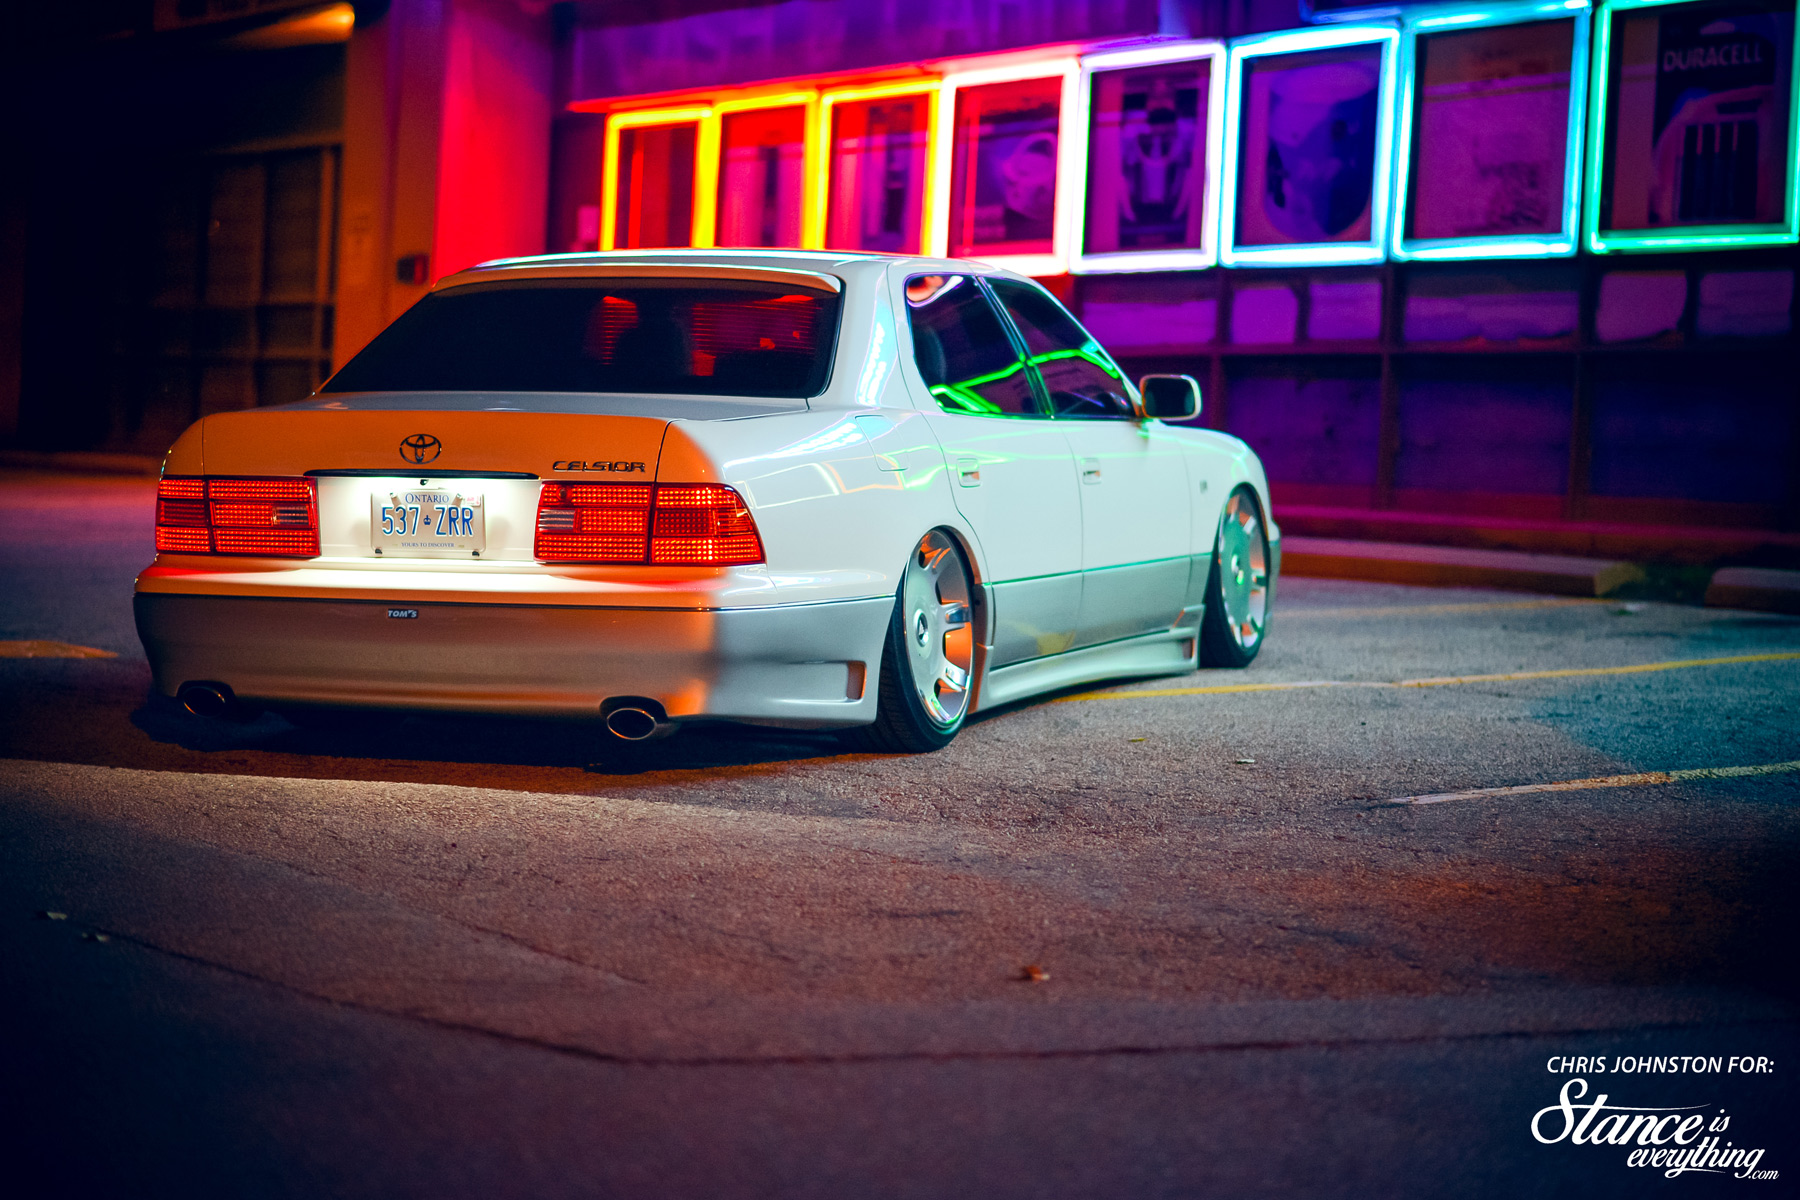
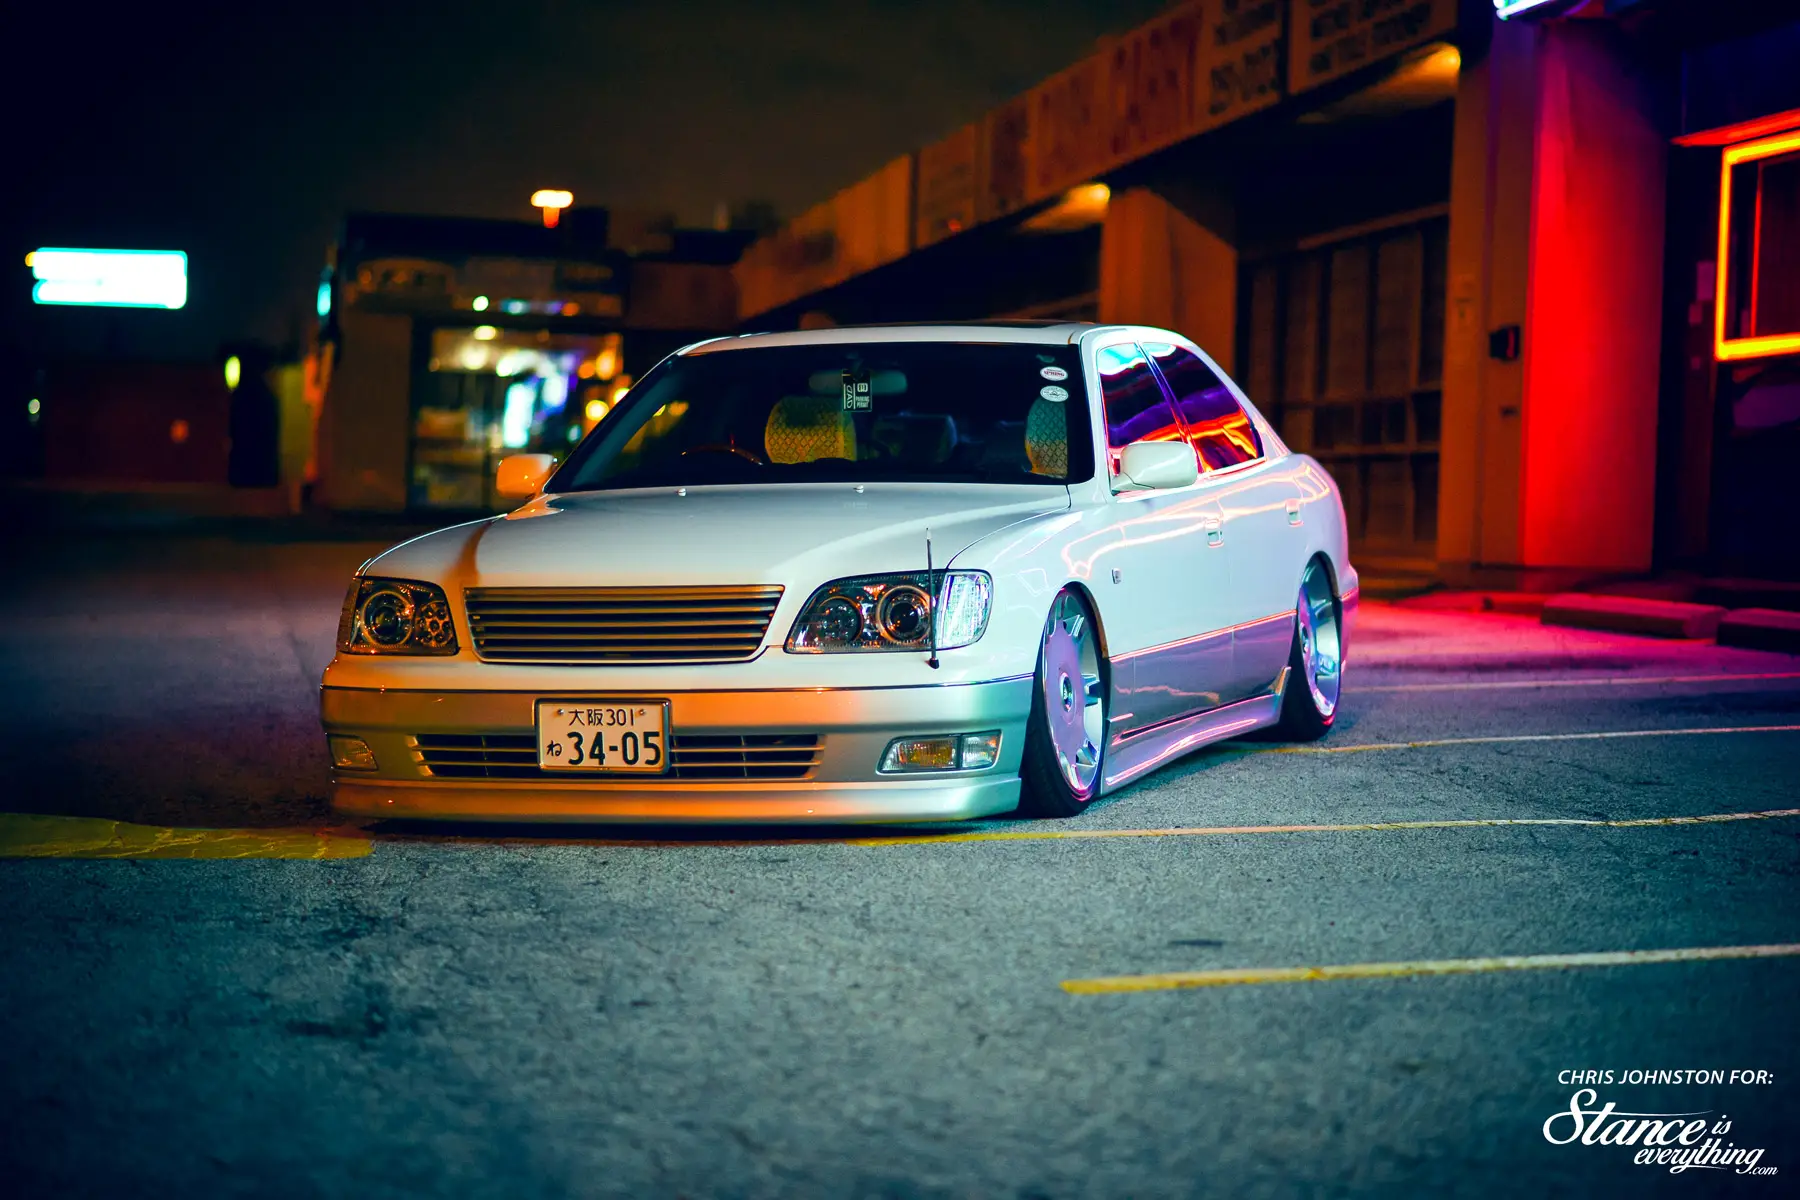
On the outside of the car Ken maintained the factory two-tone but updated it a bit with a Silkblaze front lip.
An Aimgain front grill removes the Toyota emblem and really lets the front end speak for itself.

TOM’s side skirts join the party along with a TOM’s rear bumper. A parking pole has also been installed to truly complete the imported from Japan look.


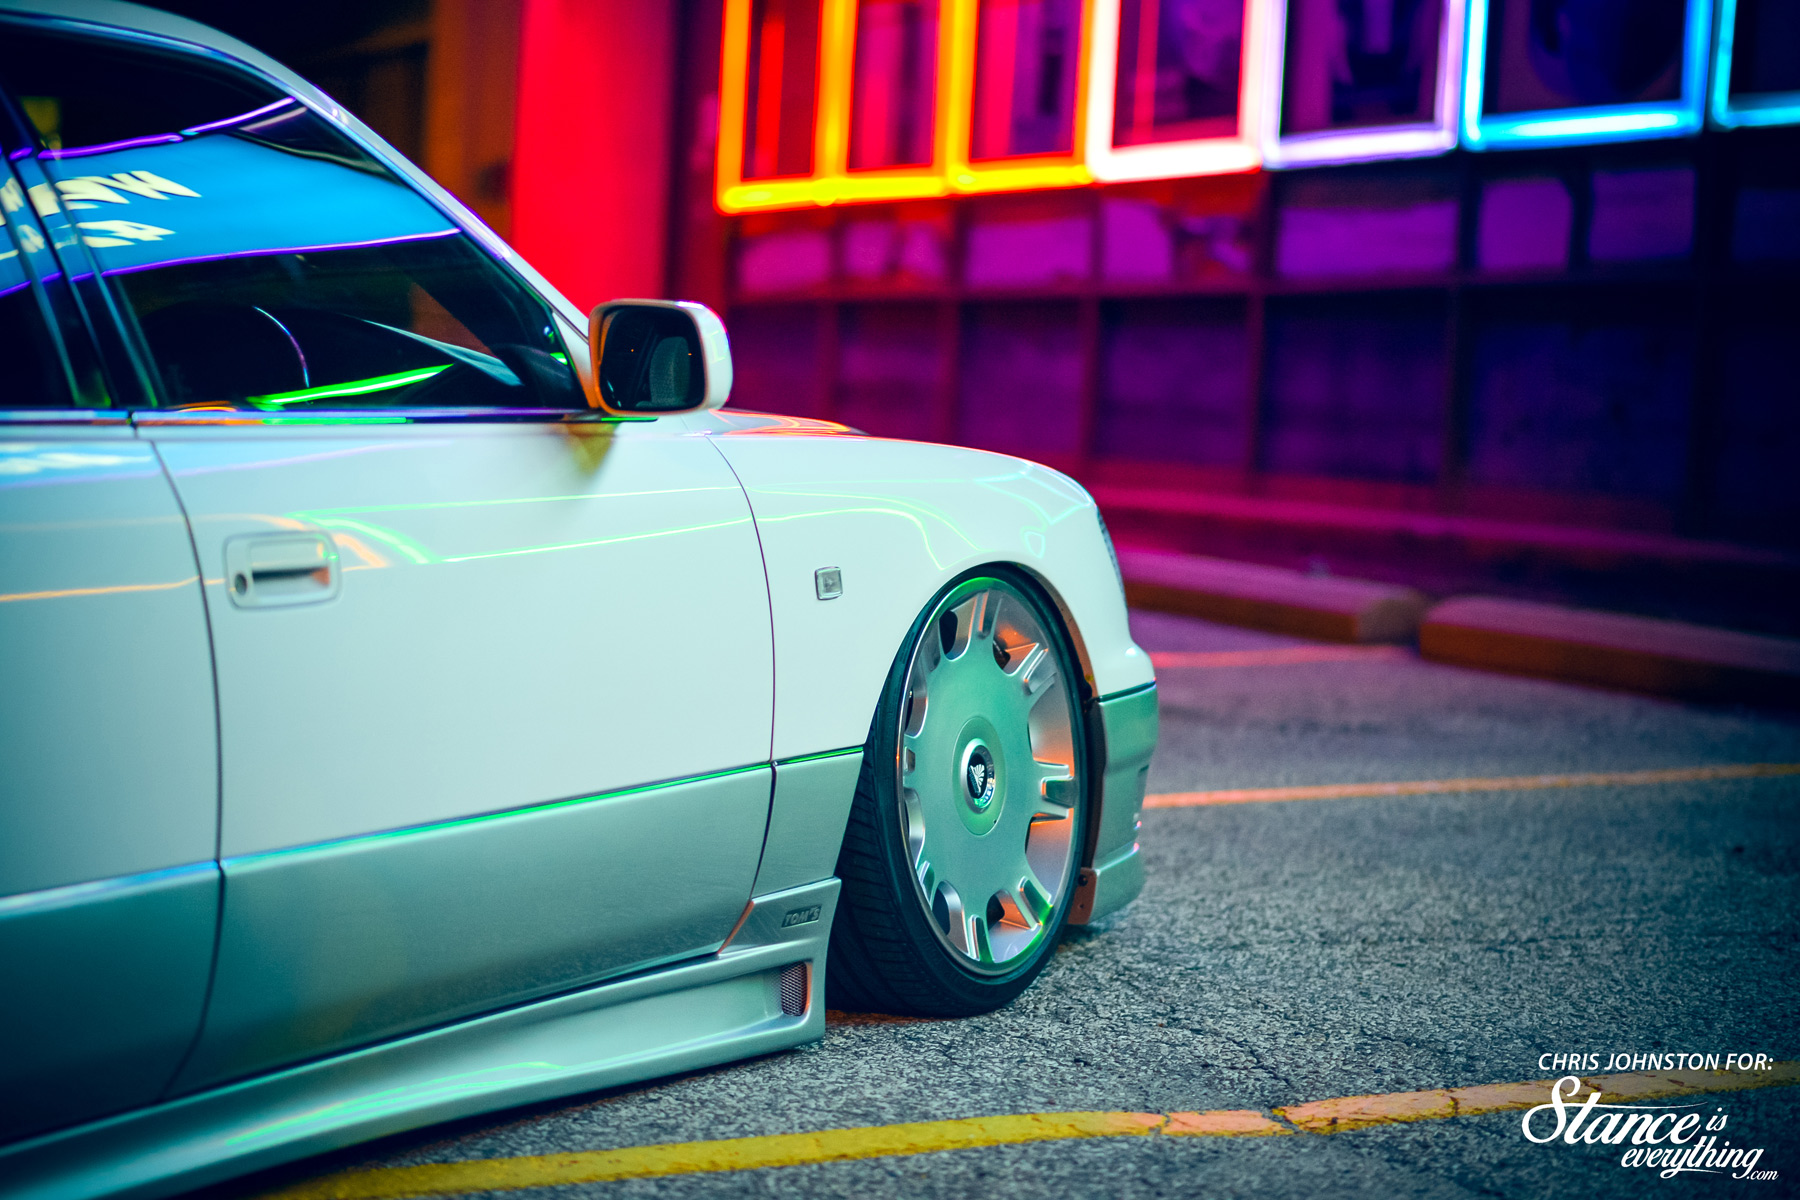
Ken admits he’s a bit of a wheel fanatic with his last car seeing ten sets, and this one on its fourth already.
With every set of wheels Ken has paid careful attention not to go too aggressive despite the numbers game going on in some parts of the VIP and LS400/Celsior communities.
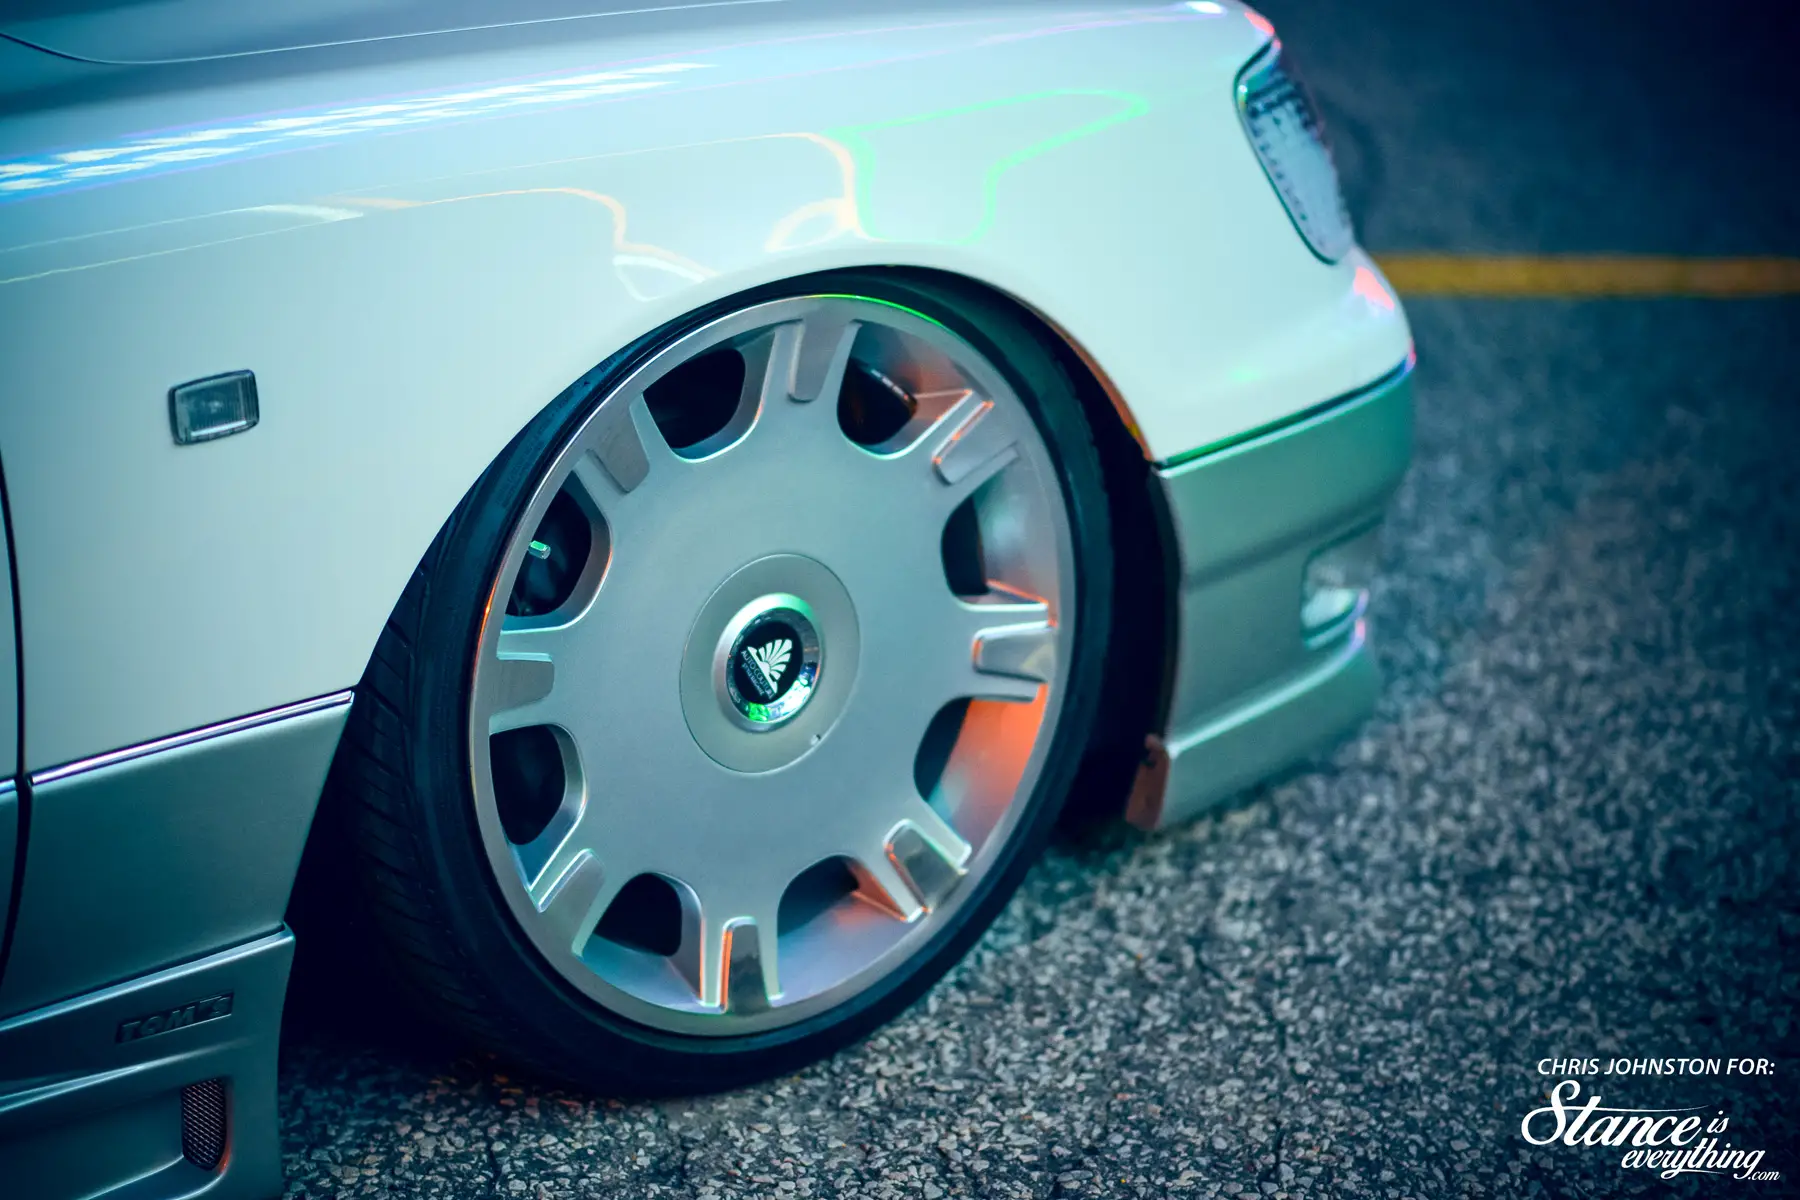

Opting not to run the risk of distorting the factory body lines, or worse creating the dreaded bacon fender, Ken only selects wheels that will play nice with his flawless bodywork.
Looking at how well the current 19 x8.5 +26 and 19×9.5 +34 Autocouture Crescent wheels fit it’s impossible to argue with his selection criteria, even when he does admit that he is looking to make the set square at some point in the future.


With the suspension, wheels, bumpers, and interior all upgraded the last thing to do on Ken’s list was upgrade the factory lighting.
Previously being a local retrofit source these lighting upgrades came easy and in no time flat HID projectors were fit into the factory housings along with extremely bright angel eyes paired with LED RGB demon eyes.

The front turn signals are now also LED units as are the rear tail lights which have the ability to dance when given the right beat.
Never one to stop collecting, or tinkering Ken is looking to get a new front lip for the car before this season is done in addition to the aforementioned pair of slightly more aggressive wheels.
However of late the itch to work on a Toyota Century has made itself known. Will this car soon make way for another iconic VIP platform? Only time will tell!

Modification List
Suspension:
- BC Racing Coilovers & UAS Aero Sport bags
- Megan rear camber kit
- Accuair Switchspeed management
- Accuair VU4 manifold
- Air Zenith OB2 compressors
- Air Zenith 5 gallon tank
- SMC water traps
- Zaetech Digigauge
- Zaetech TouchBox
Lighting:
- Custom retrofitted projector head lights with angel eyes & RGB LED demon eyes
- Custom retrofitted LED front turn signal
- Custom retrofitted LED tail lights with dancing mode
- Philips licence plate LEDs
- OEM Toyota Celsior front corner bumper pole
Exterior:
- Aimgain front grille
- Silkblaze front lip
- TOM’s side skirts
- TOM’s rear bumper
- Roof spoiler
Interior:
- Garson DAD Dash mat
- Garson DAD Cup holder
- Garson DAD Front table
- Garson DAD Potato holders
- Garson DAD Rear seat console
- Garson DAD Opera lights
- Garson DAD Blanket
- Garson DAD Cushion
- Garson DAD Slippers
- Garson DAD Trunk box
- Garson DAD Floor mats
- Retrofitted Jaguar rear tables
- OEM Toyota Celsior lace seat covers
- OEM Toyota Celsior seat hanger
- OEM Toyota rear ottomans
- Illuminating Celsior door sills
- Silkblaze sport steering wheel
- Lorinser gas / brake / dead pedal covers
- Pittura parking brake pedal cover
Wheels:
- Autocouture Crescent wheels 19 x8.5 +26 / 19×9.5 +34 with 235/35/19 & 245/35/19
***stock front & rear fenders with no roll / shave / pull***

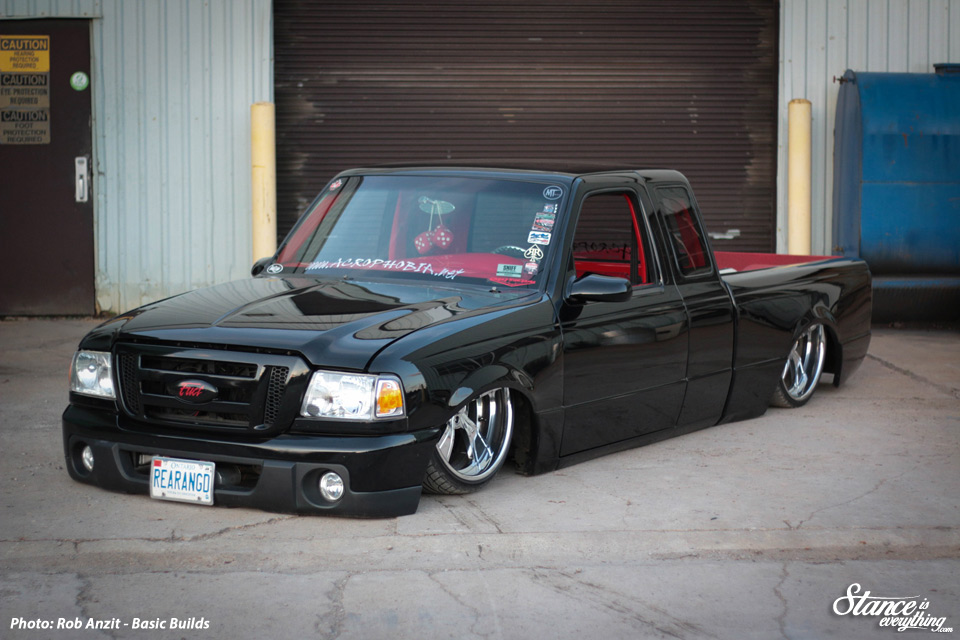
Being one of the most well-known Rangers to come out of Ontario Gary’s truck really needs no introduction. It’s appeared here in event coverage several times over, and been featured by a few other noteworthy media outlets.
About a week ago Rob Anzit, of Basic Builds, got some one-on-one time with the truck and produced the photos posted today.
Though it may be hard to believe looking at this truck completed, originally Gary didn’t plan to take his Ranger to the level you see today.
At CSCS a few years ago he mentioned that the truck was purchased “finished” as something to drive while he worked on a different project.

But, like most of us once he started making changes the desire to keep going took over and one thing led into another, which led into yet another, until he ended up with the truck he has today.
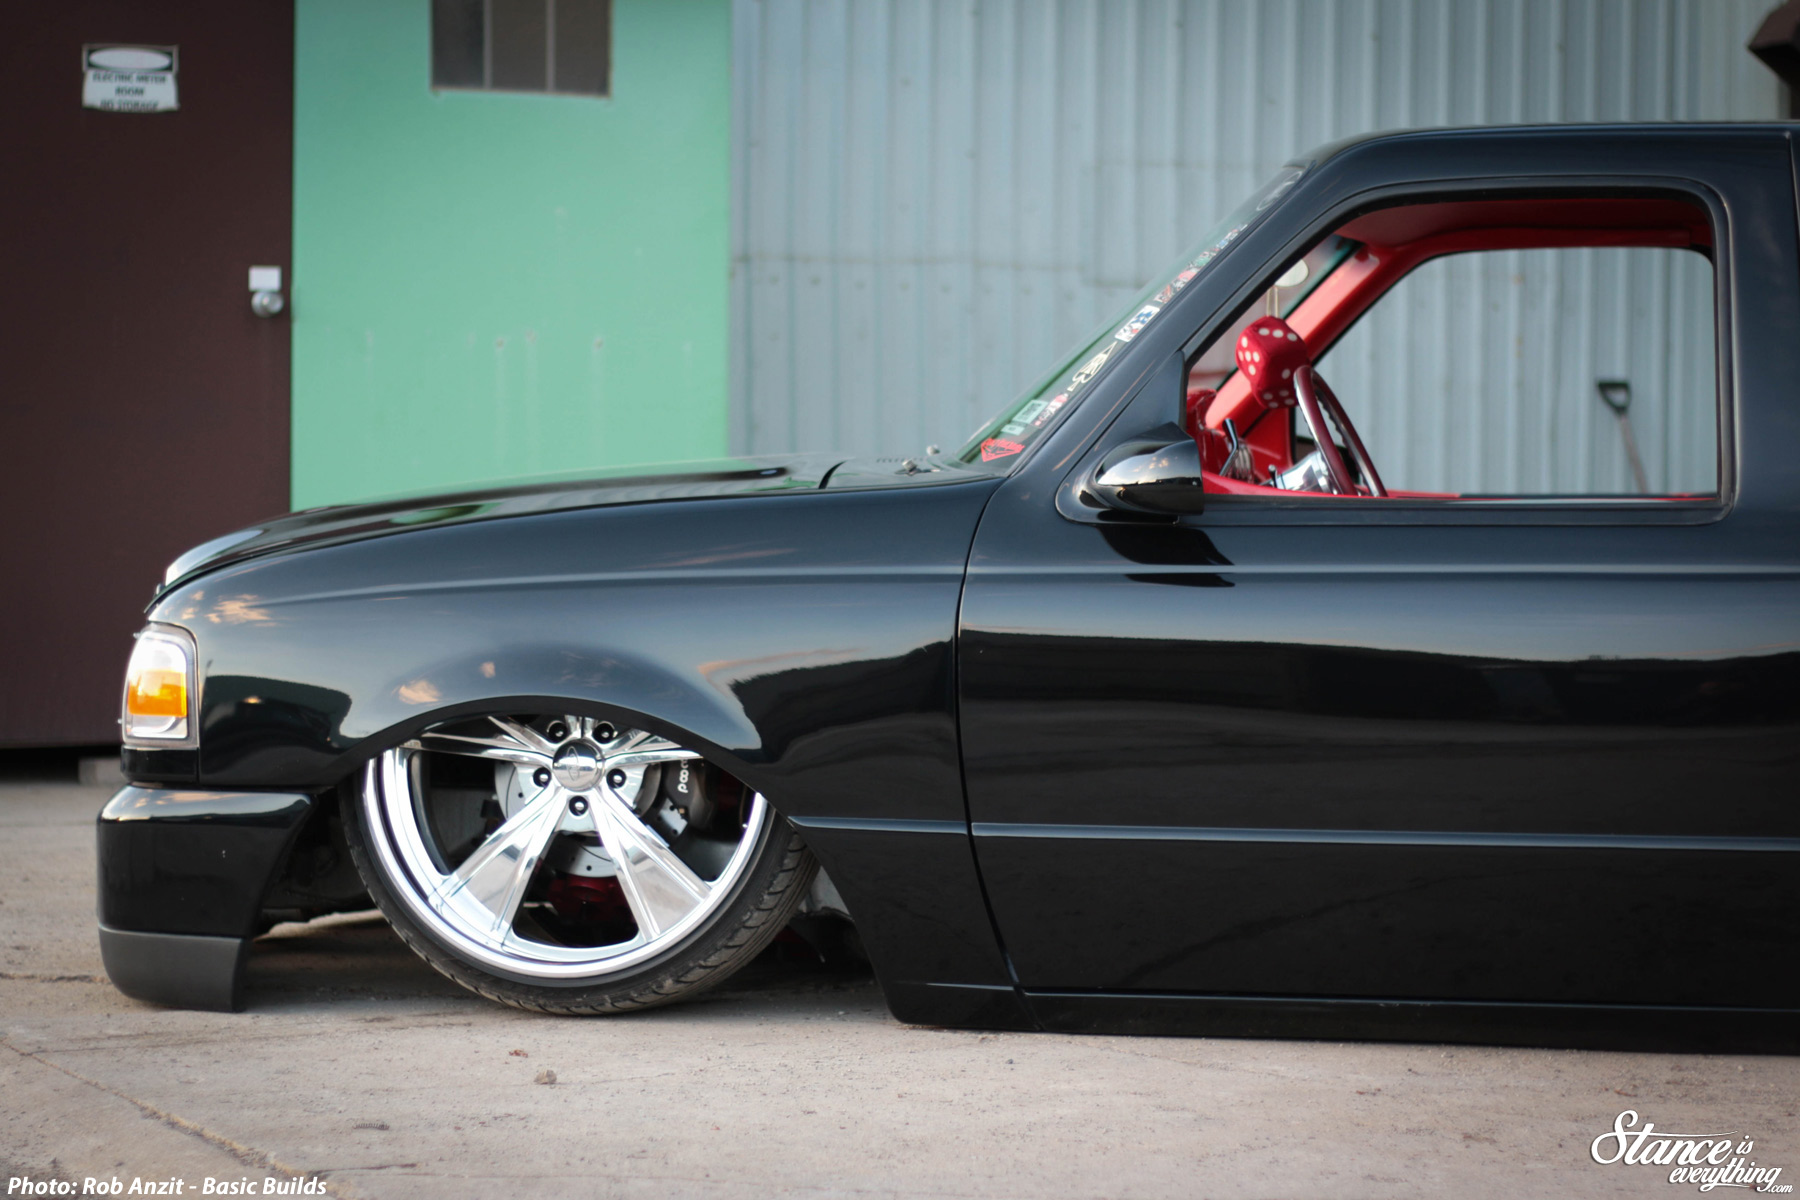
That truck is of course a bagged, bodied, suicide door equipped beauty.

Underneath the face lifted 2011 body work sits a Ford Racing engine that in addition to generating mean burn outs sends this truck down the quarter-mile in and around 14 seconds.

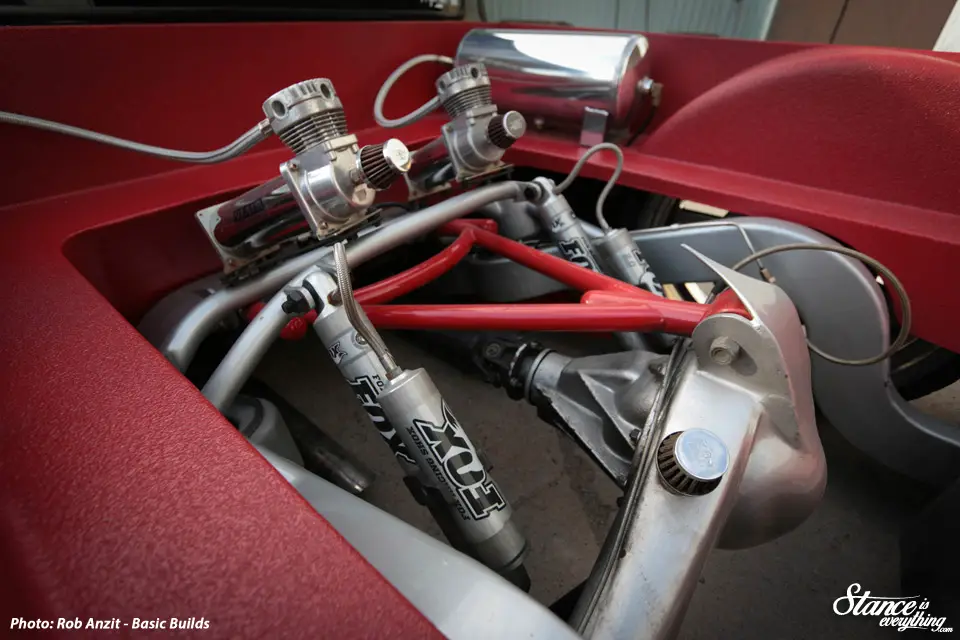
Under the motor sits an s10 front clip mated to a custom chassis that is capped off with a very unique, and very custom 3 link.
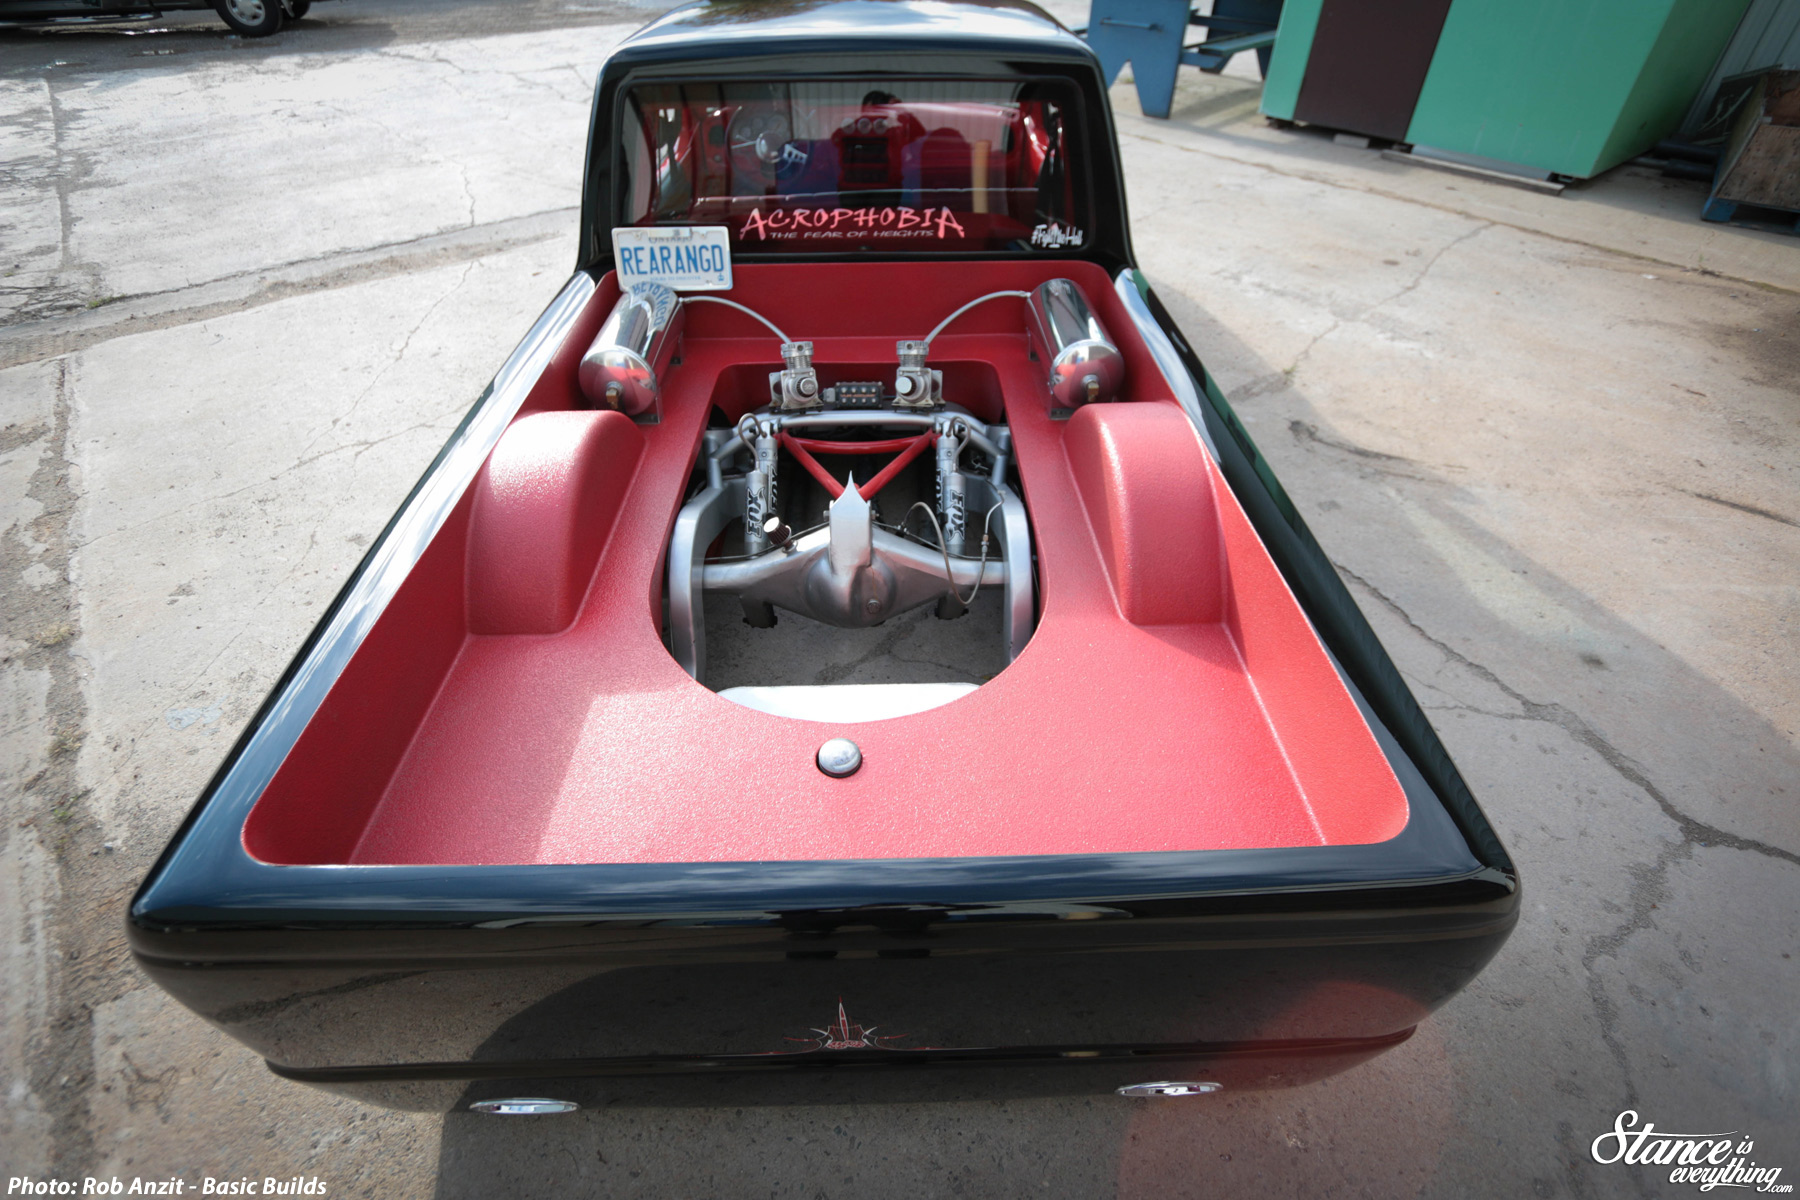
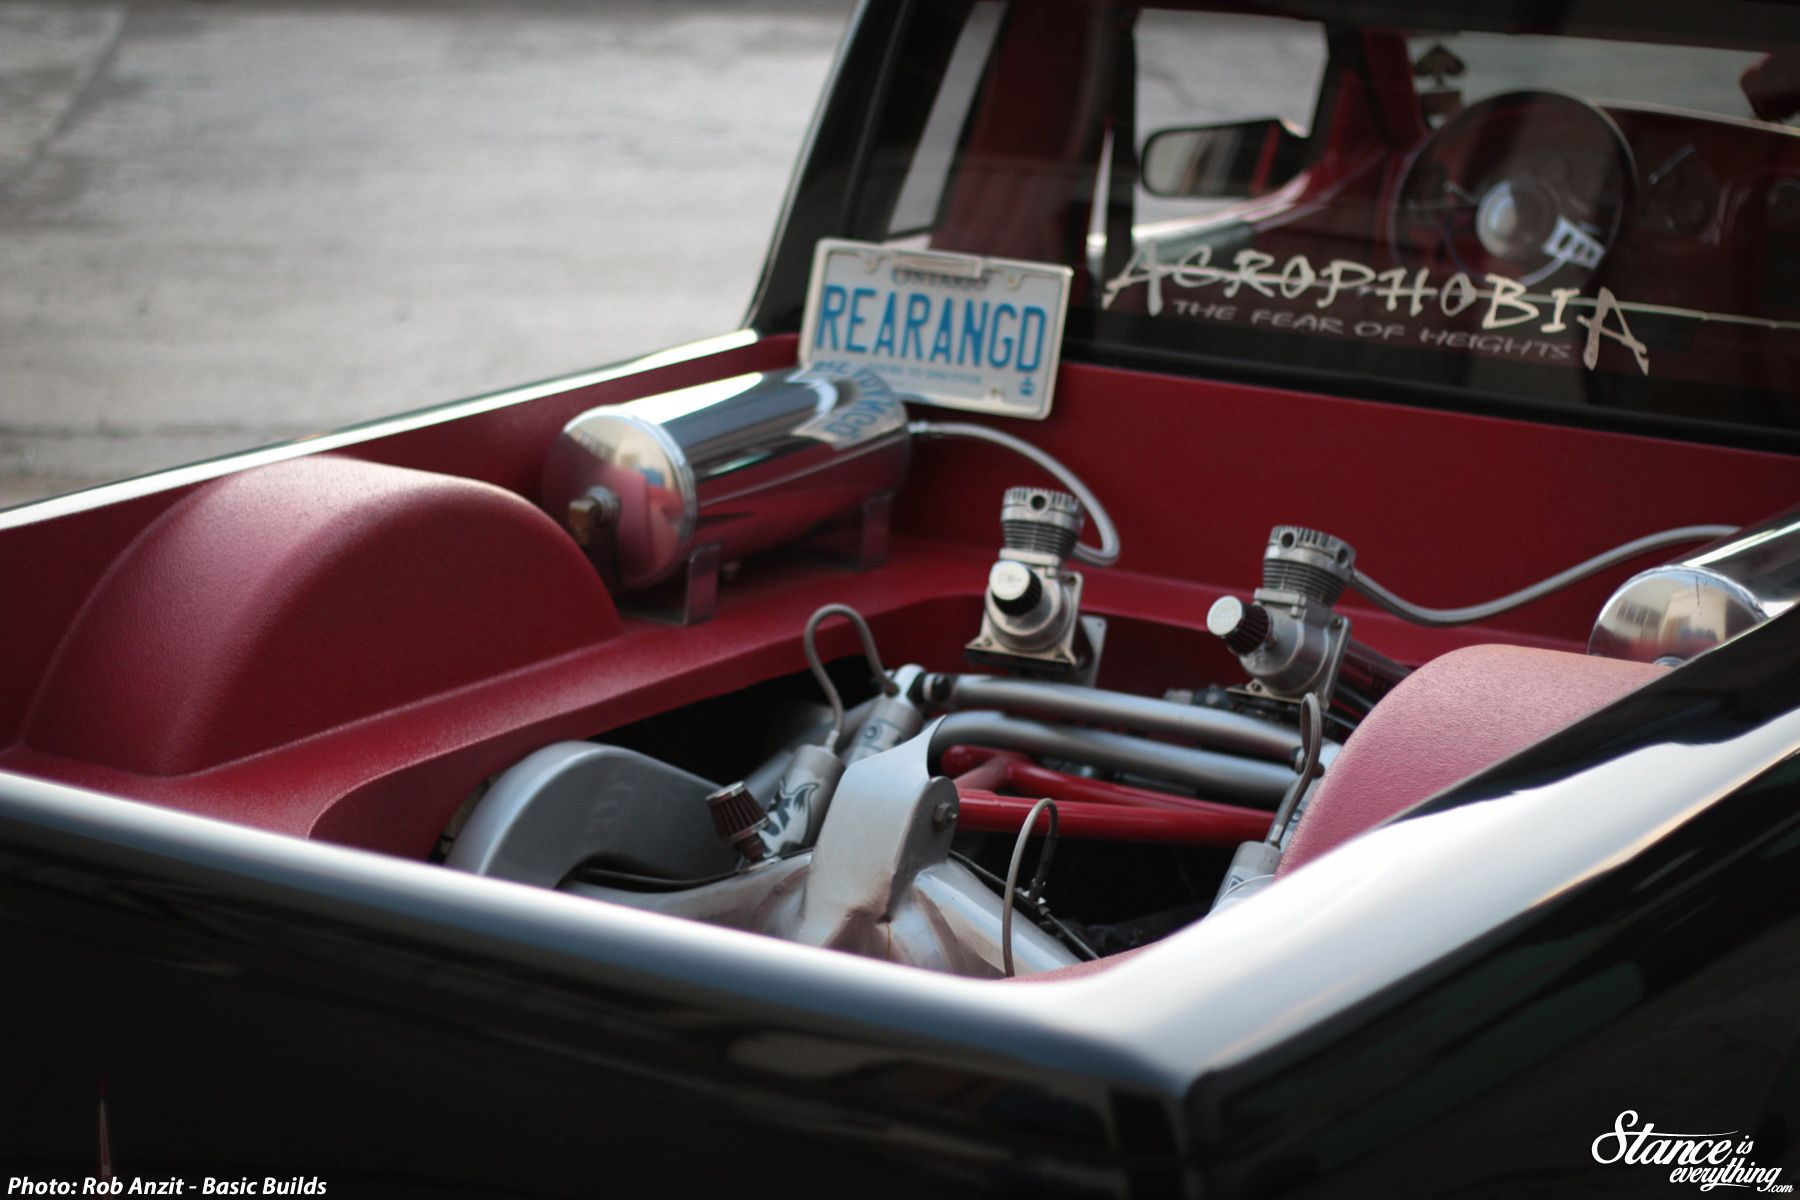

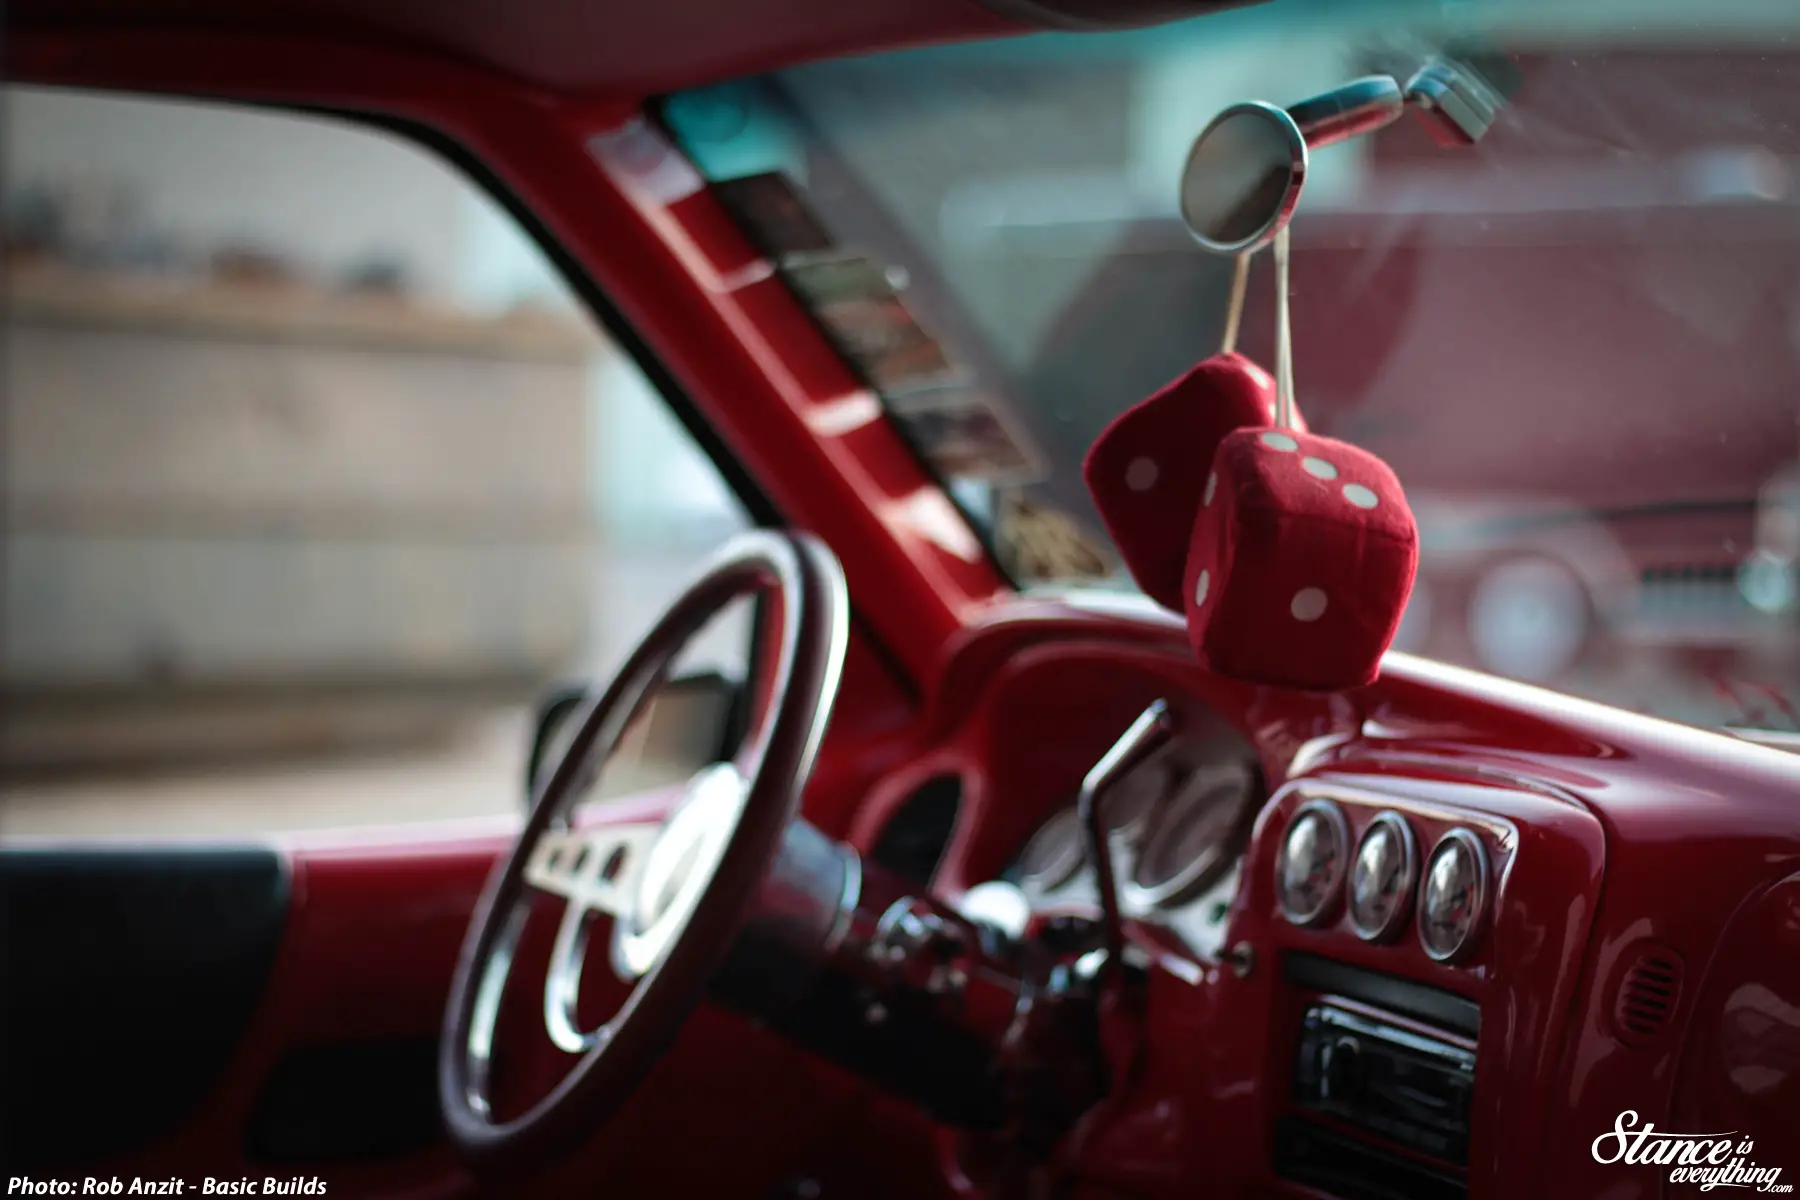
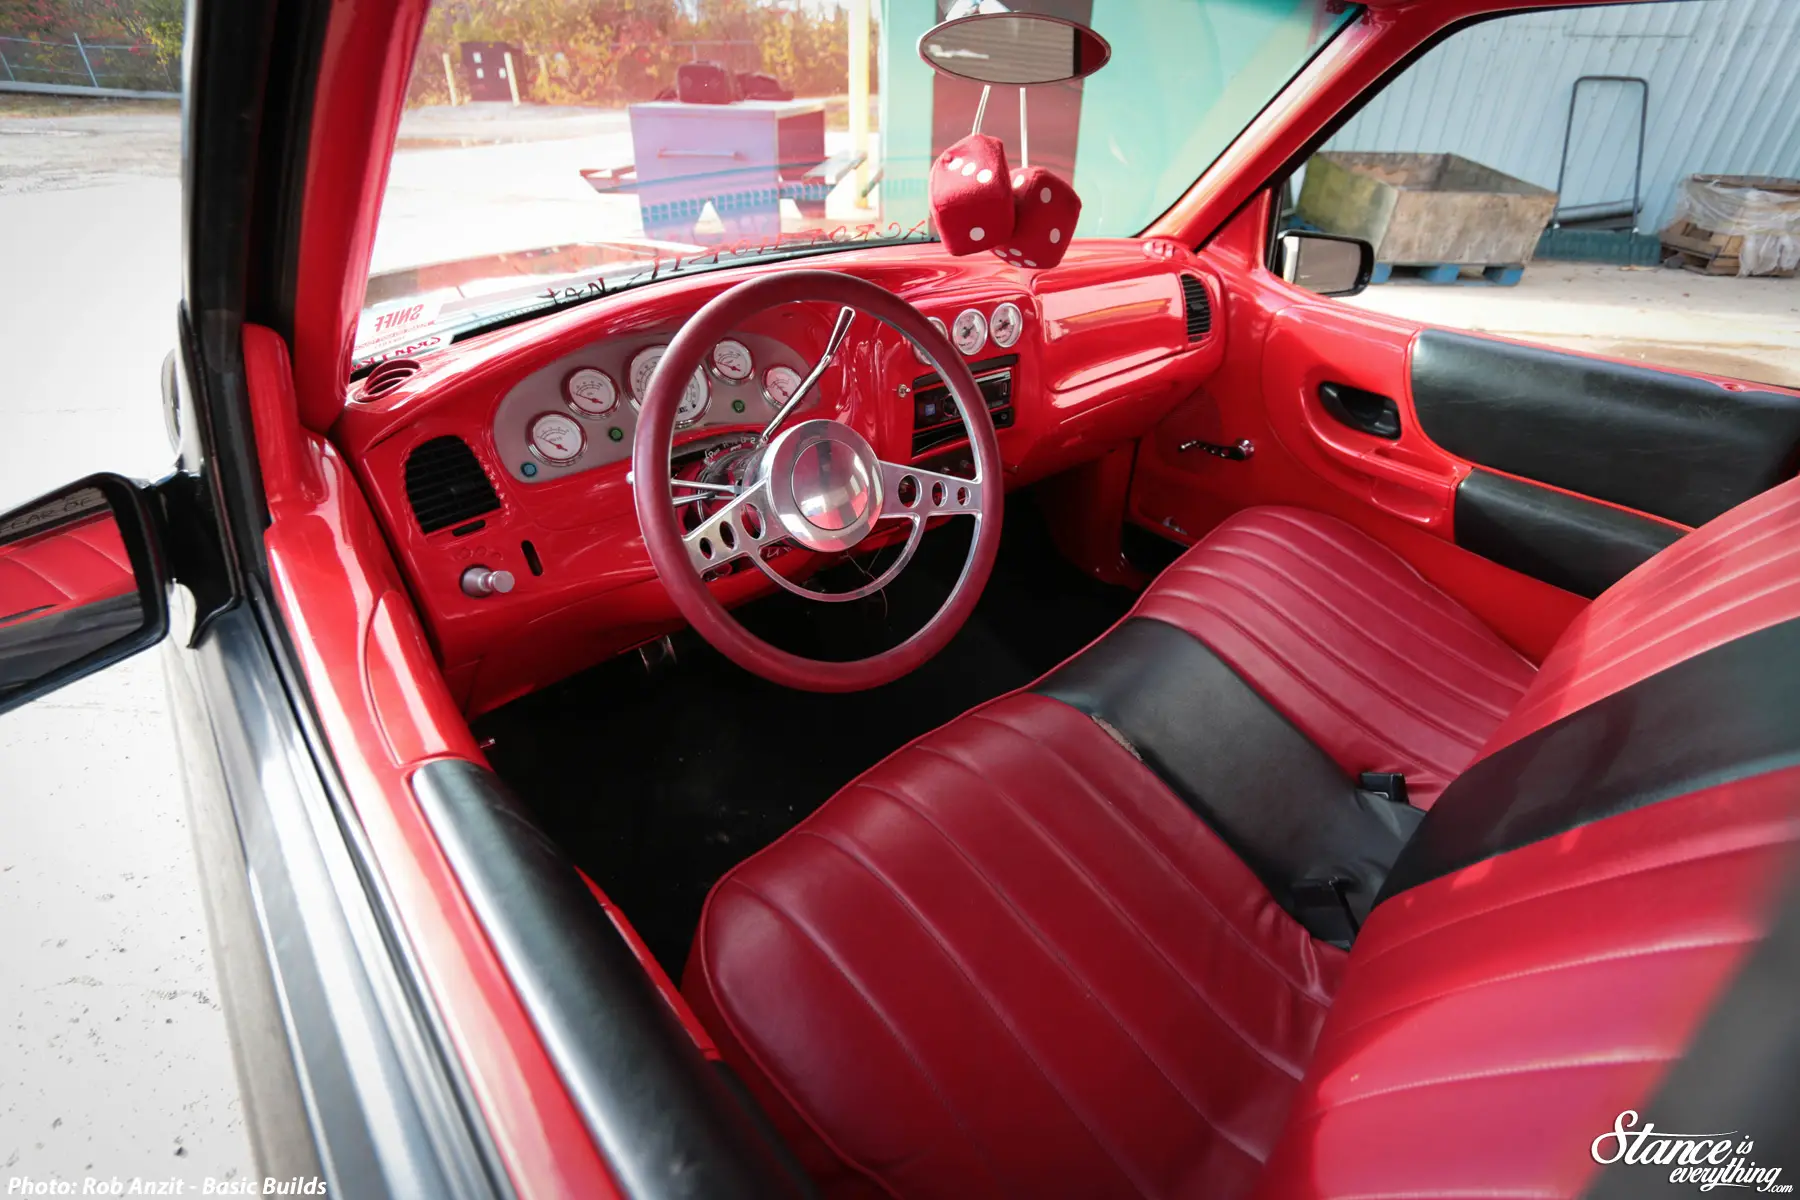
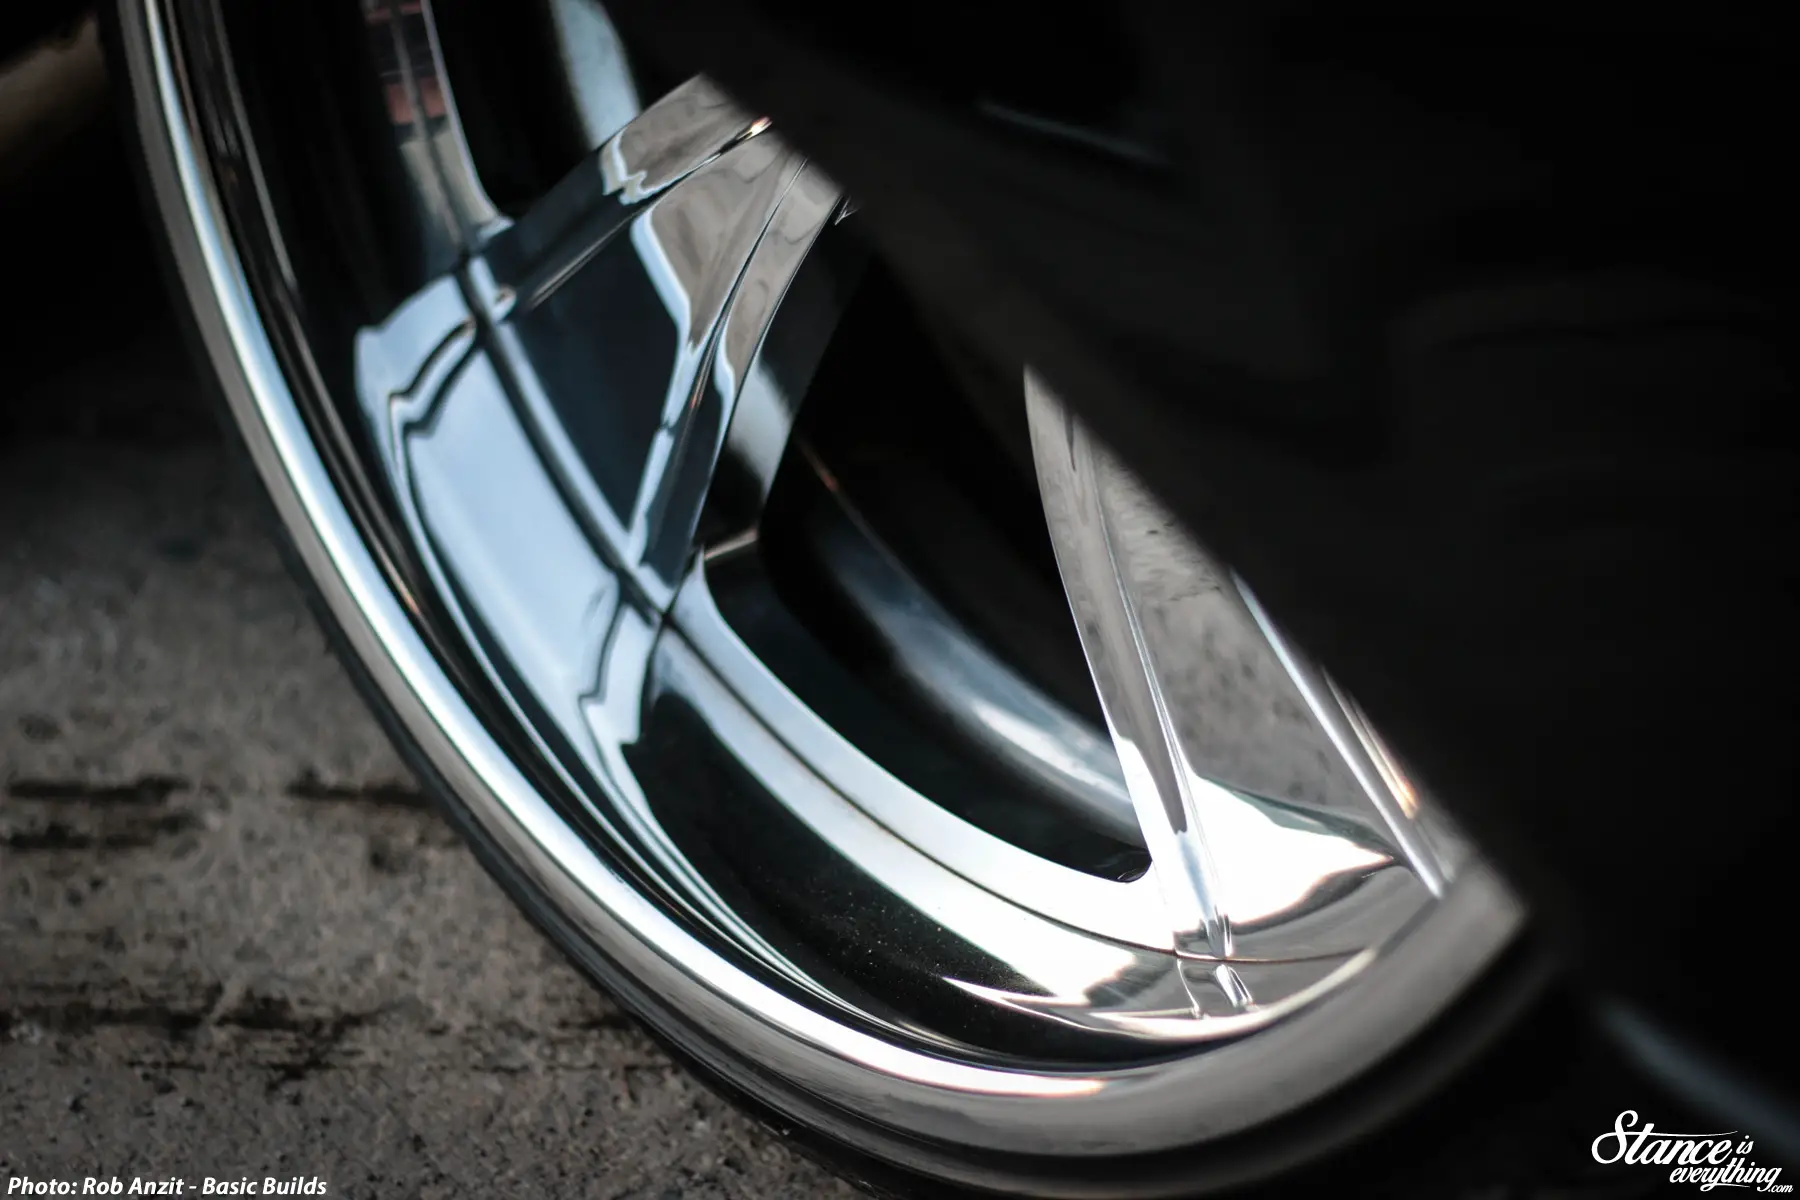
The deep, immaculately maintained black paint is contrasted by billet Intro Vista 22×8 and 22×10 wheels and a custom red interior.

The interior features a smoothed dash, a billet wheel, Classic Instruments gauges and the prerequisite ample stereo.
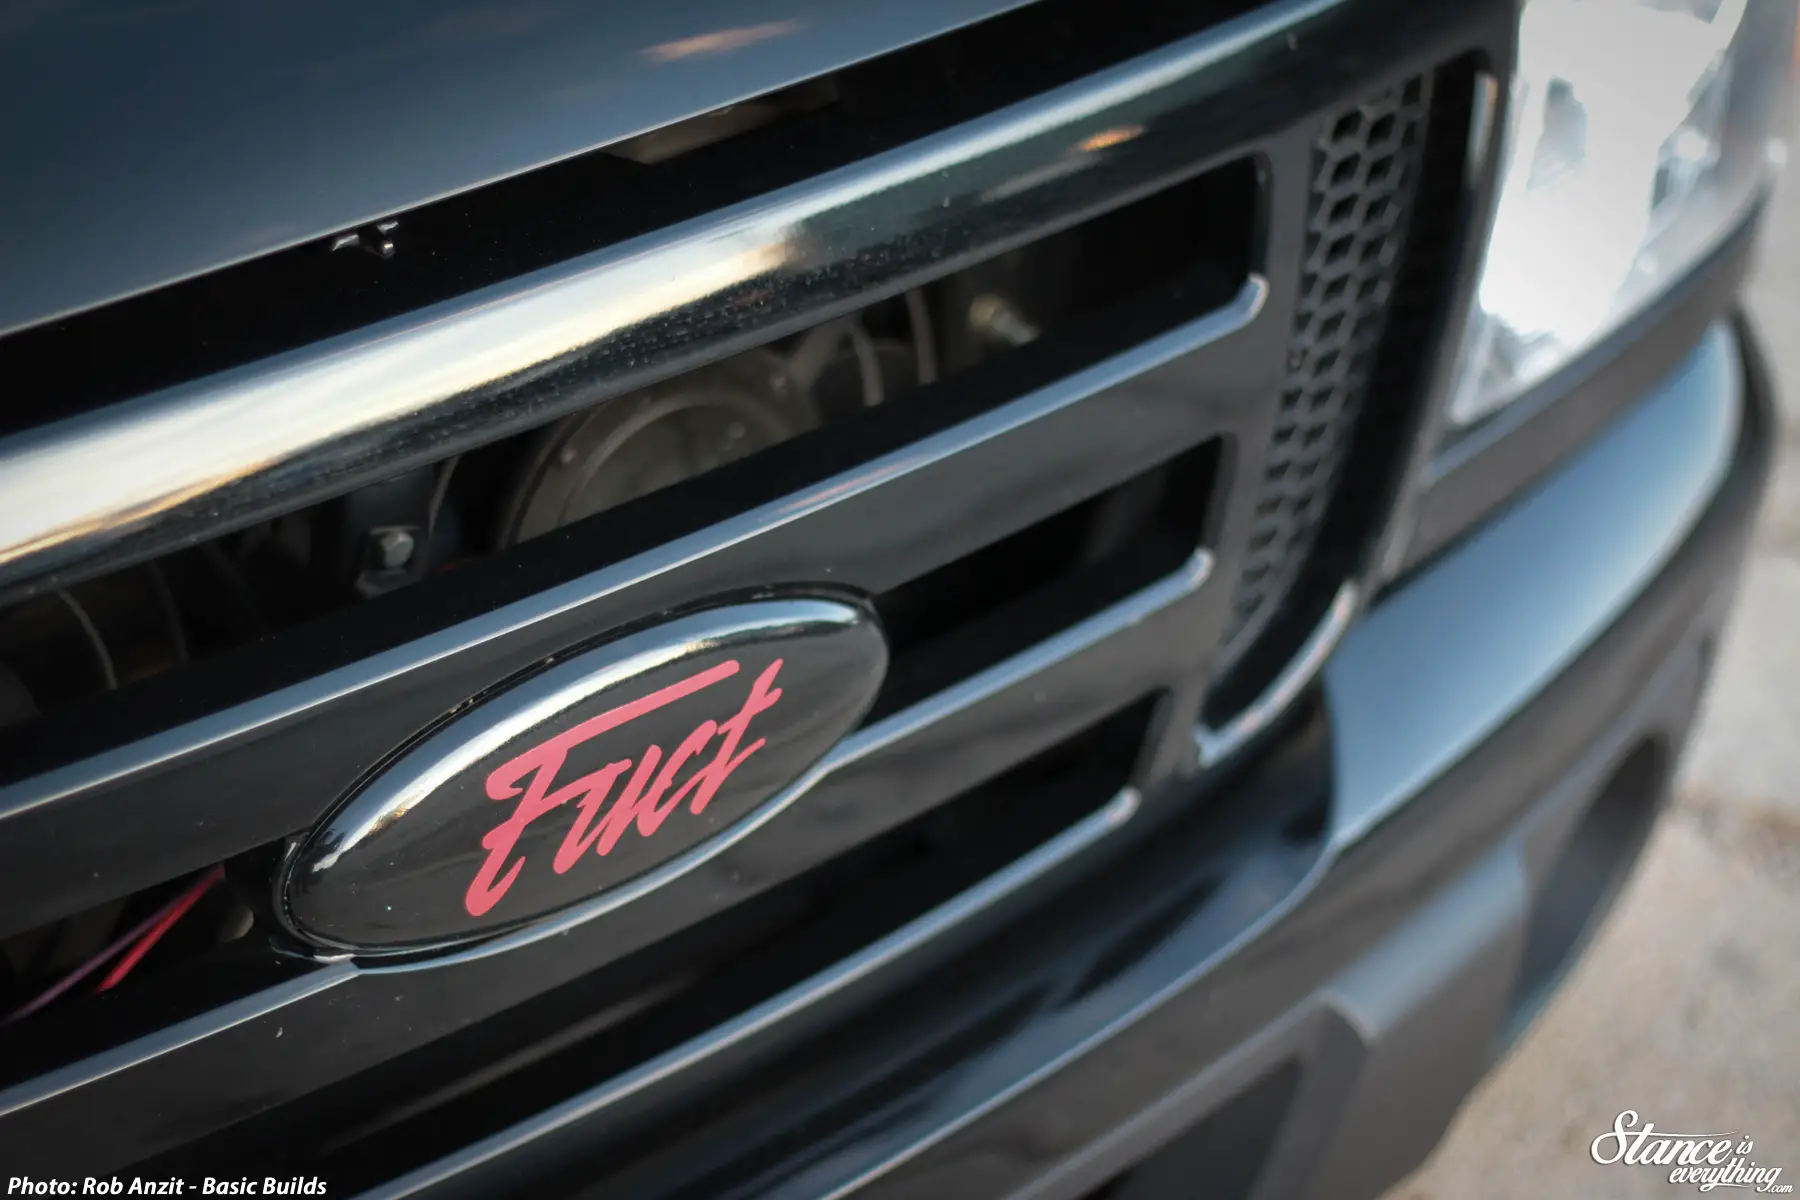
The pinstriping you see on the door jabs, inner fenders, and tailgate was handled by the talented, and previously spotlighted, Christian Melchoir.
To round out this photo set Rob shot a few pictures with model Chelsea Spina along with a short video.

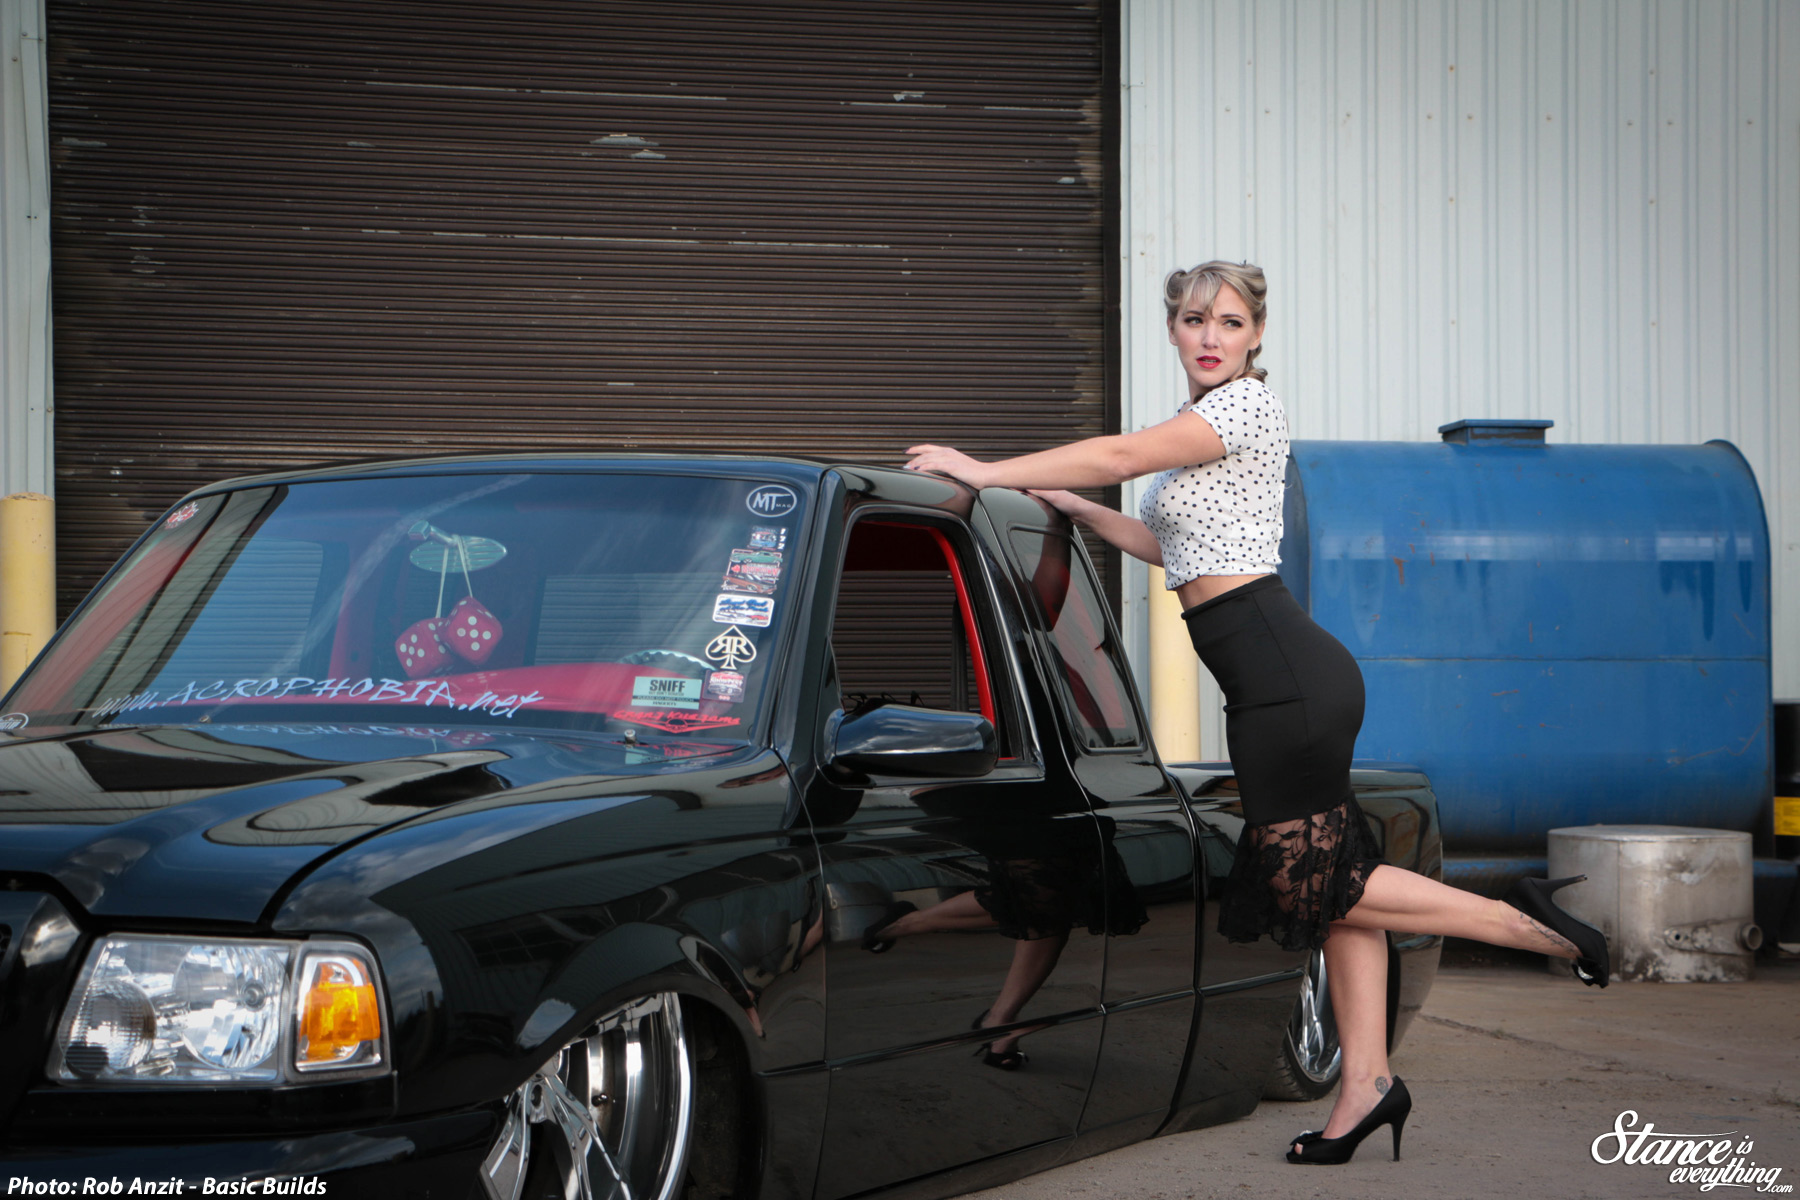
As always be sure to follow Basic Builds on Facebook and Instagram.

It’s been two years since both the last time a Volkswagen Beetle was featured on the Stance Is Everything, and the last time a Taylor’d Customs build was featured, which is far too long for either.
The “People’s Car” is no stranger to the Taylor stable with at least two —and sometimes three— kicking around the shop at any one time. Near constant exposure to bugs is what birthed the idea for this particular car which Blair admits he has been wanting to build for a while.
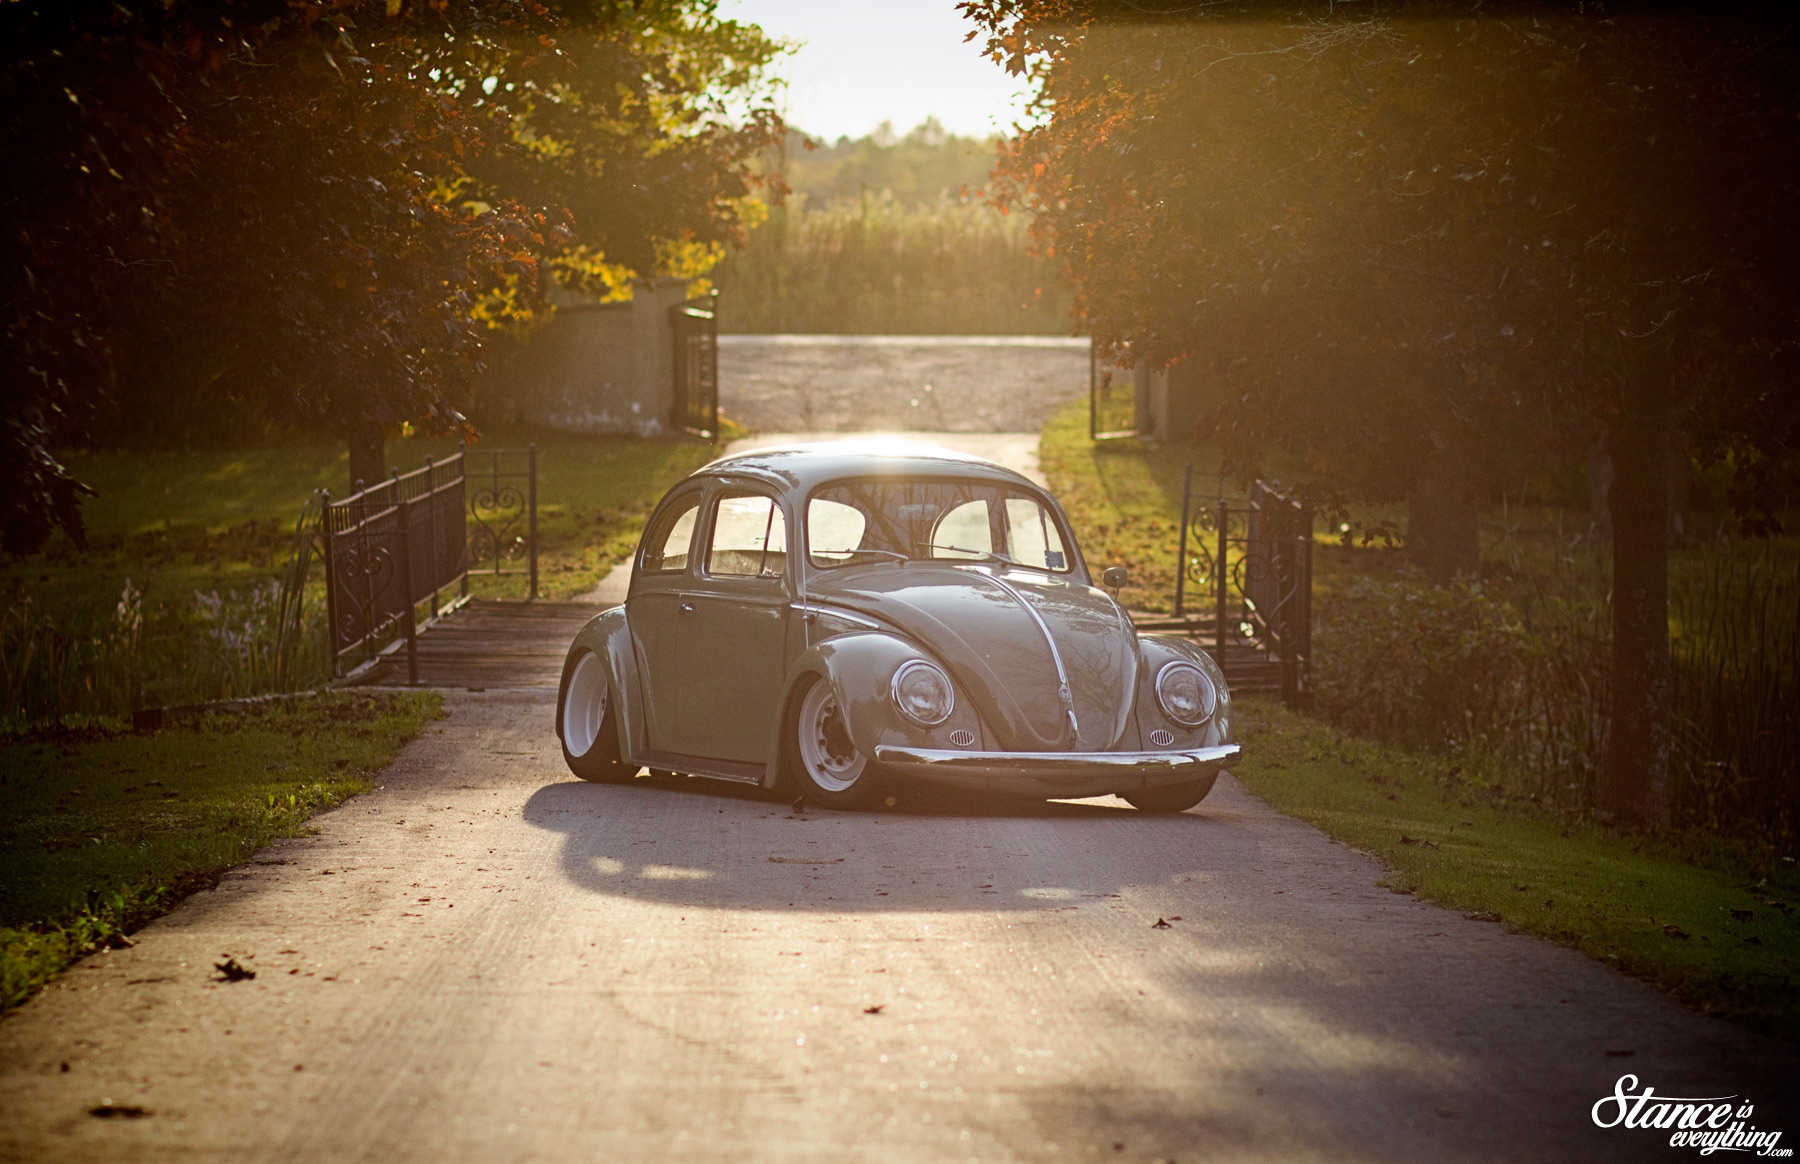
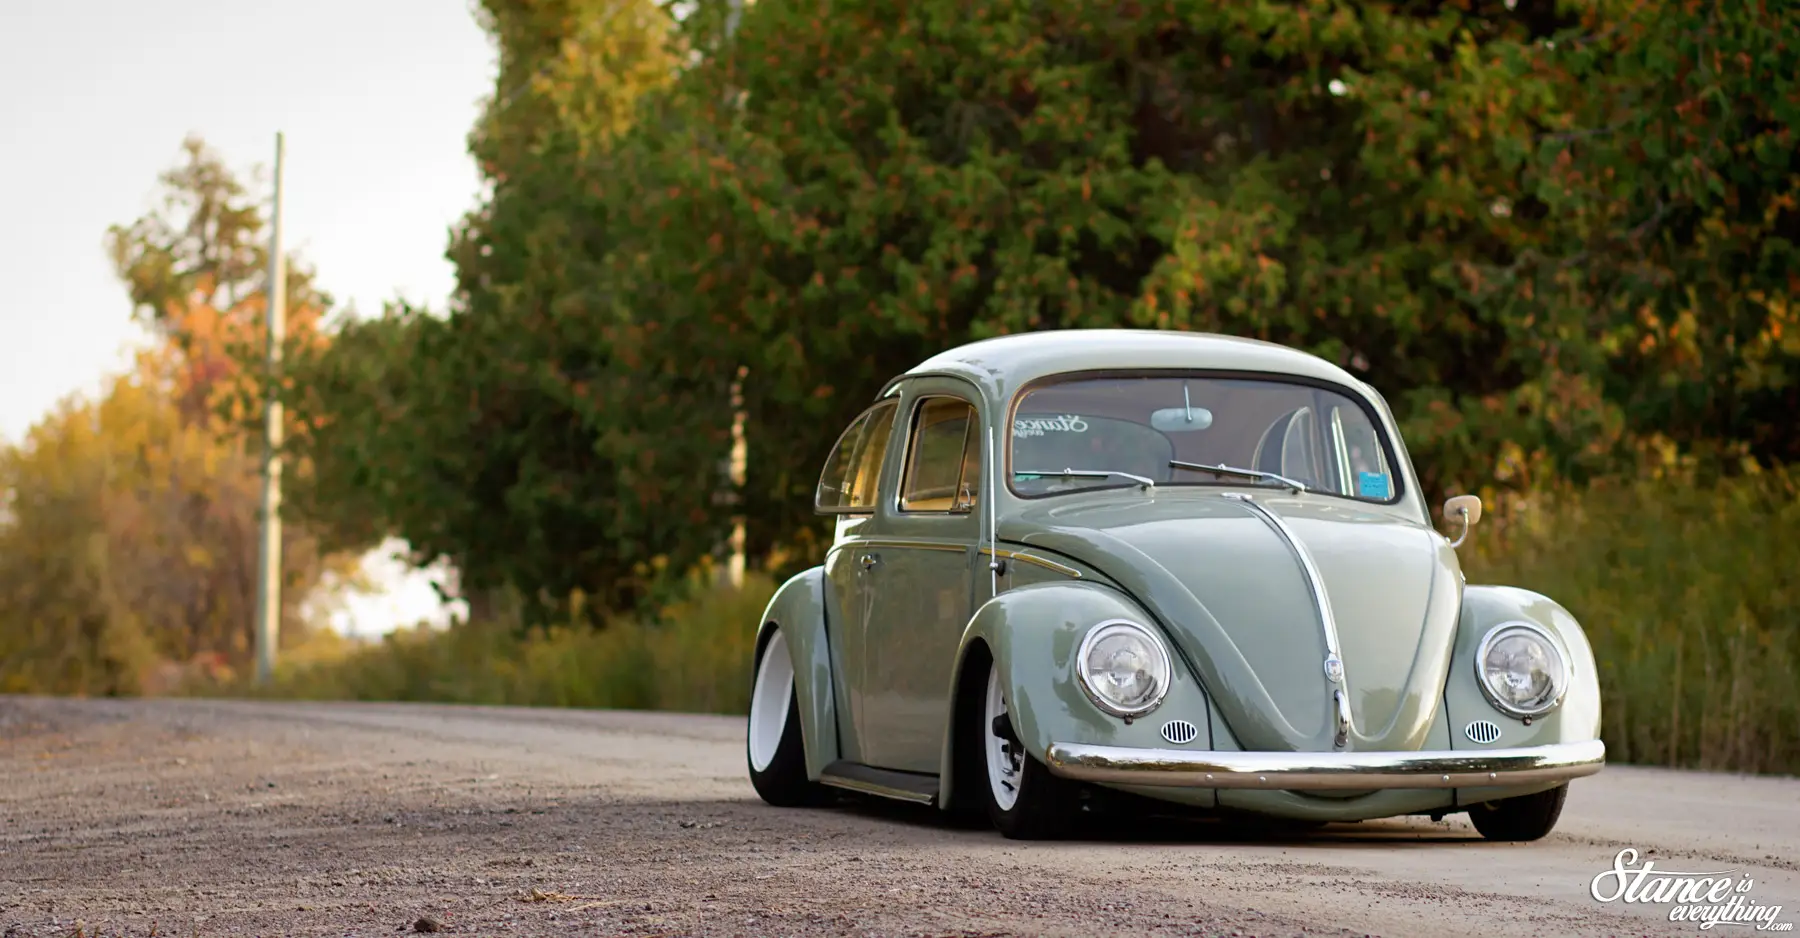
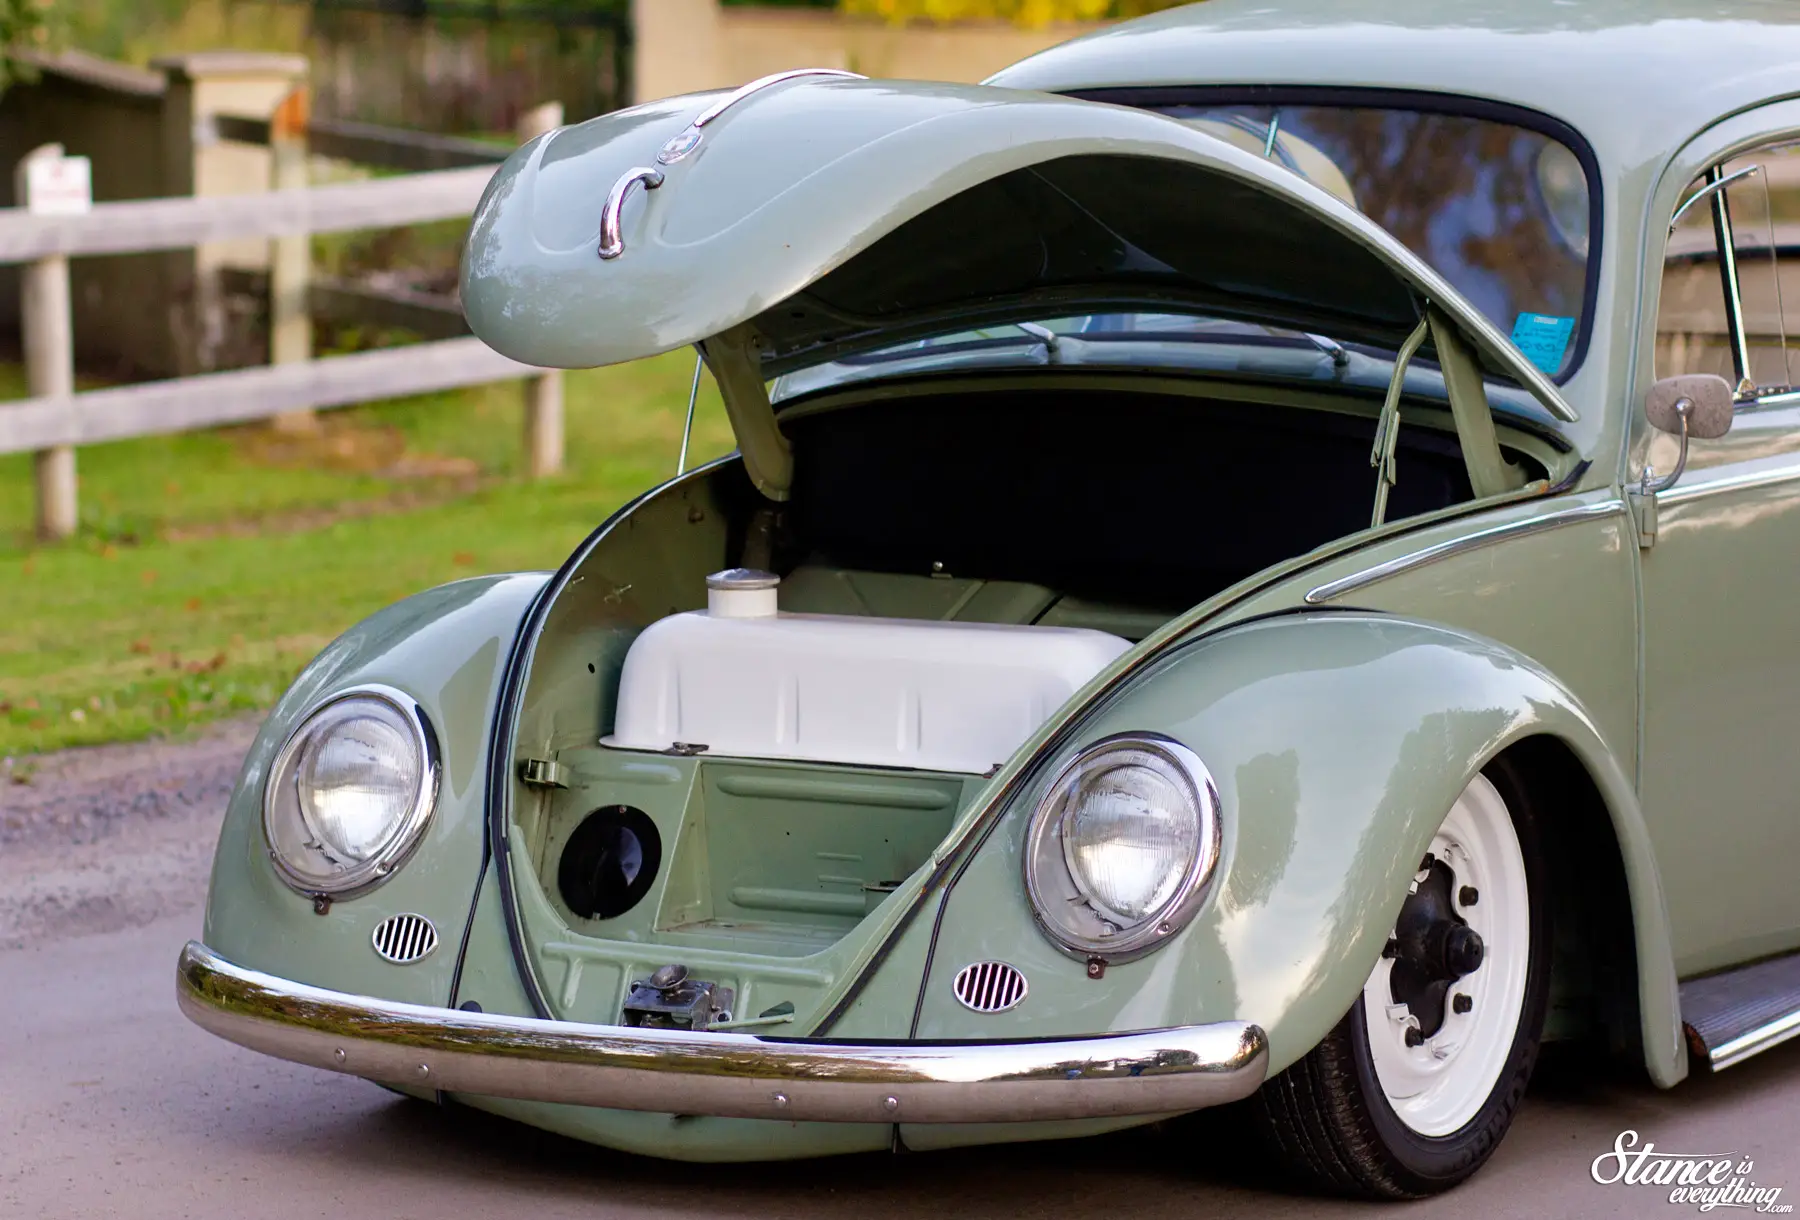
This German model was found in Colorado by Blair’s dad and originally the plan was a quick refresh and a mild drop.
However with the car being as clean as it was things snowballed slightly to the point where ‘mild drop’ is perhaps the most inappropriate combination of words that can be used to describe the ride height of this car.
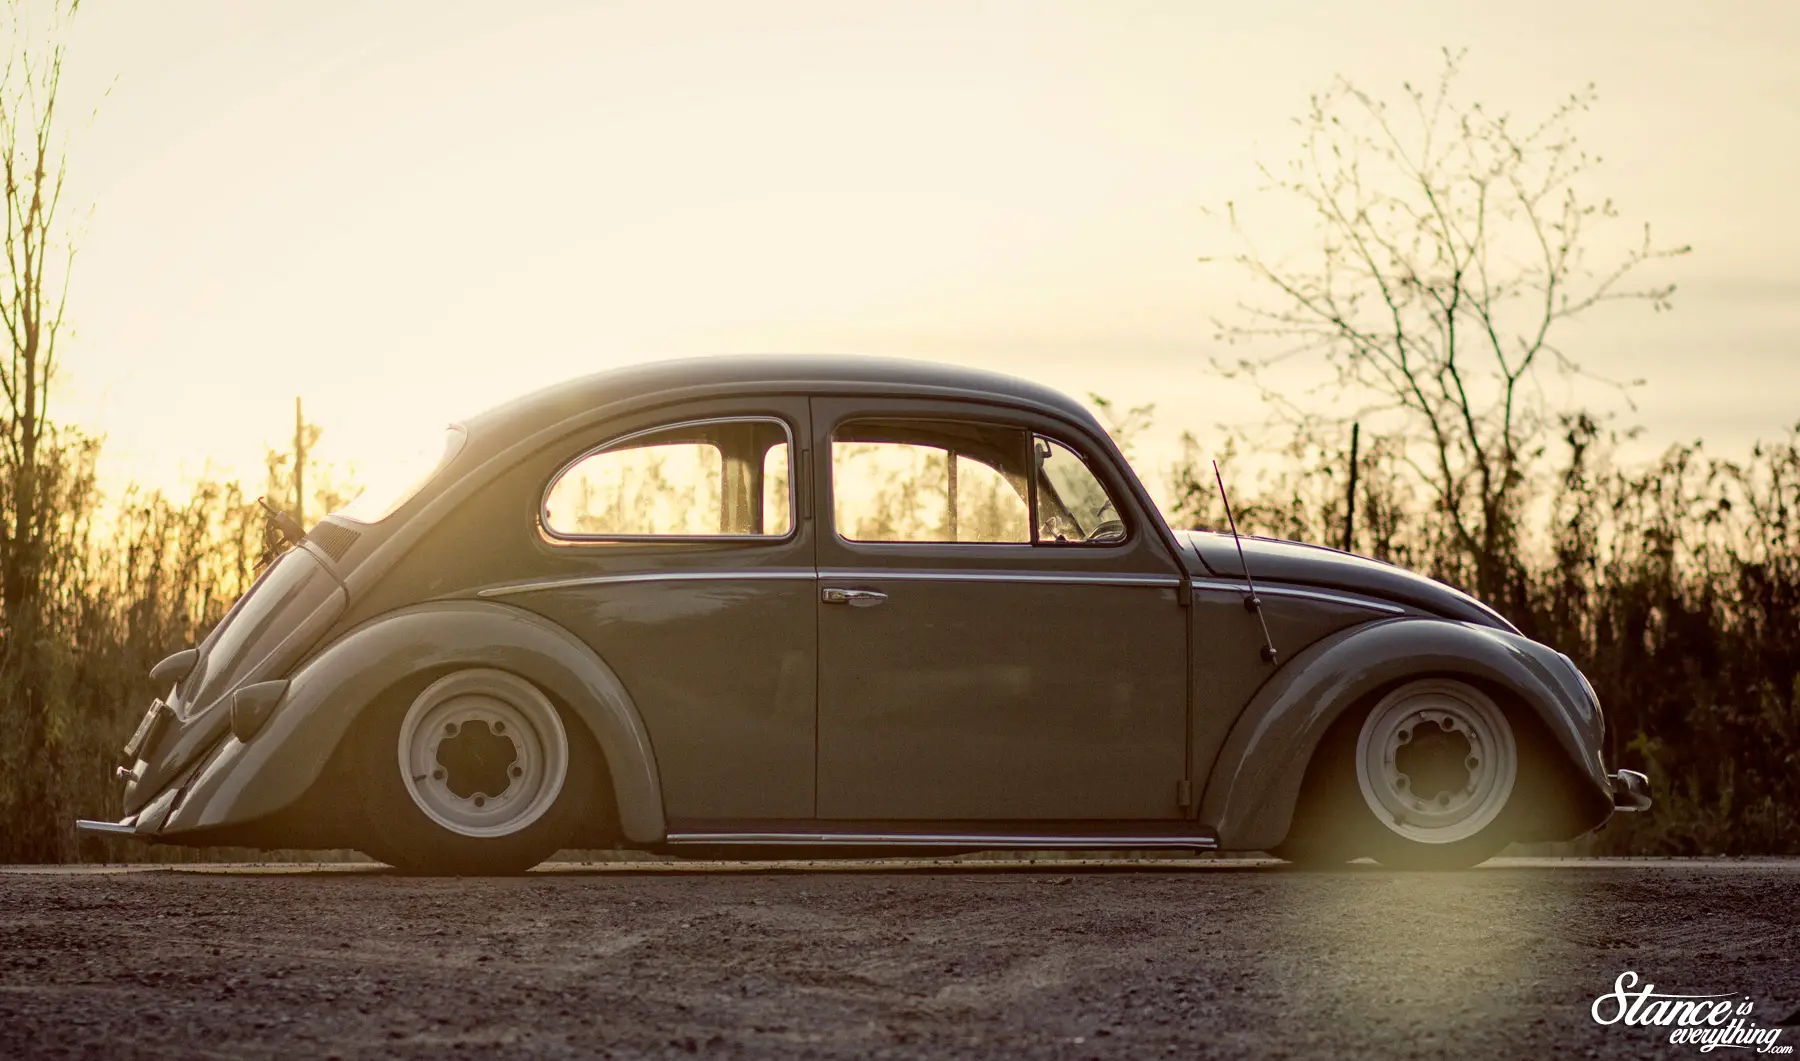
To bring the rust free pan closer to the ground first an adjustable 4″ narrowed beam was installed and set at its lowest position. In the rear new notched spring plates were used, again set to be the lowest possible.
Riding low is nothing new to Blair, but riding low static was a bit of an adjustment and ironically the only place he’s high sided the car is his own driveway.
Since that day air shocks have been installed and a hand pump has come along for the ride just in case.
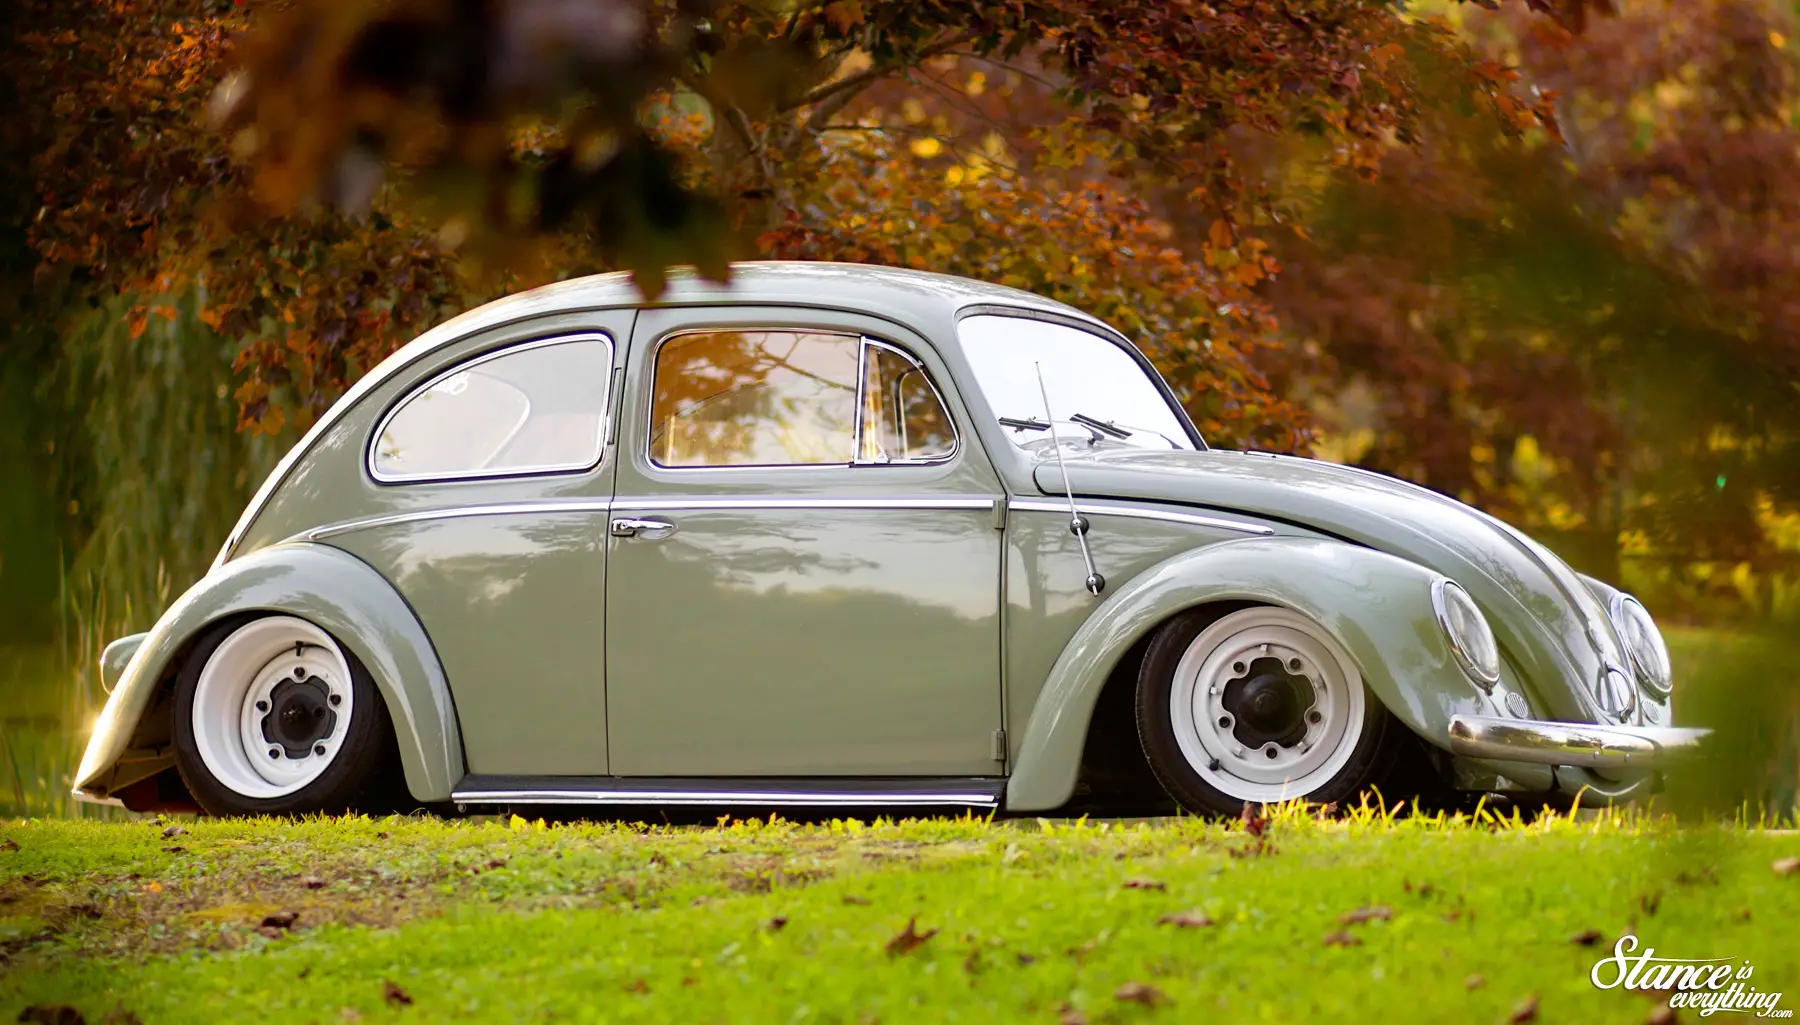
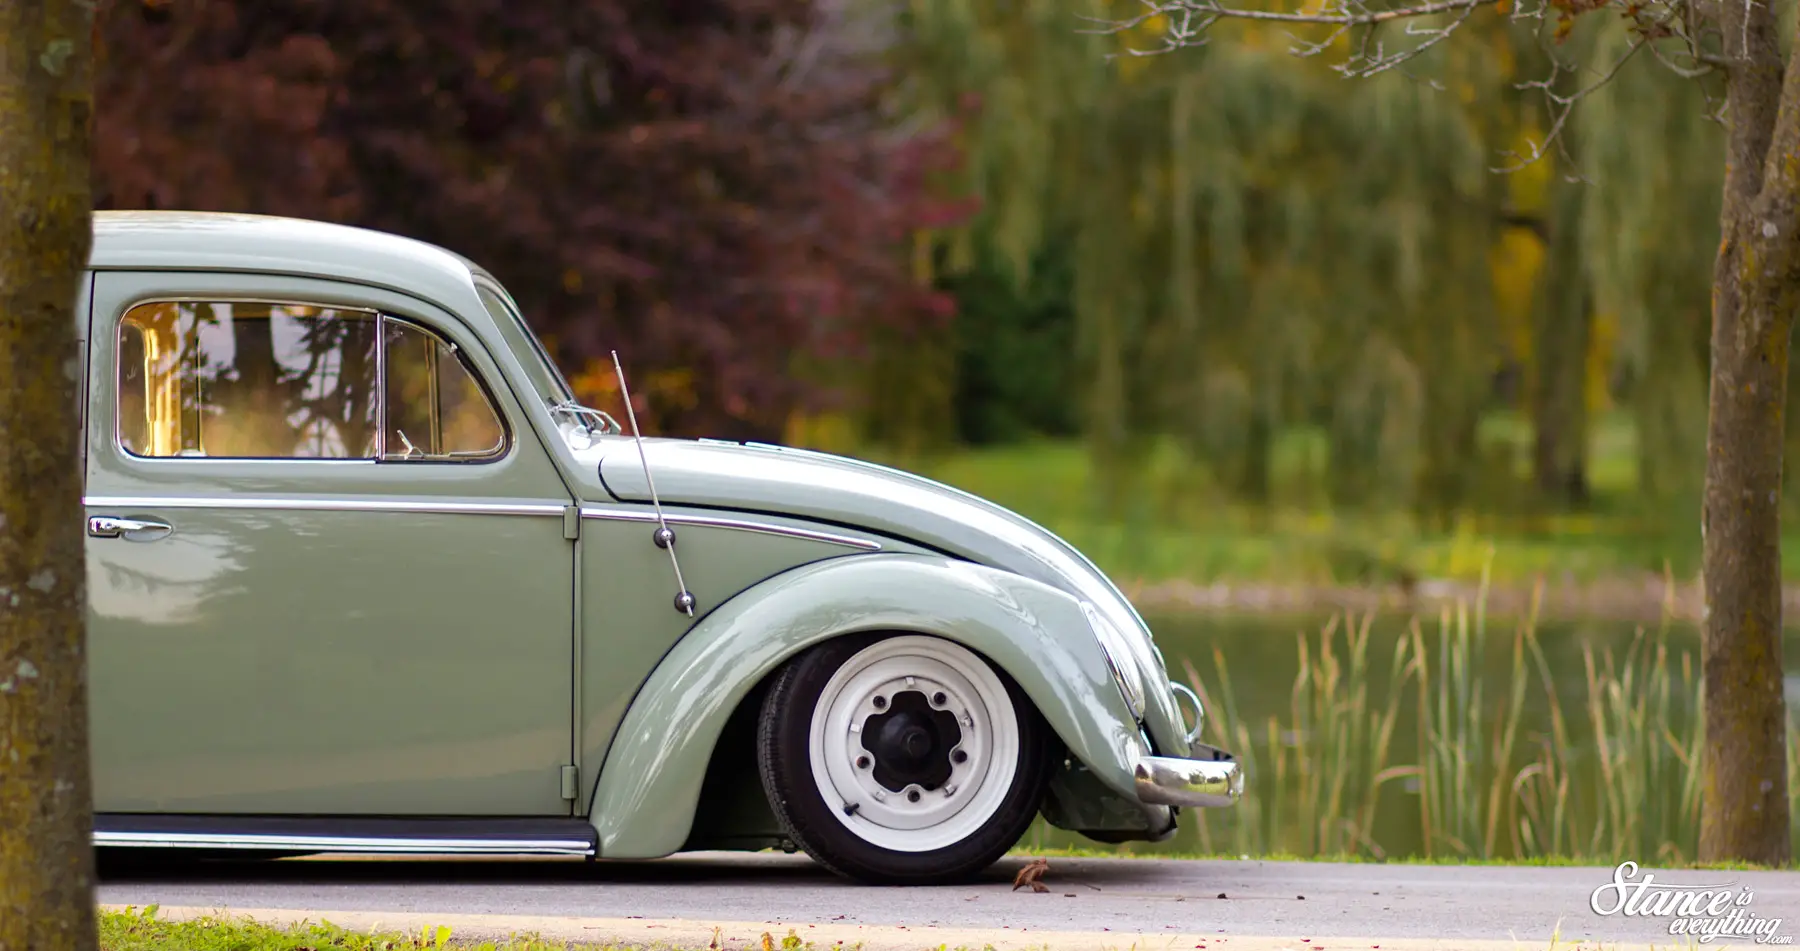
The unique, pea soup reminiscent color on the car was actually chosen by the previous owner and instead of sanding it down and getting it sprayed something more traditional Blair had the guys at Royalty Auto Spa polish it out to its current luster.
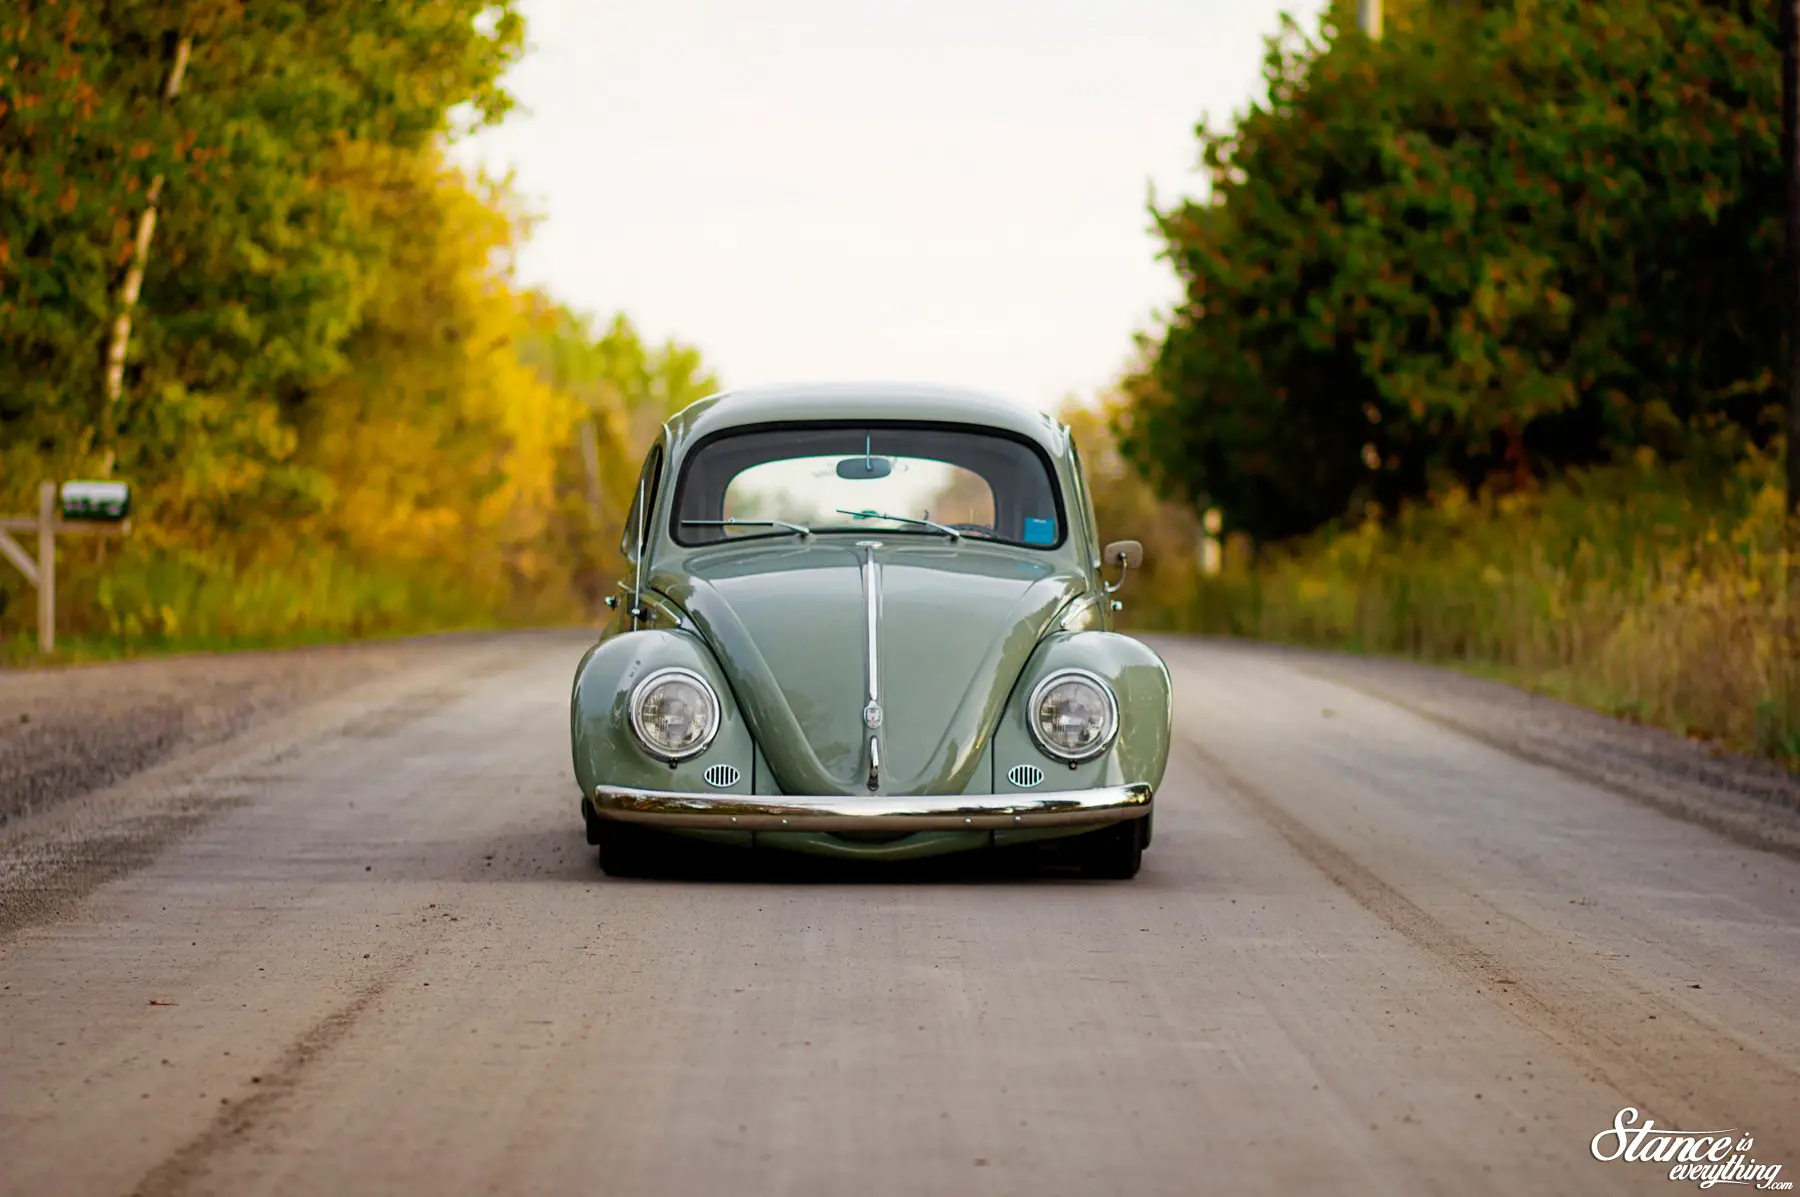
The first time I saw the car under the shop lights I wasn’t quite sure about the color myself, but Blair always had faith so he had the trunk and hood painted to match before choosing the white and green color palate for the interior.
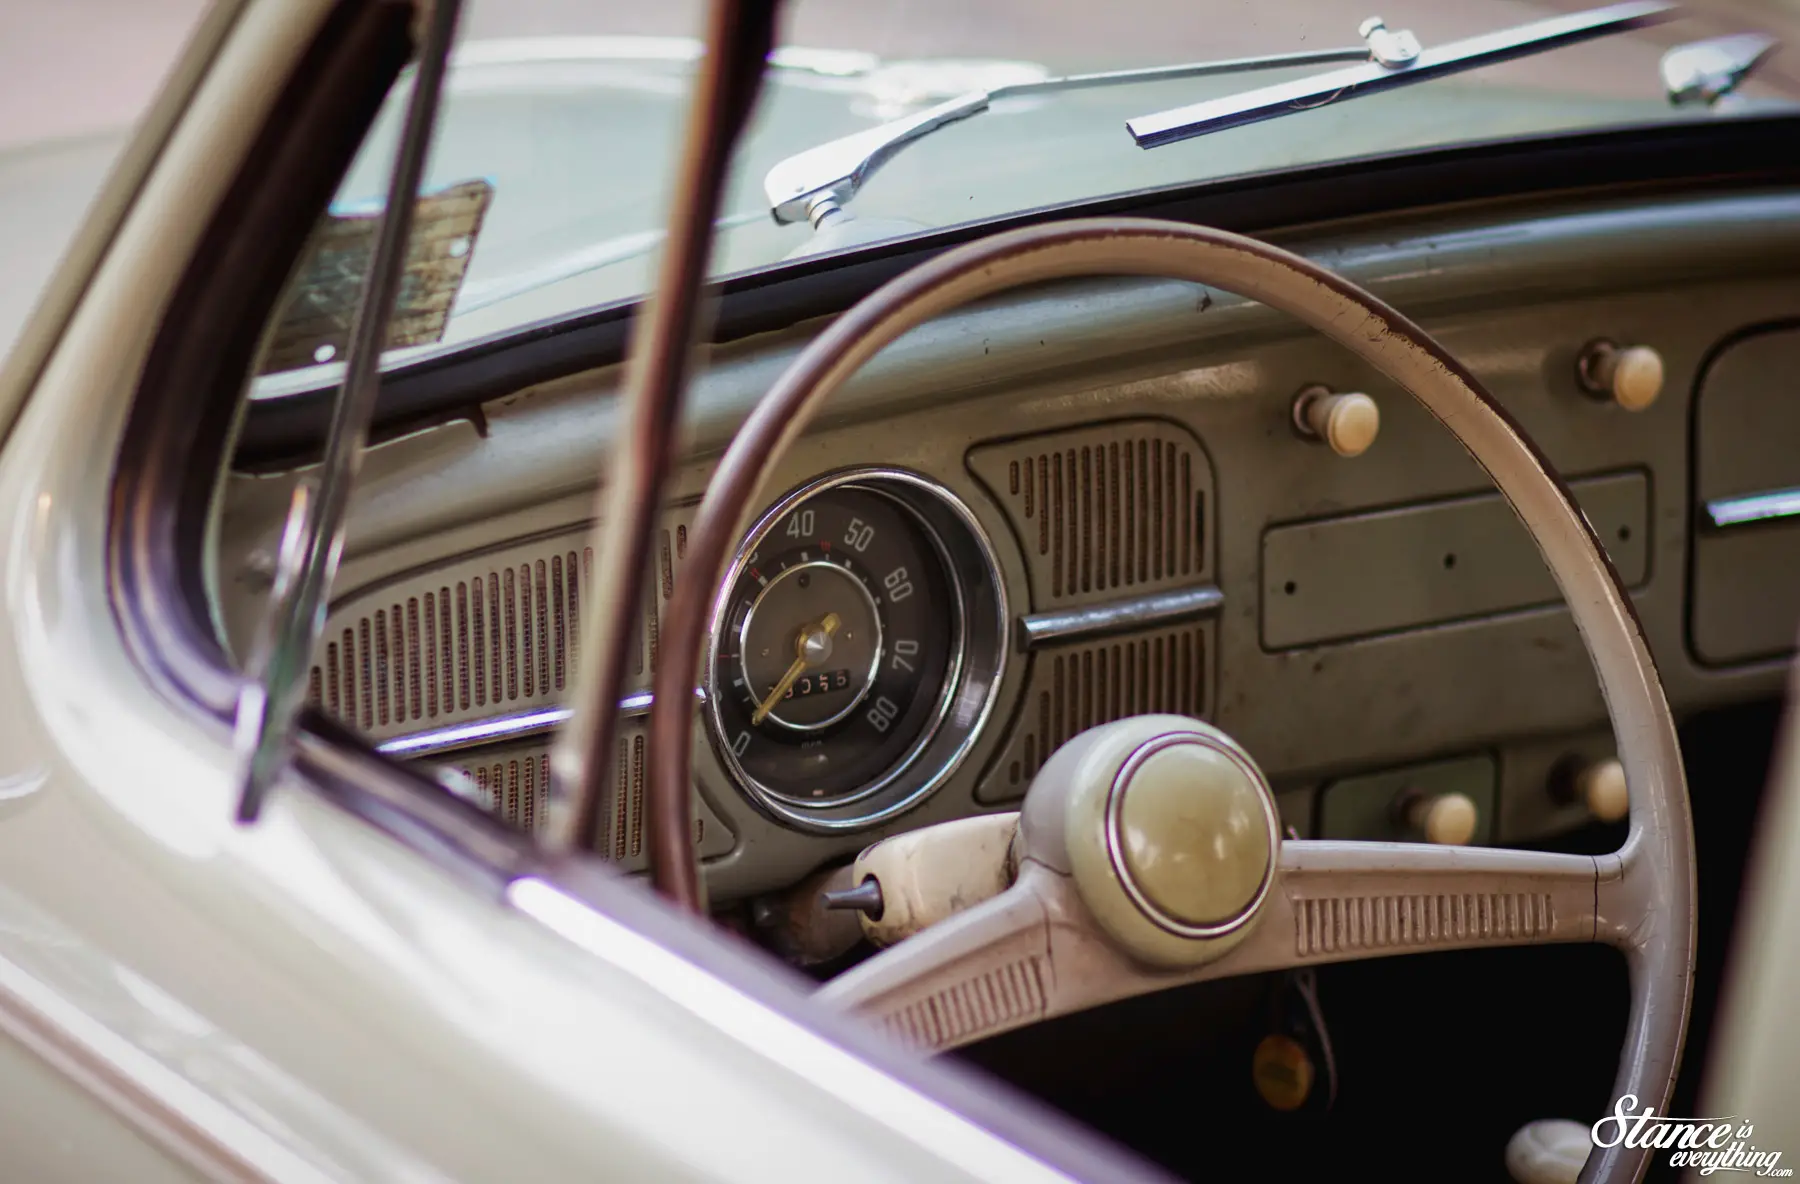
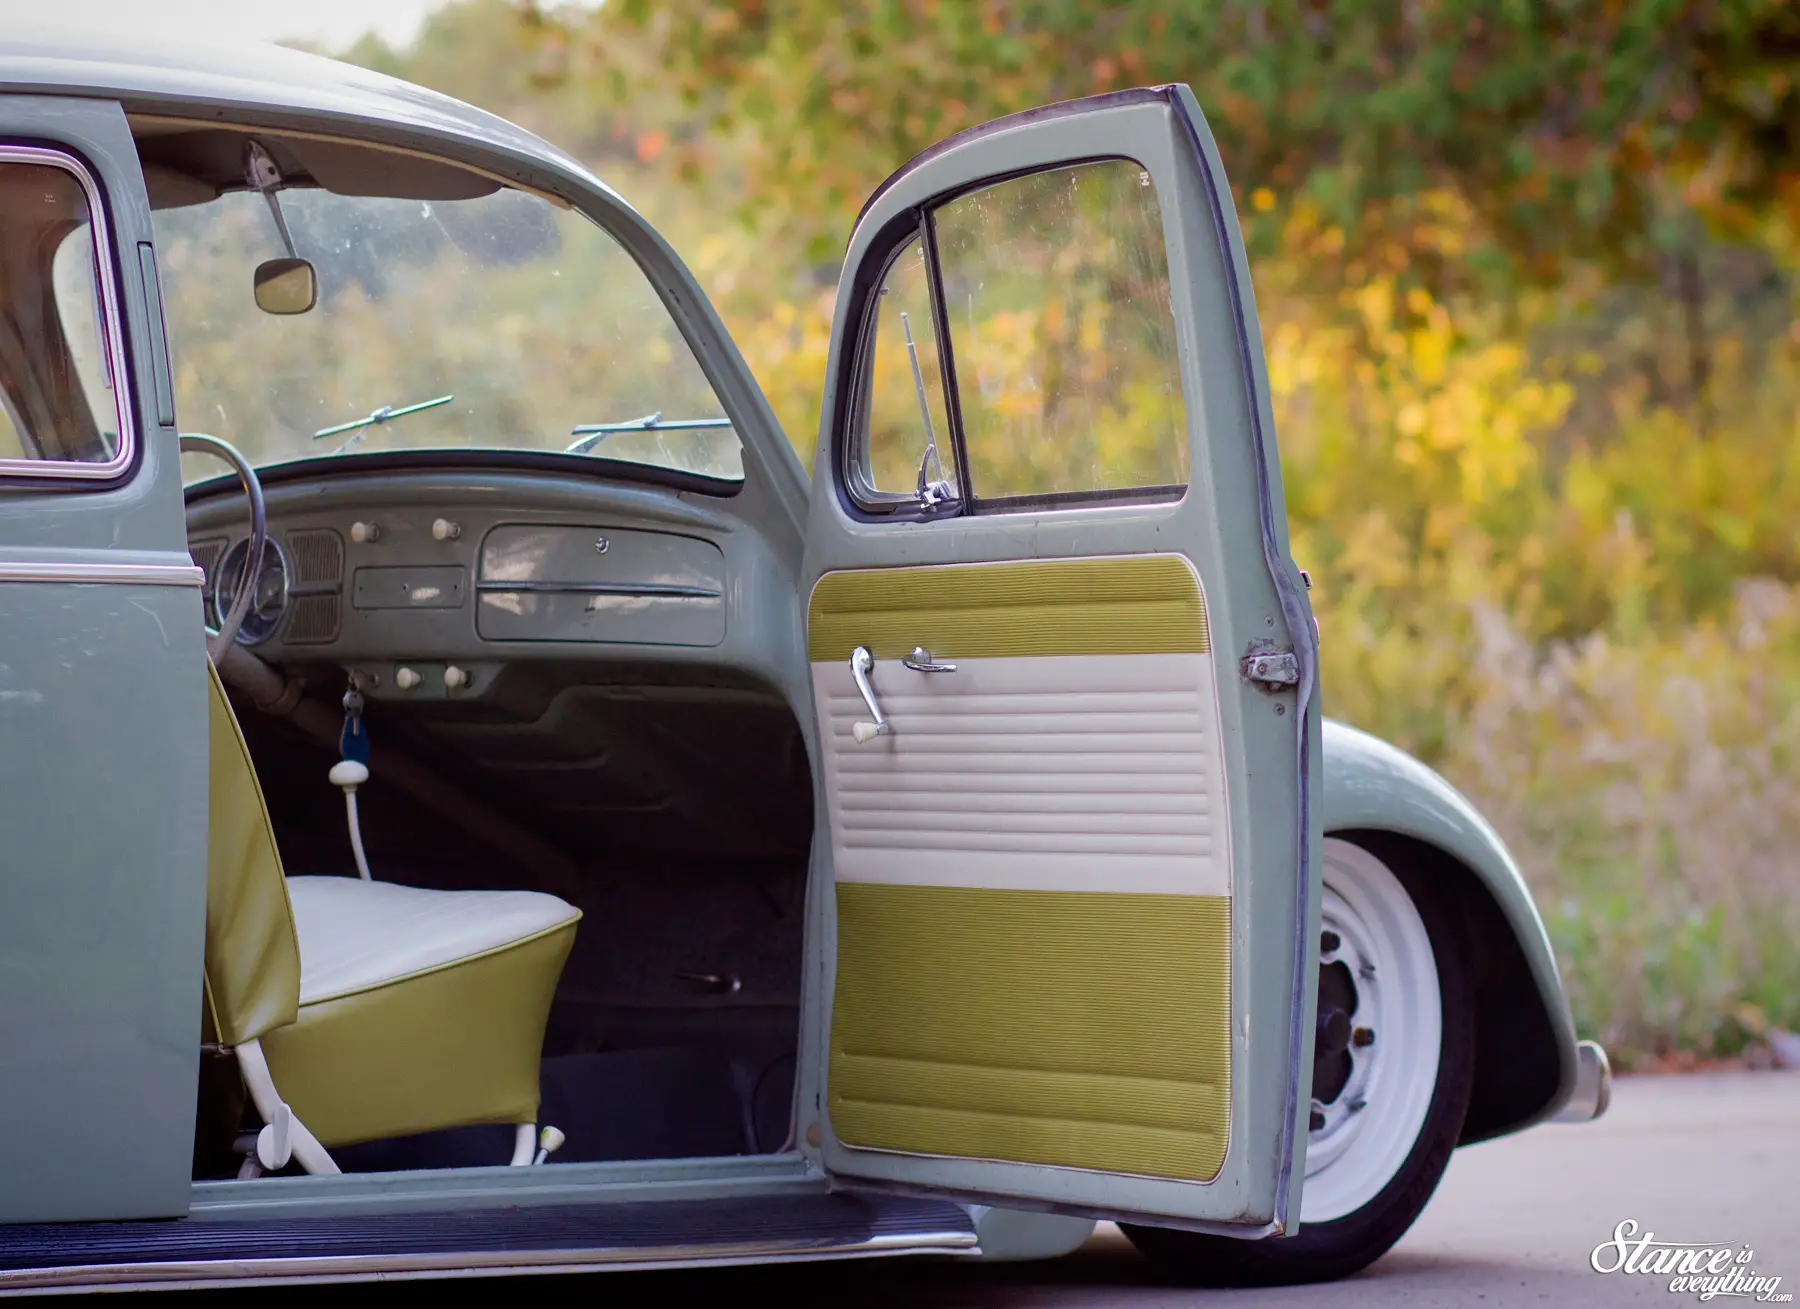

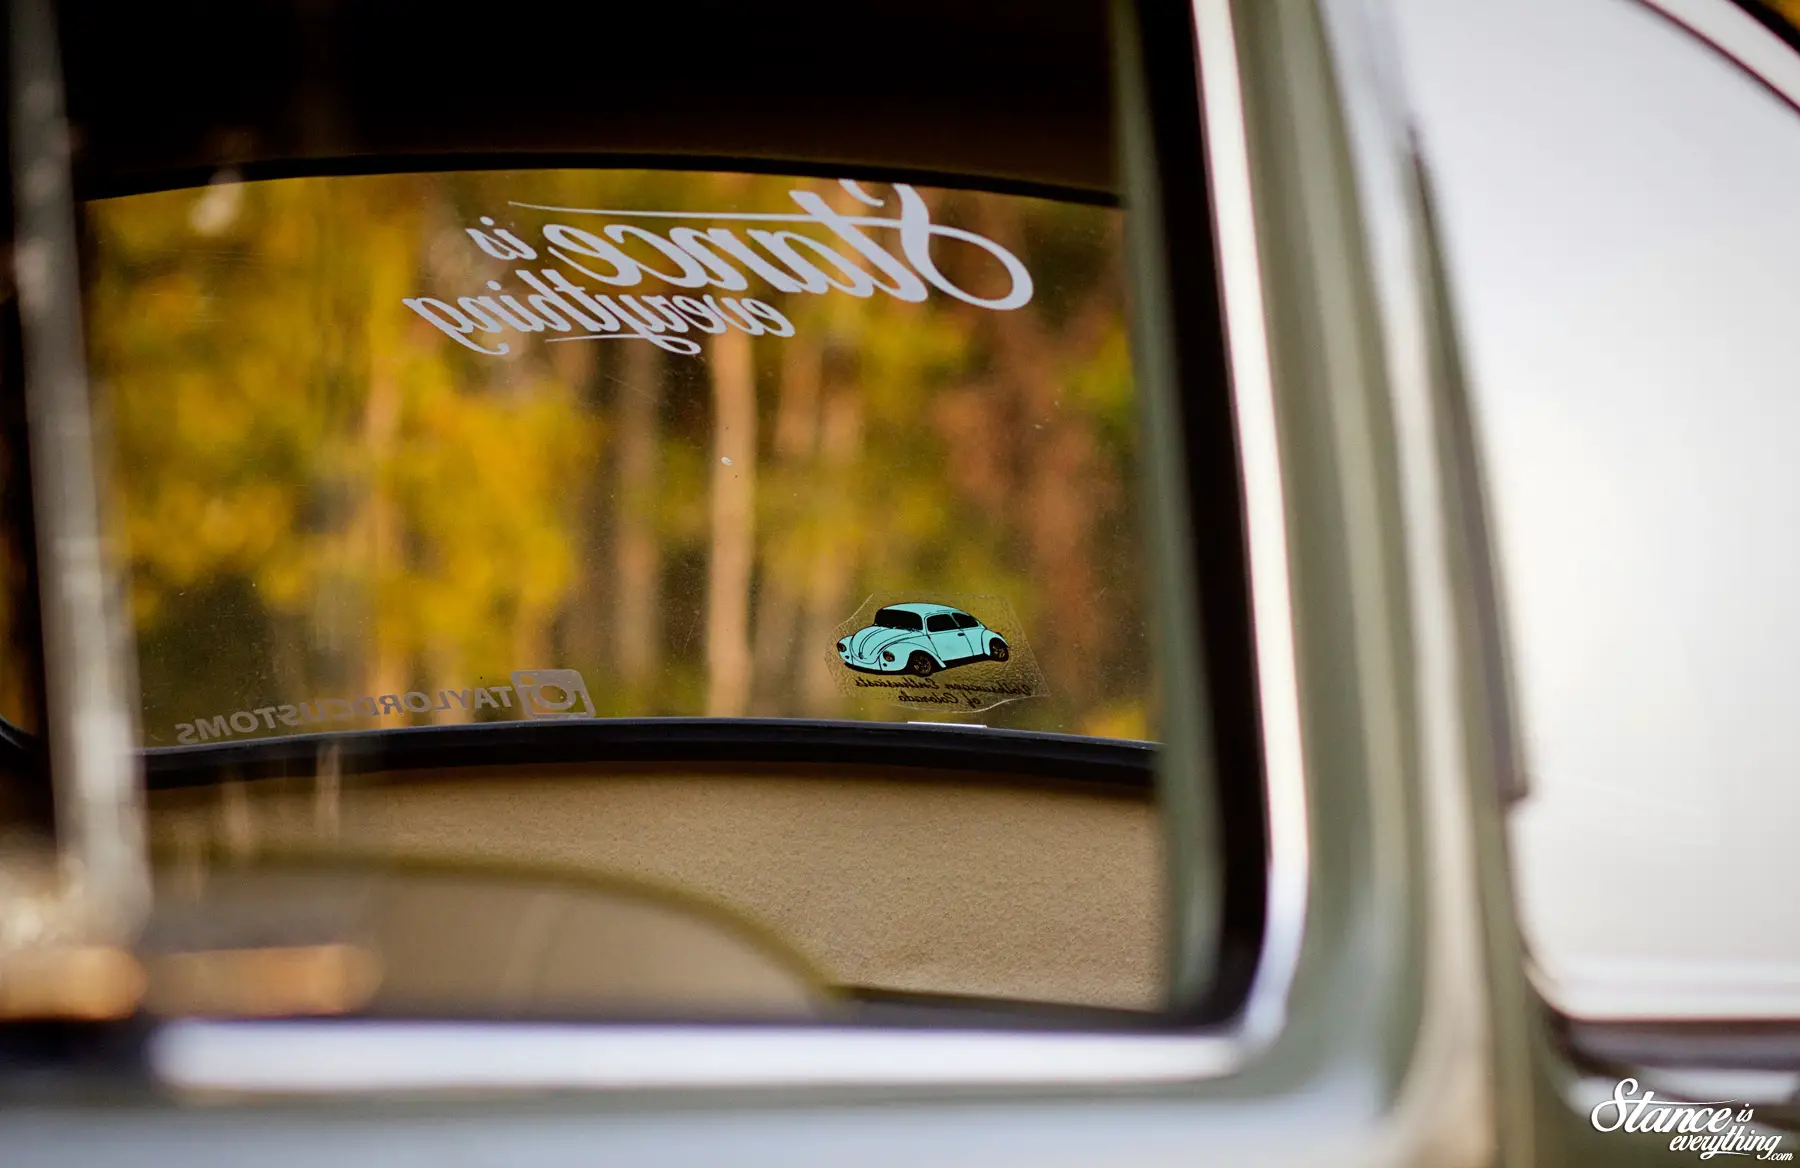
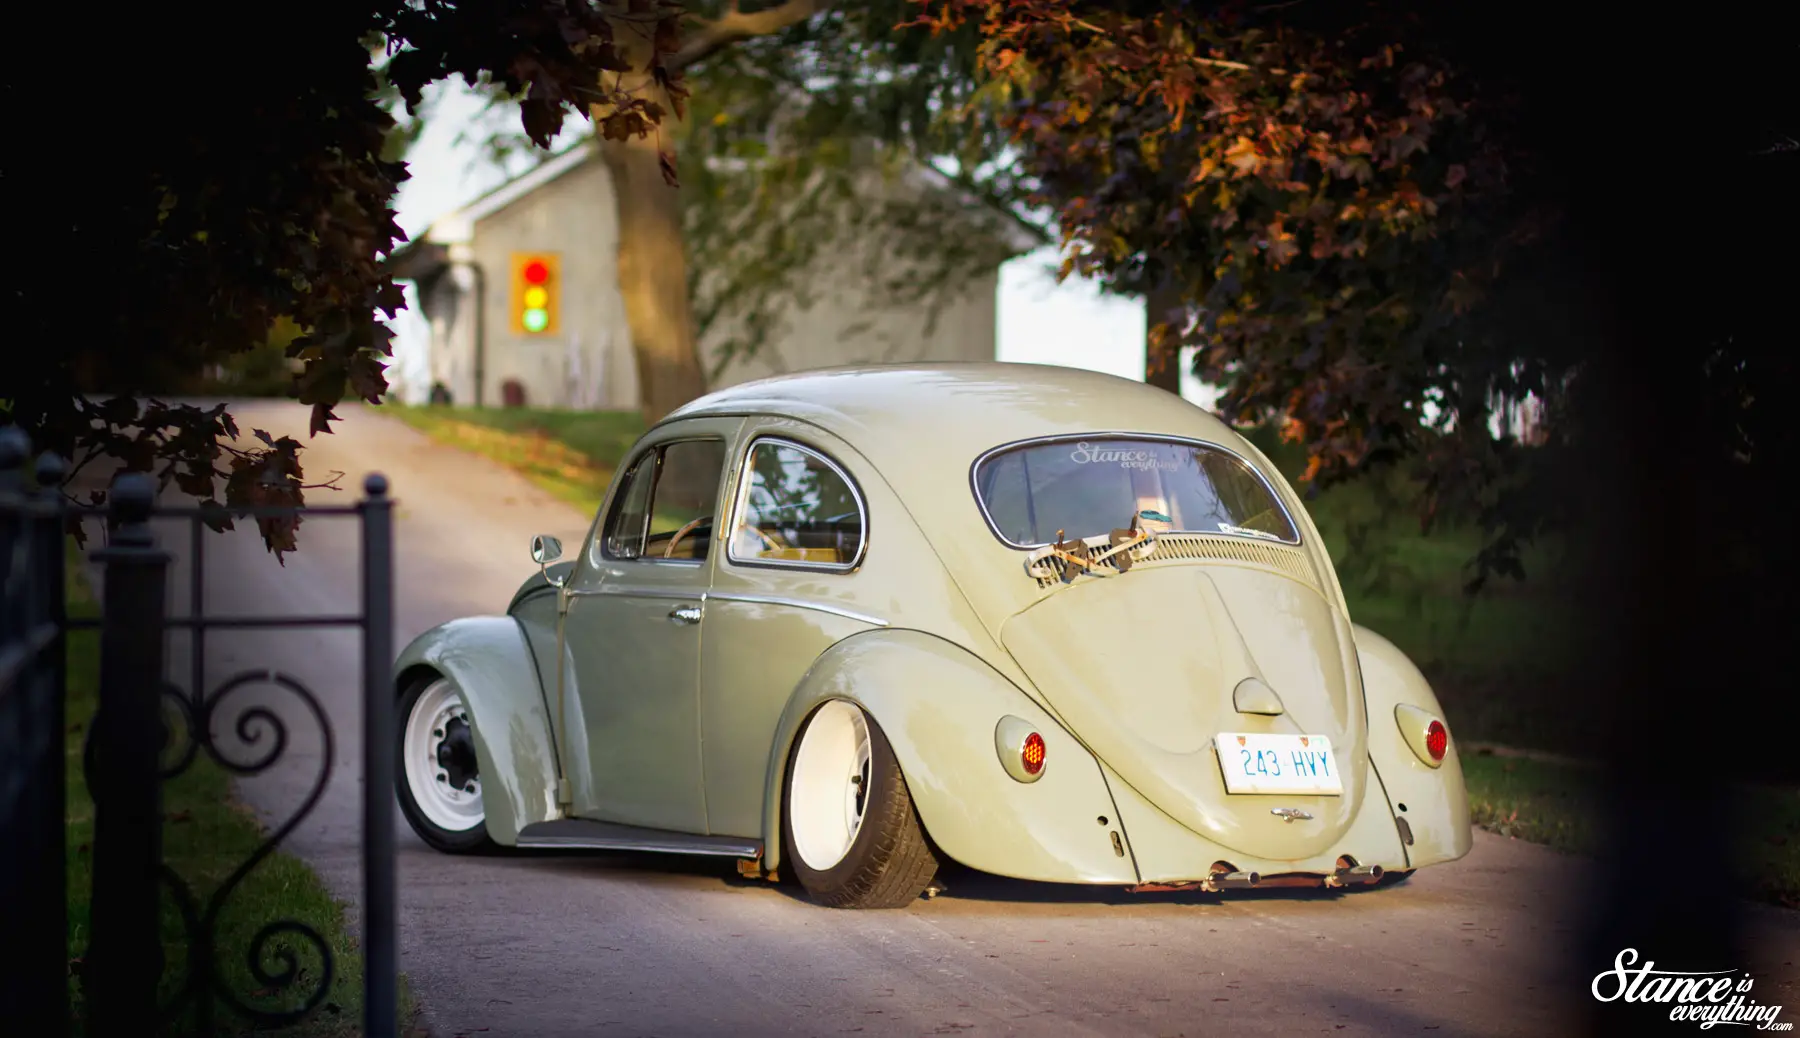
Along with the fresh Wolfsburg West interior the ’59 received a new headliner and exterior brightwork.
New window seals and highly coveted pop out windows where also added and the car also features working semaphore signals. Rare items that die-hard Beetle fans are sure to be jealous about.
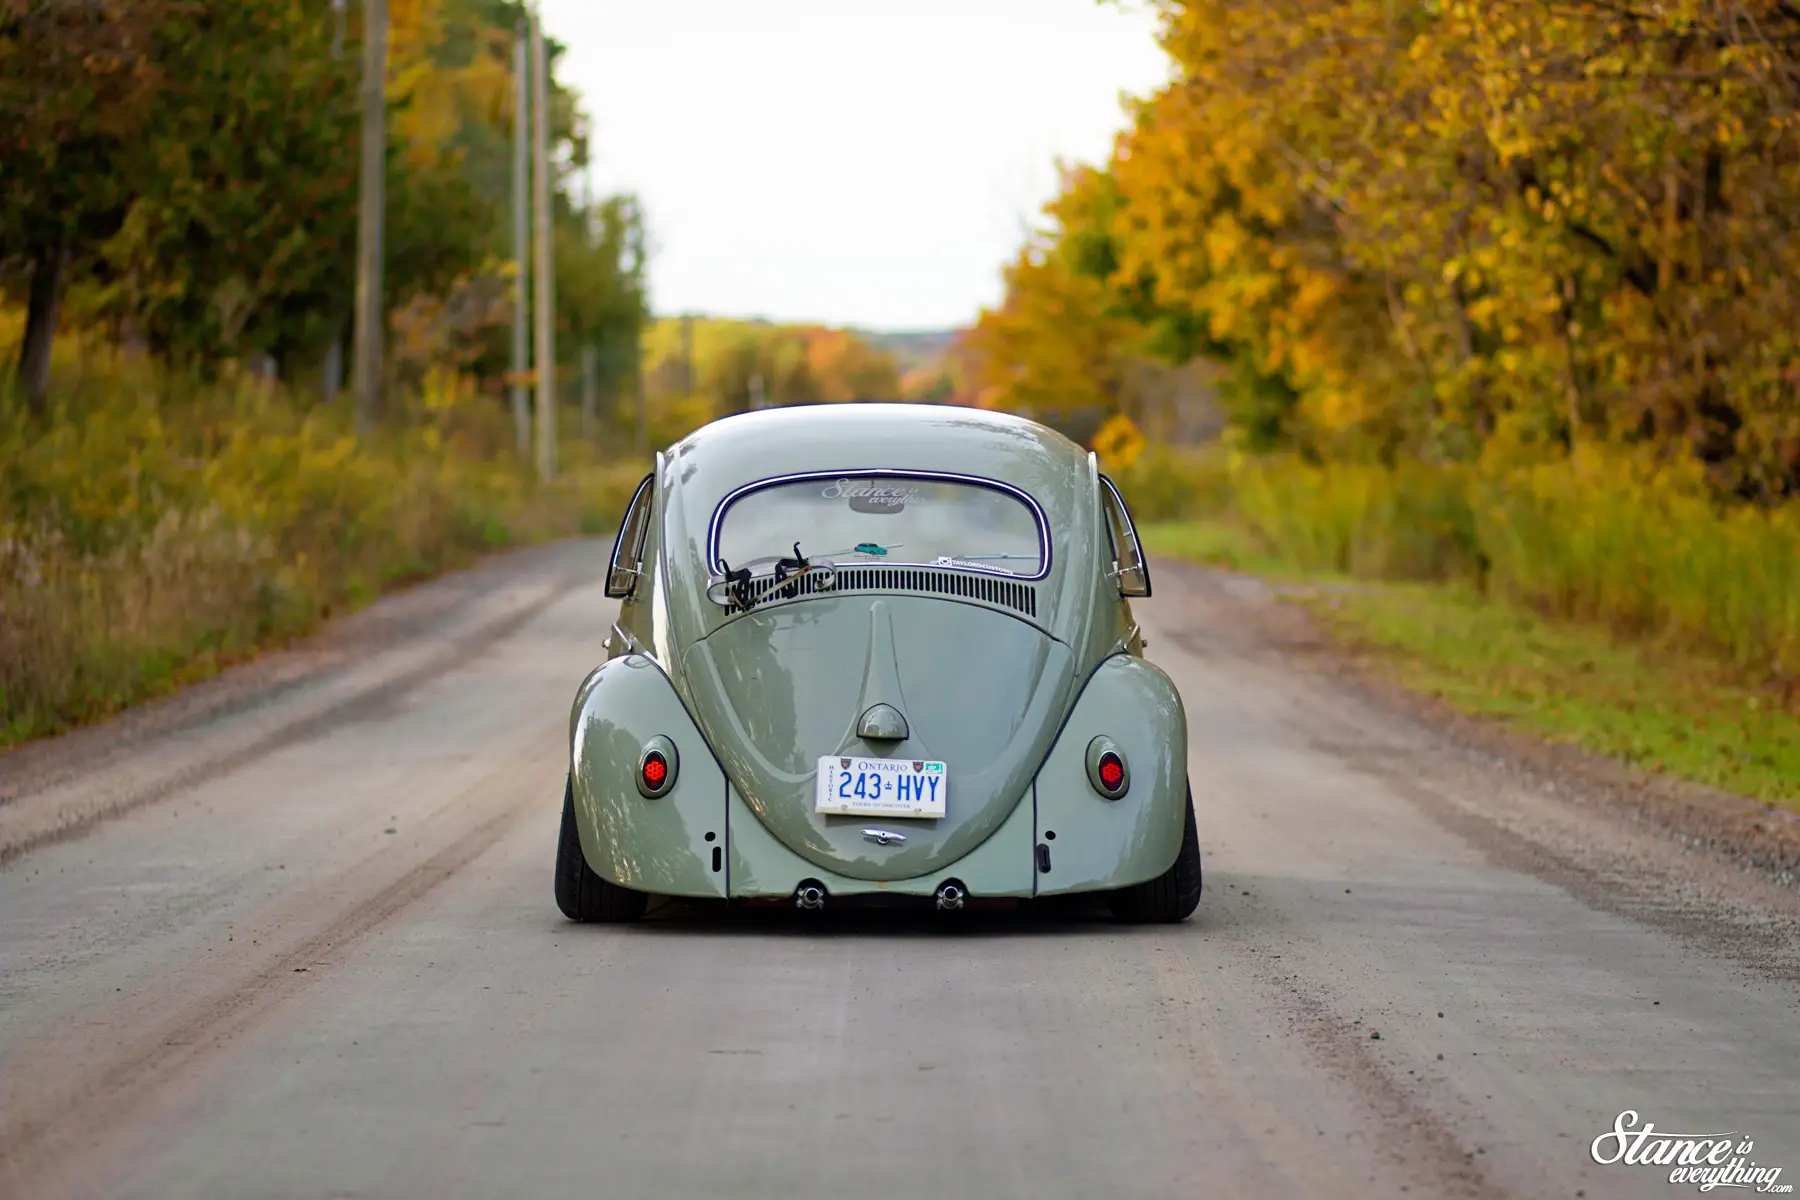
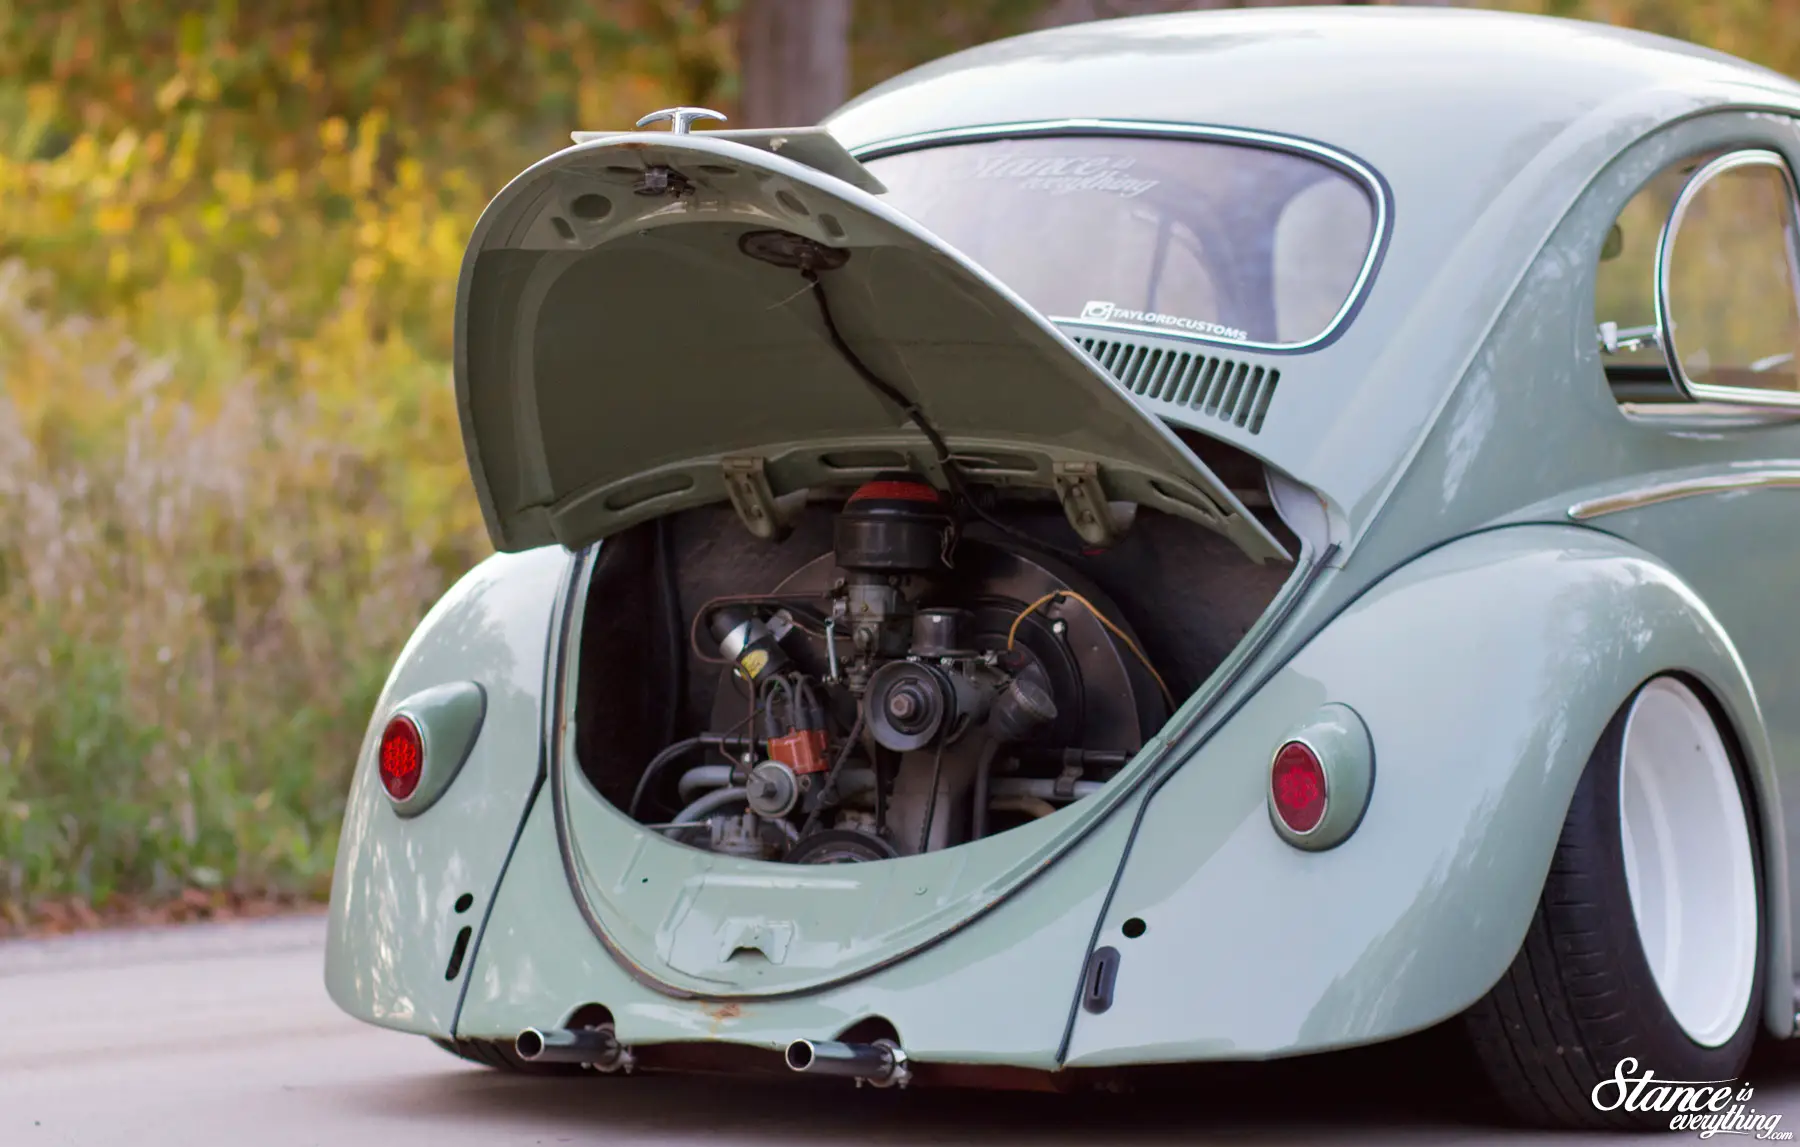
The front bumper was retained but in the rear Blair left the bumper in the shop. The smooth rear end helps emphasize perhaps the major talking point of this build, the rear camber.
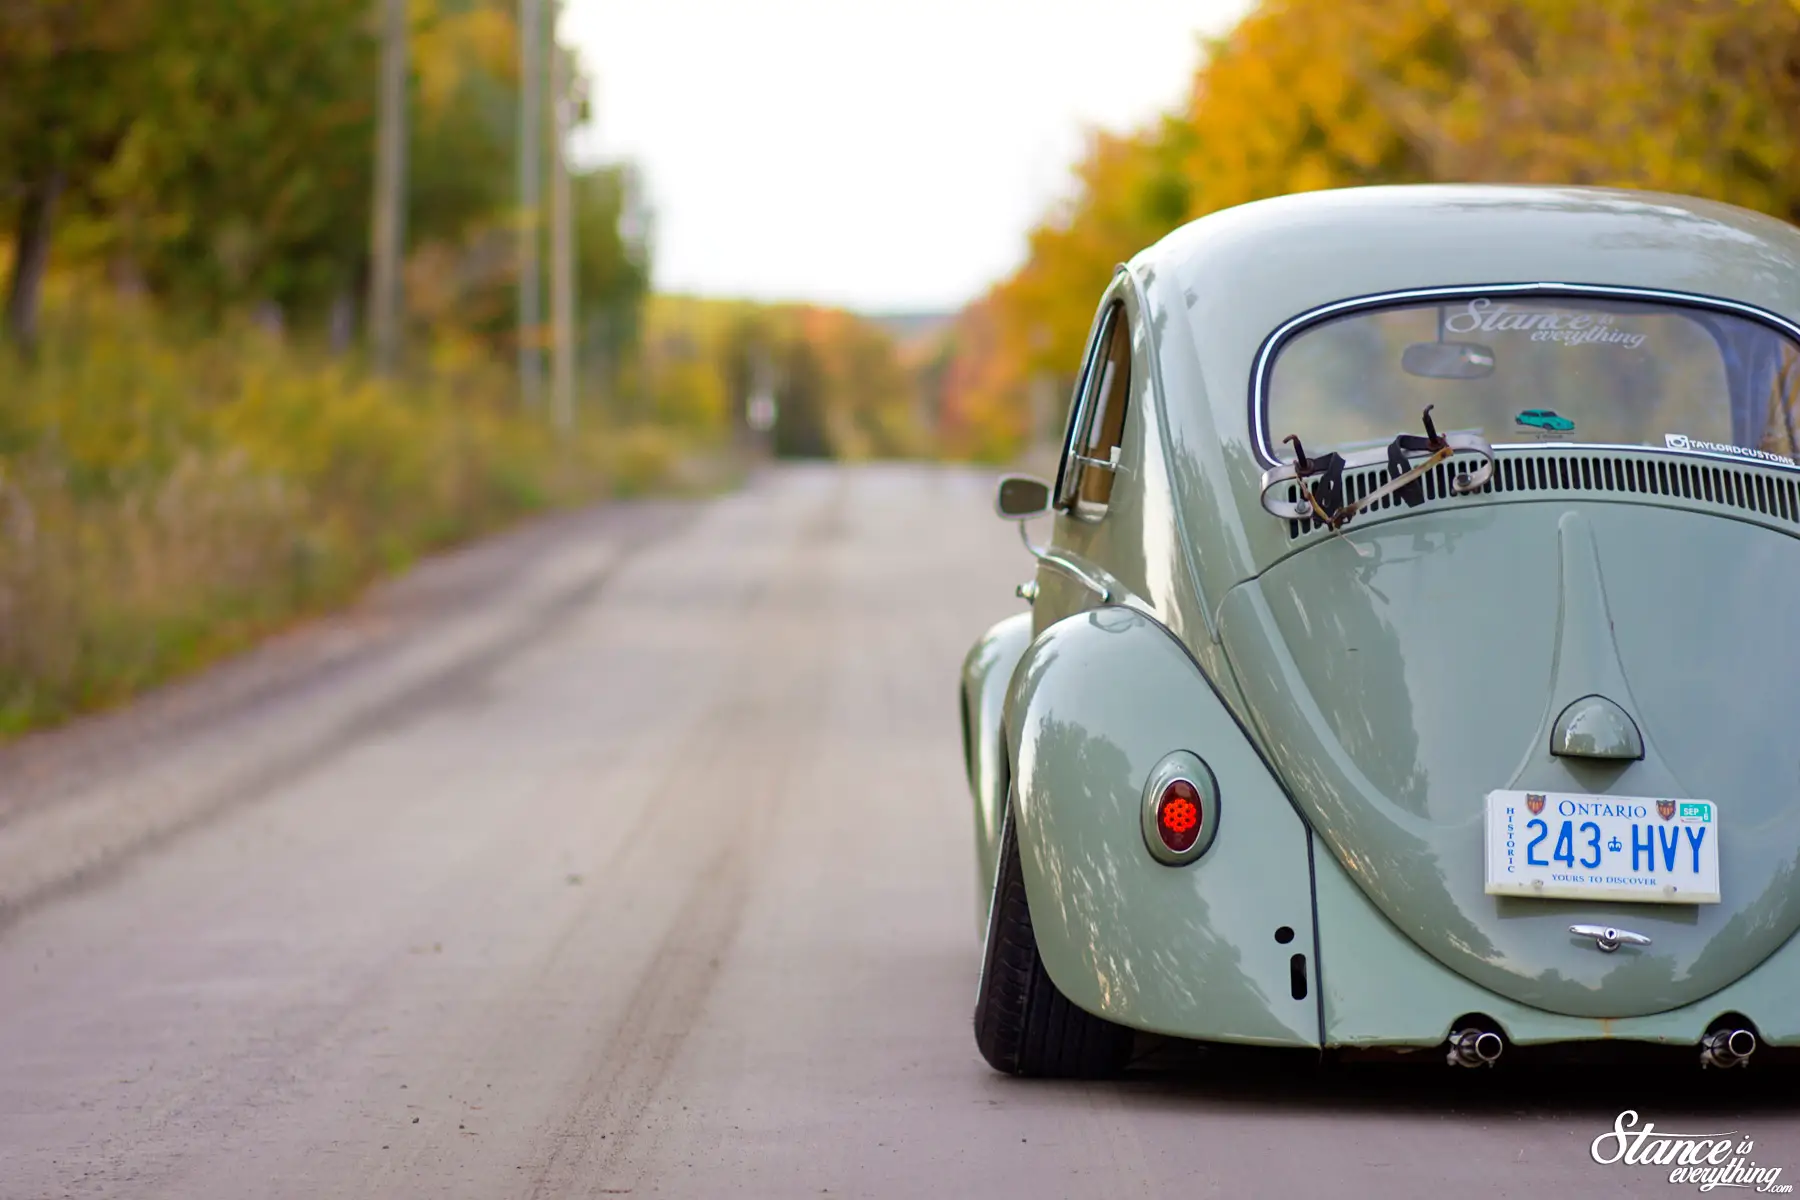
The -9.5 degrees per wheel is necessary to tuck the 8″ wide steel wheels bolted to the back of the car. These wheels are a combination of factory centers and aftermarket hoops welded together by Blair with the help of Stony at Oddball Kustoms.
The front wheels are currently stock width but plans to widen them are set for the not too distant future.

With so much rear camber the toe is, as you would expect, quite a bit out of factory spec but with tires being a very moderate $50 a piece Blair isn’t too fussed about tread-ware.
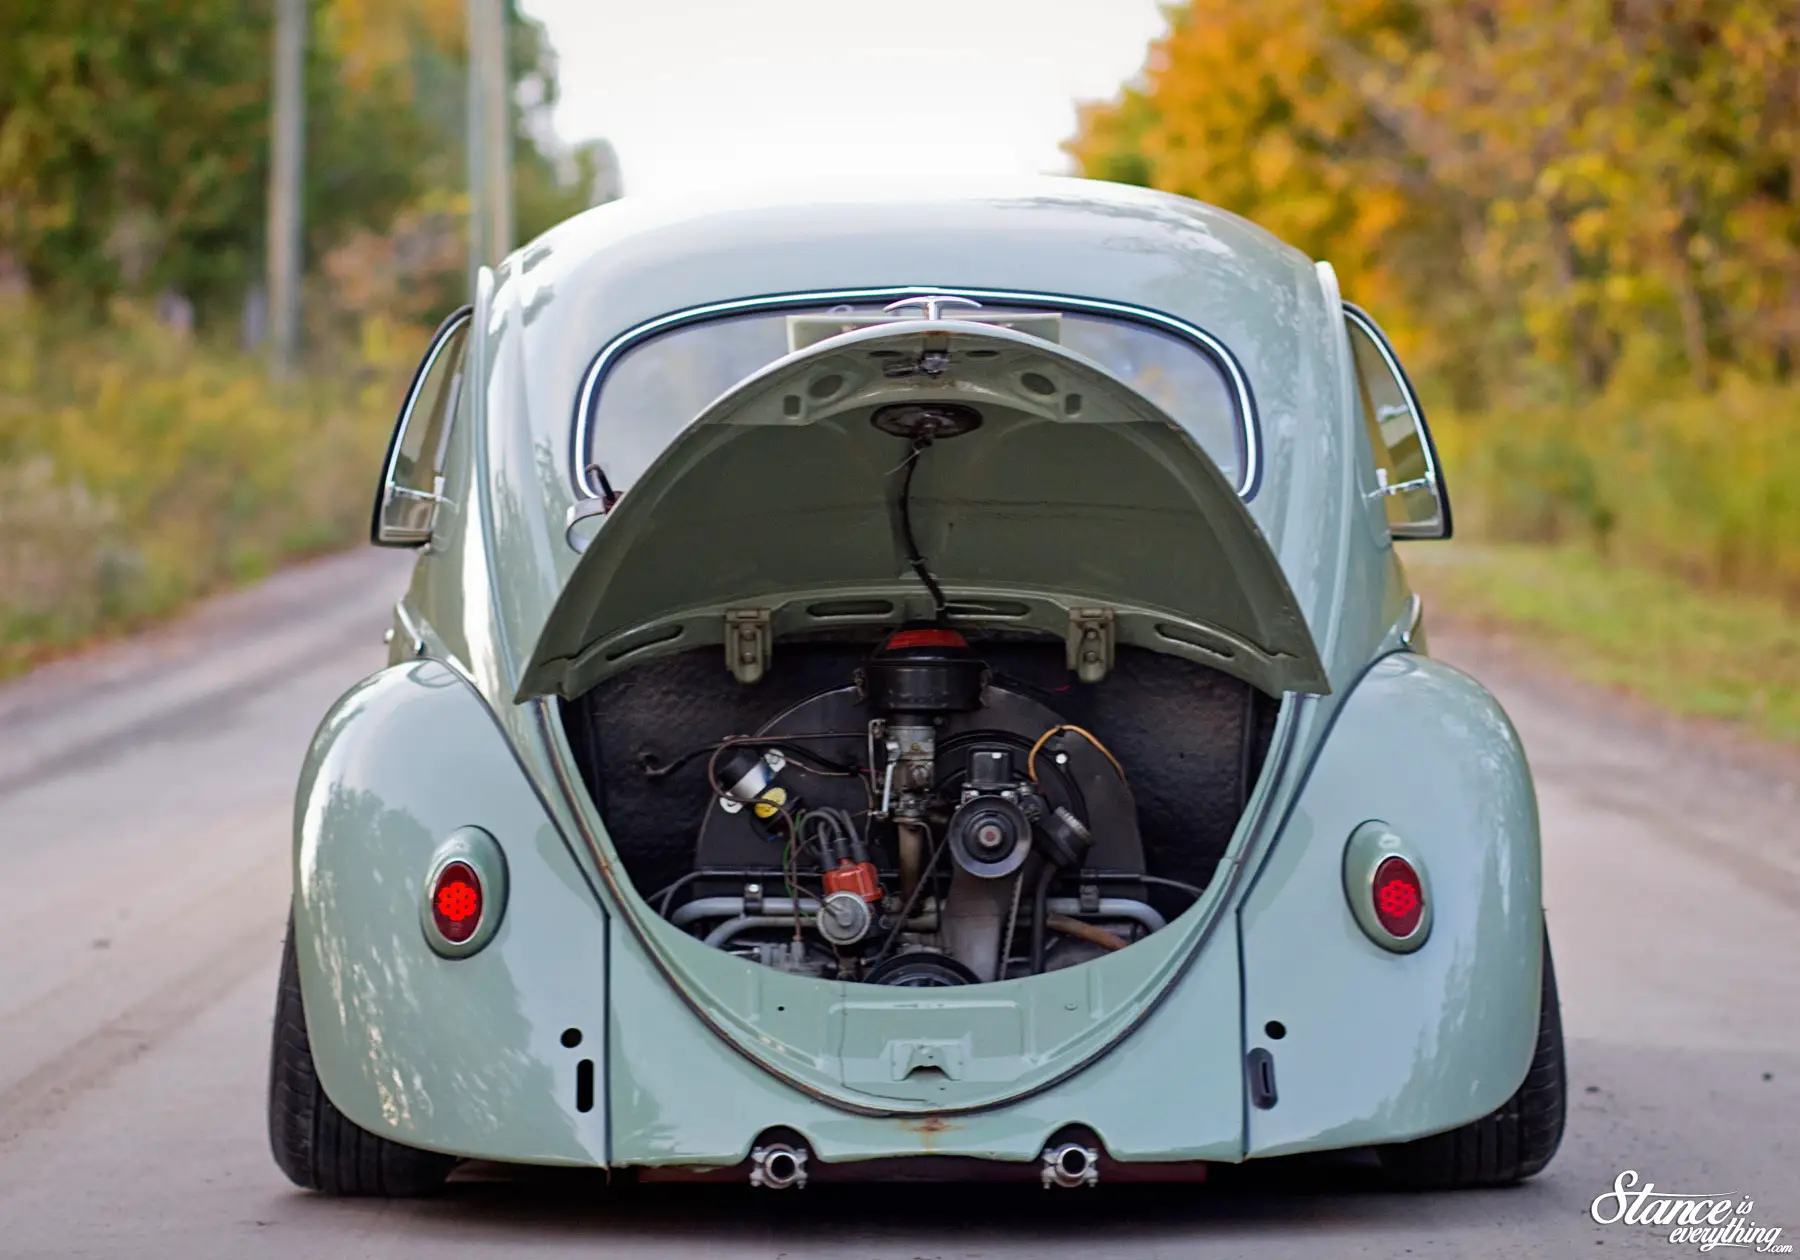
Besides with the factory 36 horsepower 1100cc motor urging the car along from the rear it isn’t exactly a tire roaster.
Still despite the sub 40 horsepower rating the car is still very drive-able and does manage to get up to and maintain highway speed just fine, it just takes a bit of time to get there.
Though it’s the newest build in the Taylor’d Customs fleet this Beetle has already become quite the favorite.
It’s said that everything is for sale, and the ’57s recent trip overseas proves that, I don’t see this car going anywhere few a few years. Or at least not until a few more of his ideas roll out of the shop…

8 Oct, 2015 | Admin | No Comments
Coffee Time: Mike’s S2000 – A Video By Basic Builds
Basic Builds mastermind Rob Anzit recently got the chance to spend some time with Mike Pimenta (@mike_s2k) and his ’07 Honda s2000.
Bagged on Airrex struts, sitting on K3 Projekt Wheels, and sporting a host of both cosmetic and functional upgrades Mike’s car makes an excellent subject for the short video Rob produced below.
Rob’s previous work has been featured here before and you can stay up to date with his most recent photo and video work by following him on Facebook on Instagram at @basicbuild and on twitter at @basicbuilds.
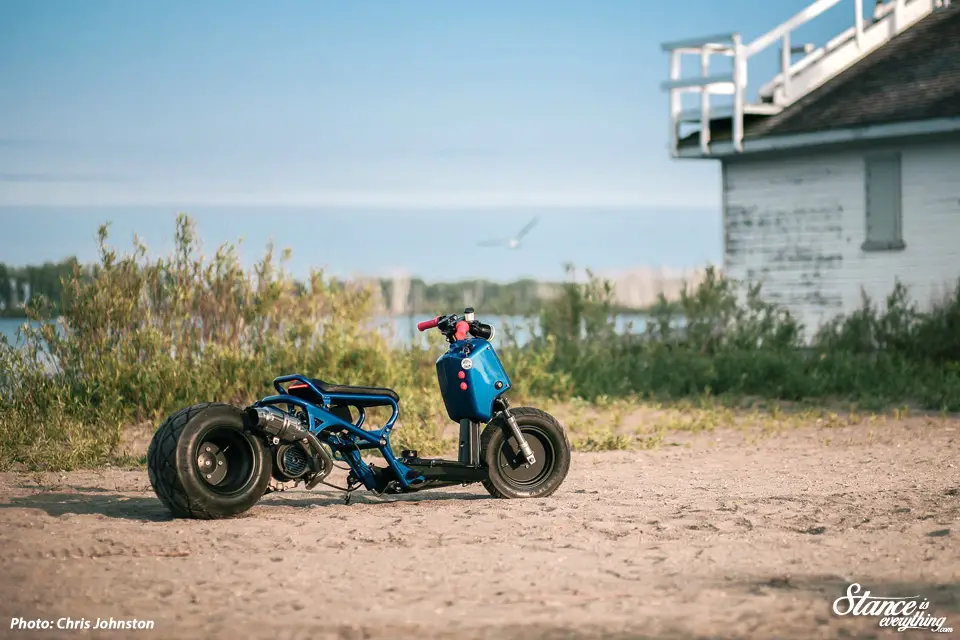
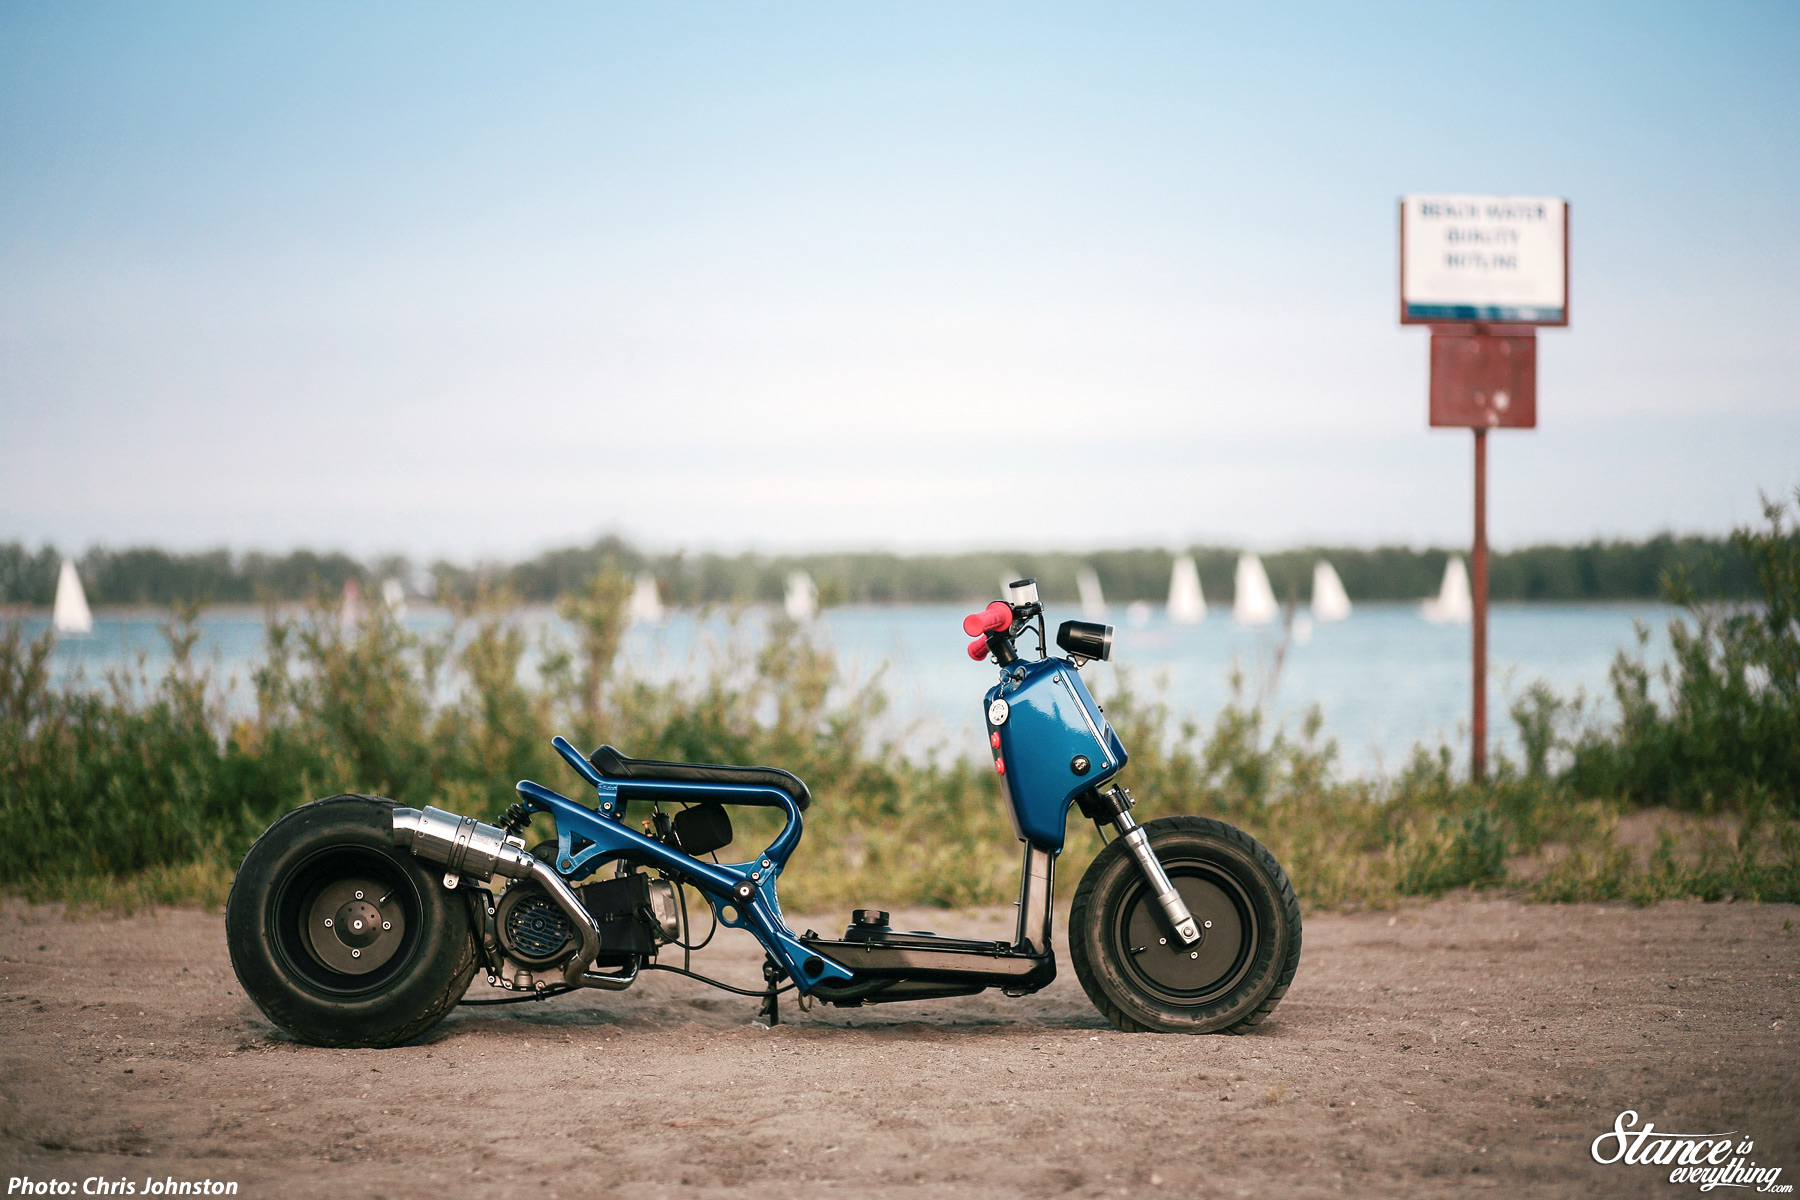
Mini Moto Lab‘s latest build, Ms. Fat Booty, started out as a small side project for co-owner Anthony’s girlfriend to cruise around on and was nearly completed four years ago before life got in the way and the build was torn apart and shoved in a box.
Brought back out years later as a much needed distraction from the now ex-girlfriend this once shelved build is now one of the most unique looking ‘Rucks’ on the streets of Toronto.

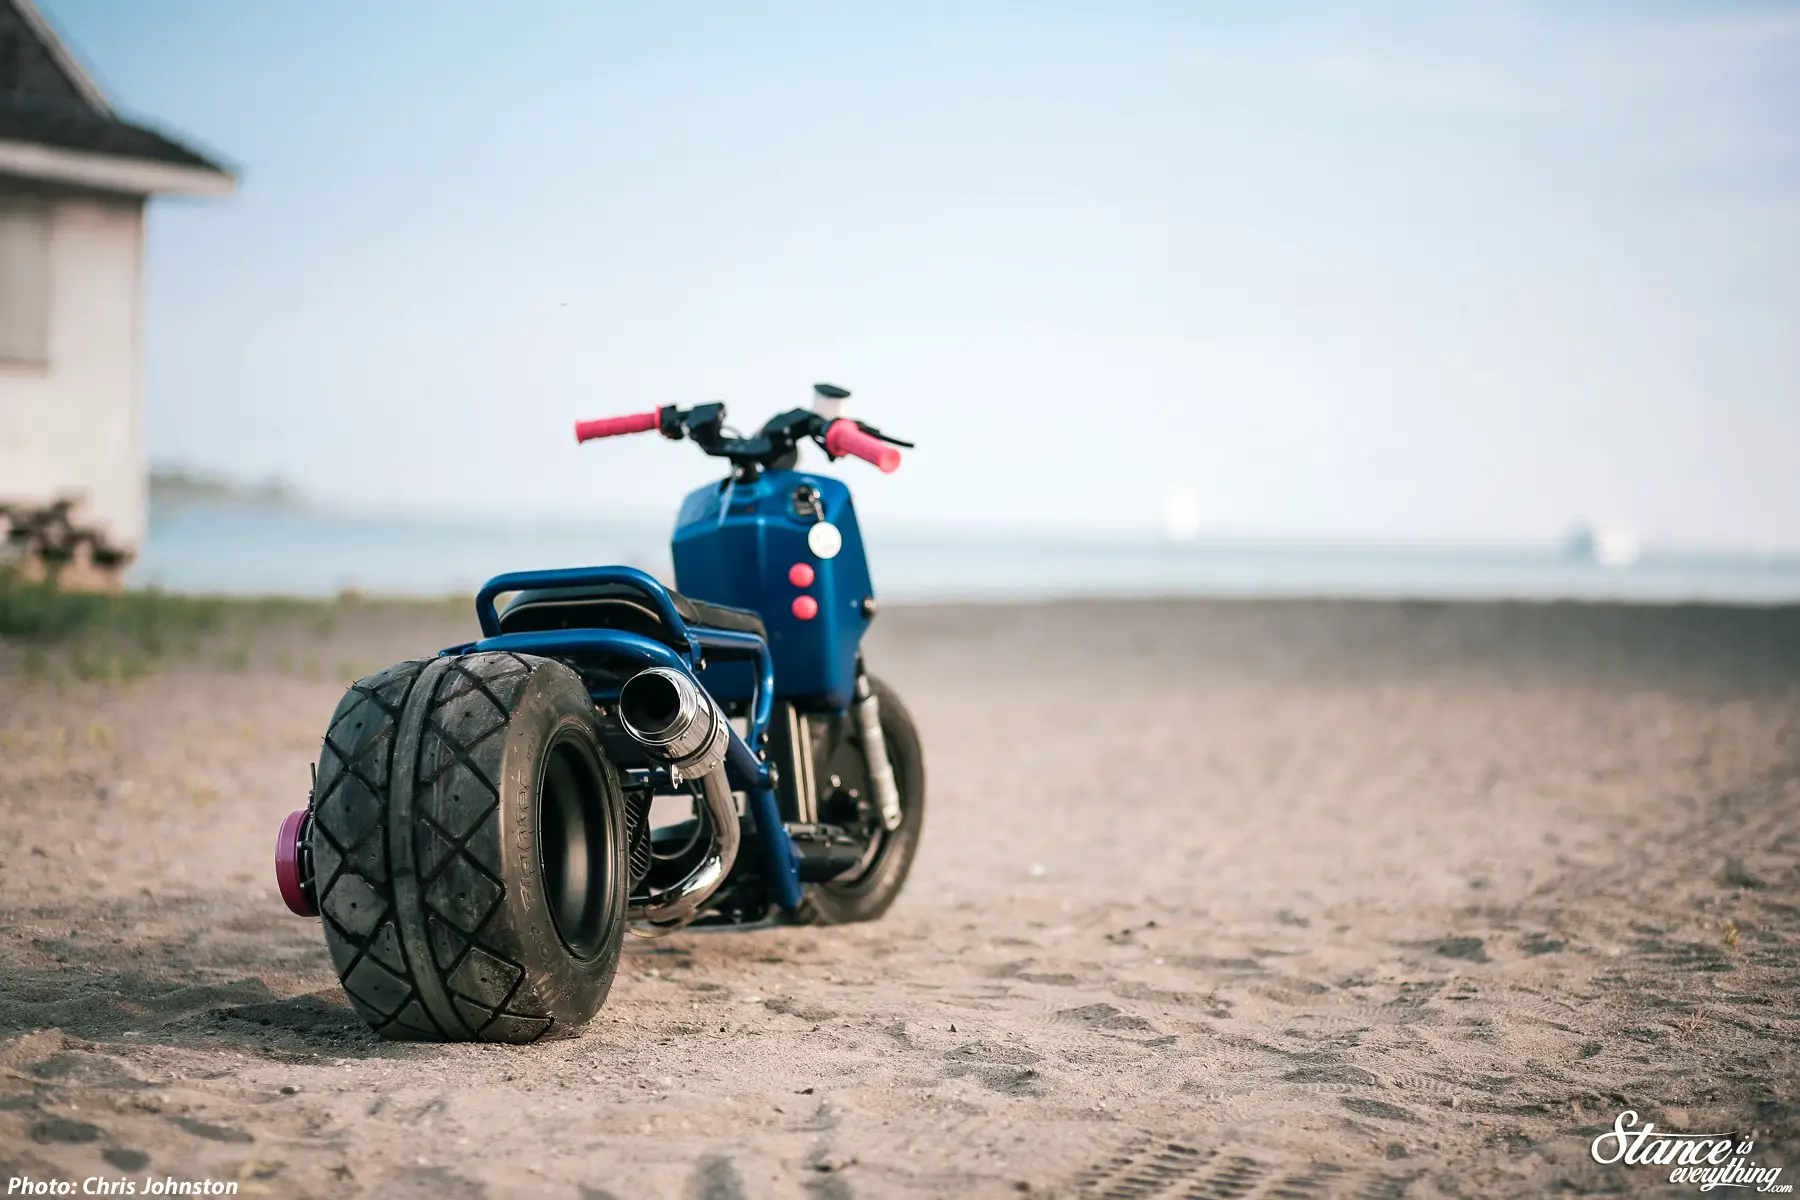
The focal point of this build, and how it earned its moniker, is of course the Douglas 10×10 rear wheel wrapped in a Duro Top Fighter rear tire.
This combo gives the bike a unique look only possible with a wheel that is as wide as it is tall.
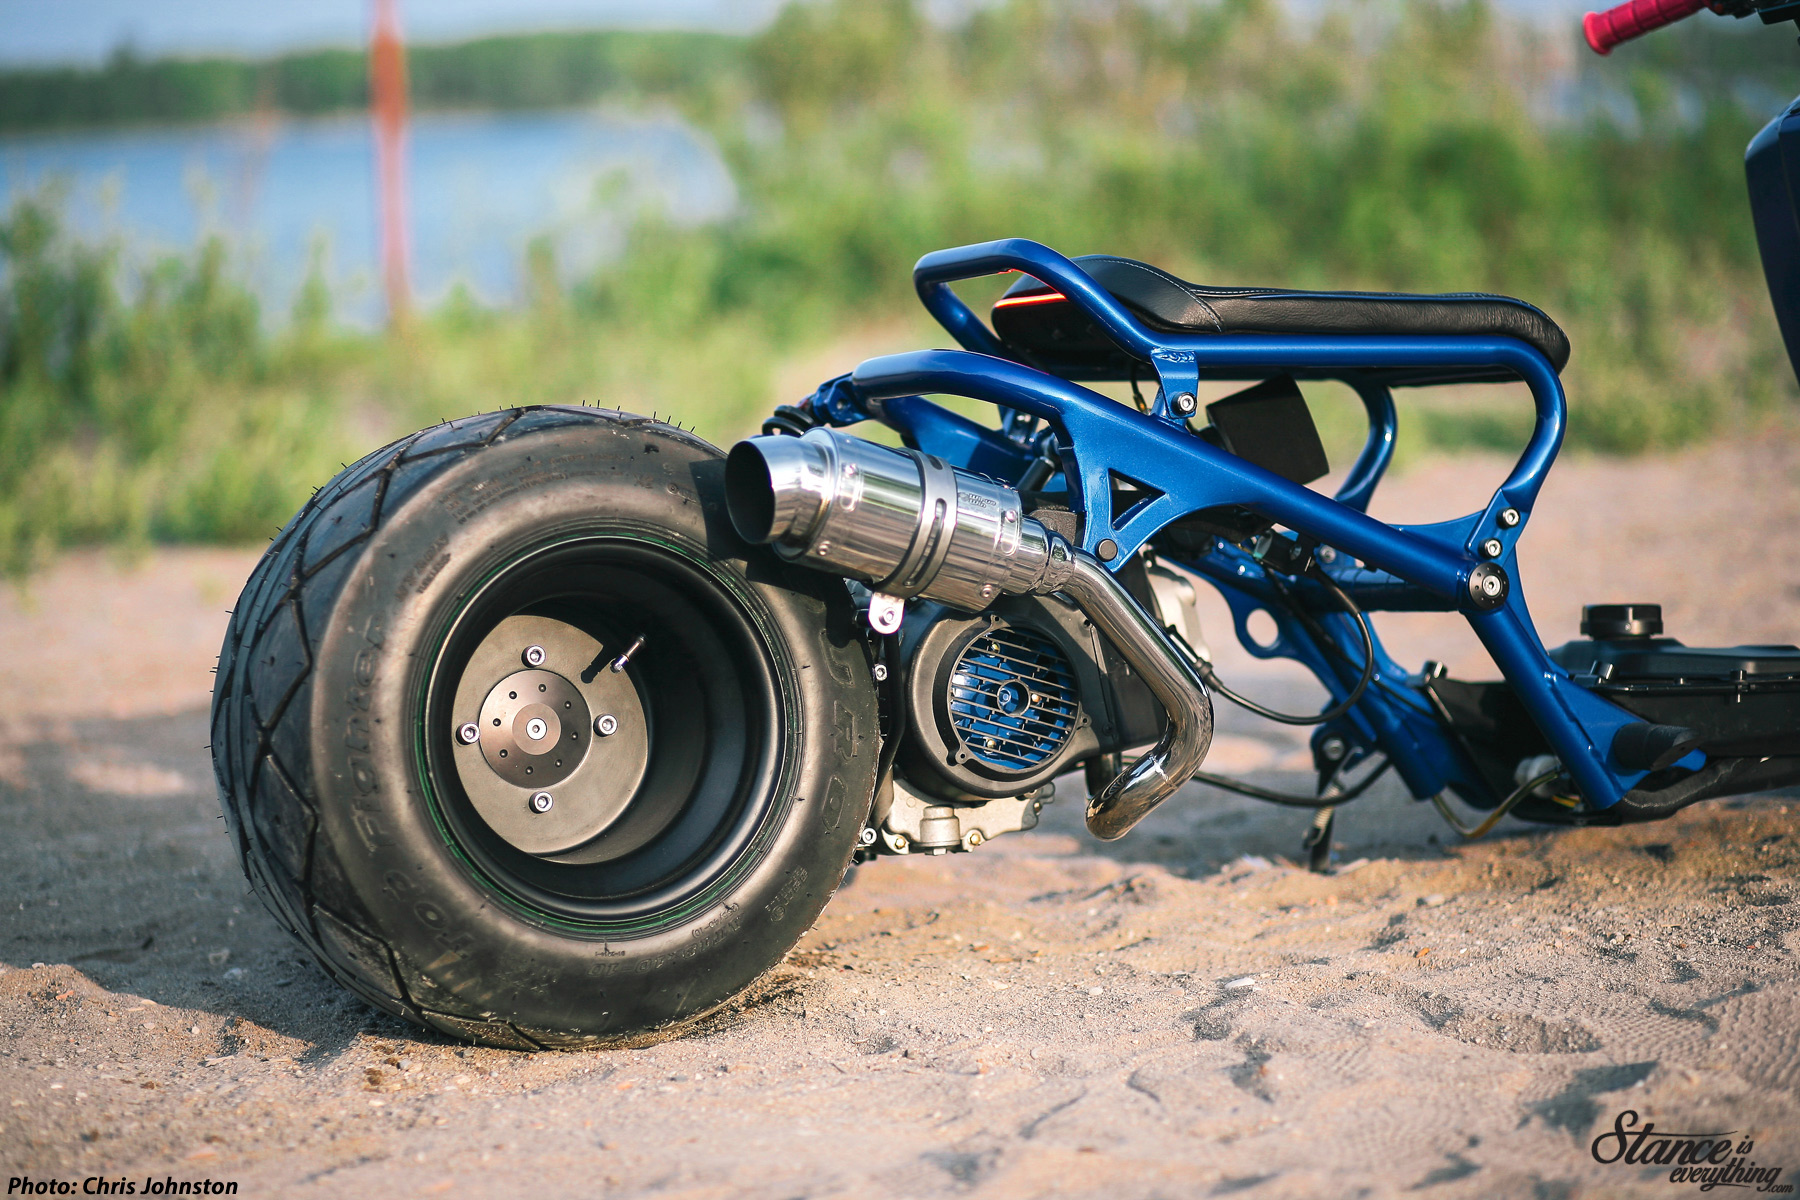
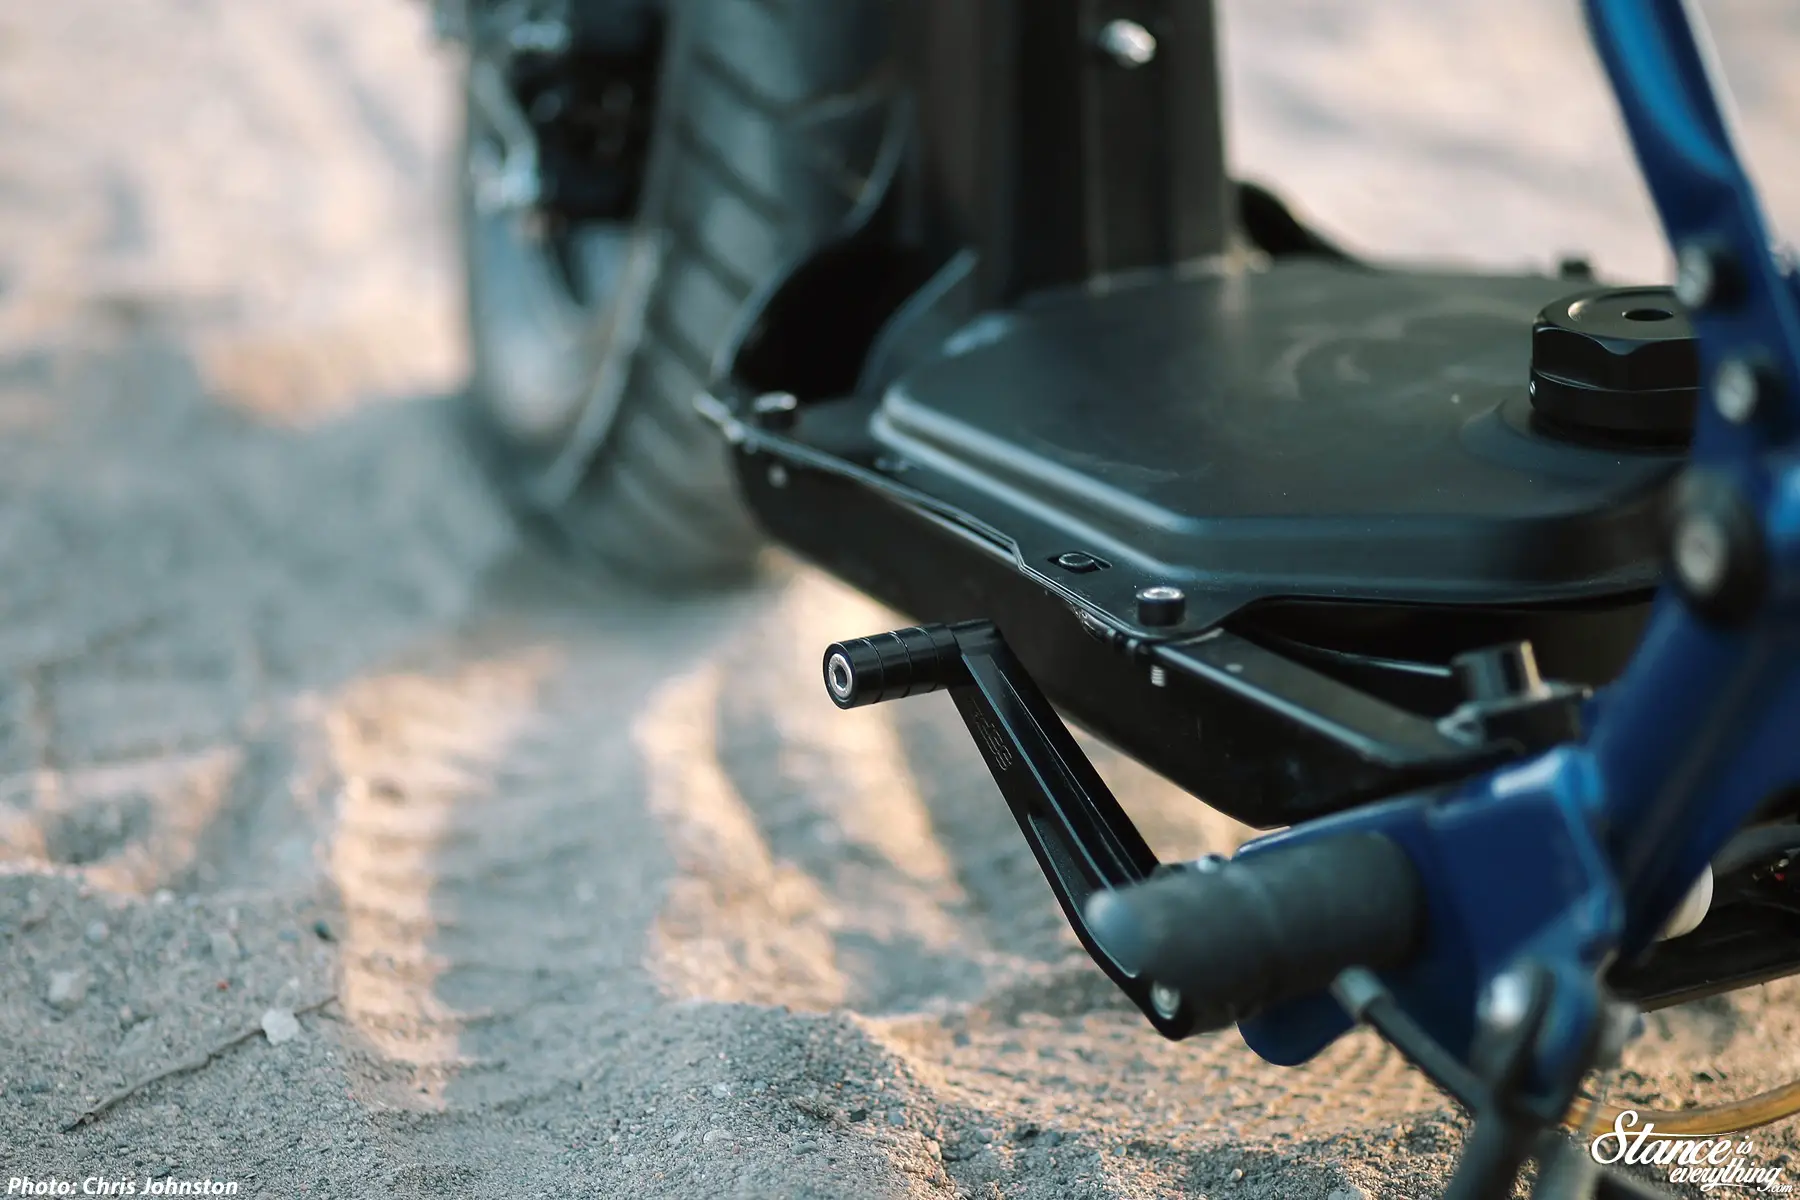
Housing that massive roller is a custom one-off Rucksters rear mount and behind the steam roller is a custom foot actuated rear drum brake.
Up front is a Kitaco 10×3 solid disc wheel wrapped in Pirelli rubber.
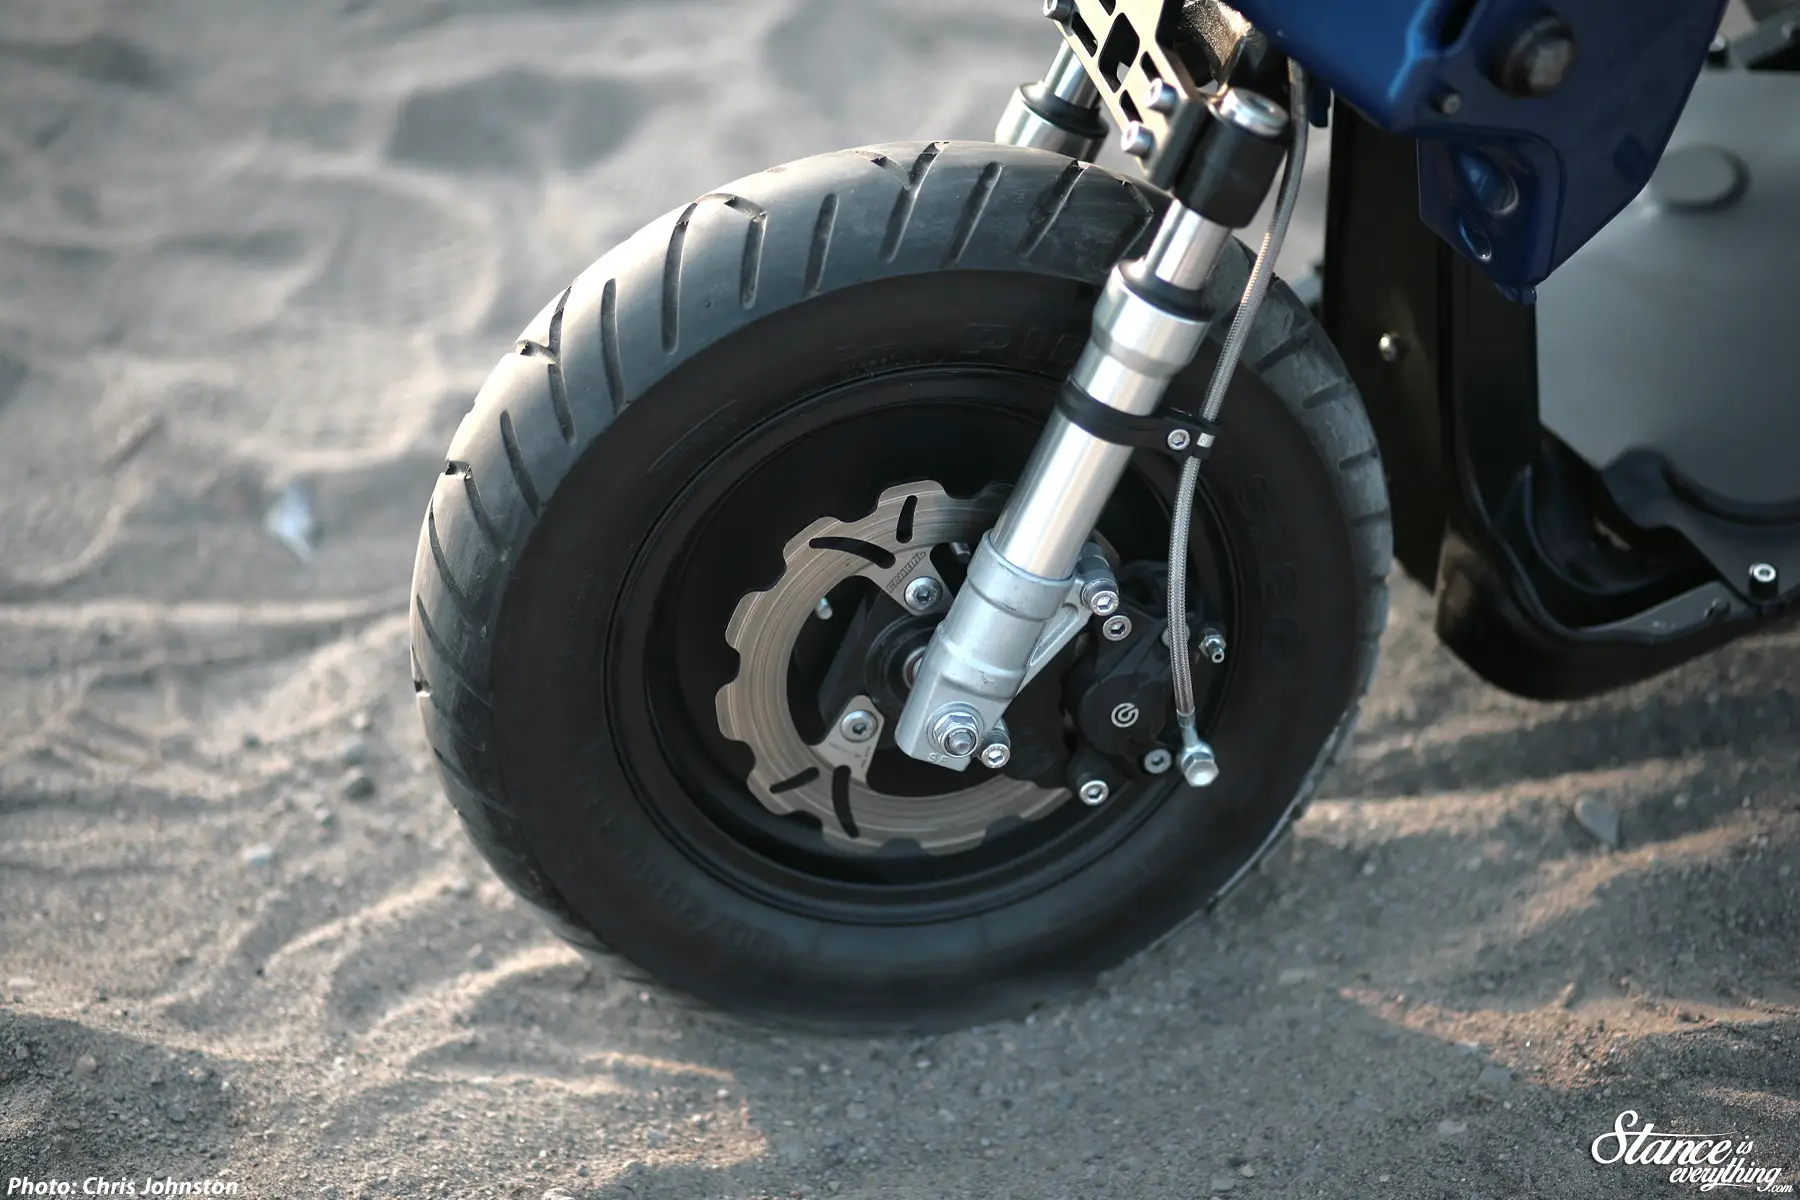
A Brembro p32 Front calliper clamps down on a Braking wave 190mm front disc via a Willwood Short Lever and Master combo.
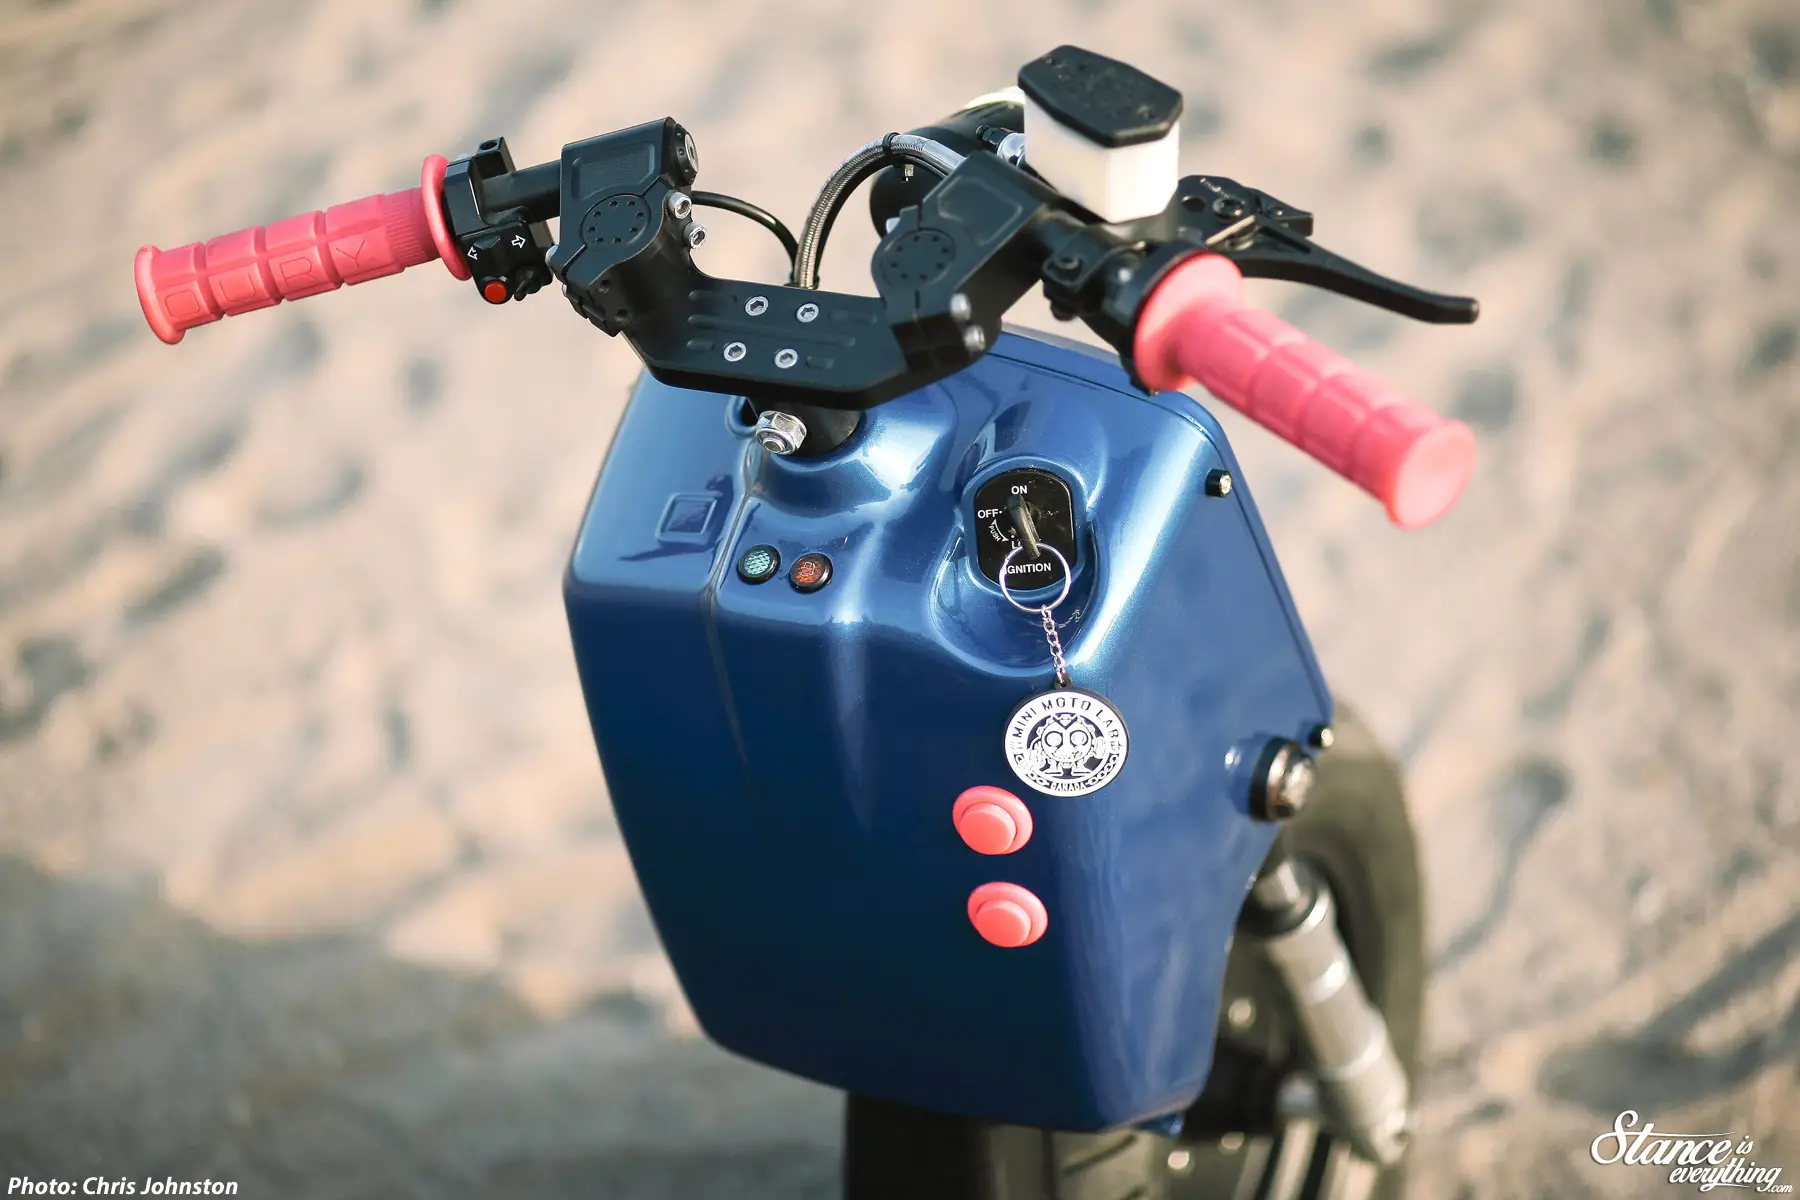
The GY6 motor has been given a little help thanks to a OKO 30mm slide cab, NCY Intake manifold and custom WirusWin exhaust.
The Ruscksters GY6 harness cleans everything up essentially giving the bike a Ruckus version of a wire tuck.
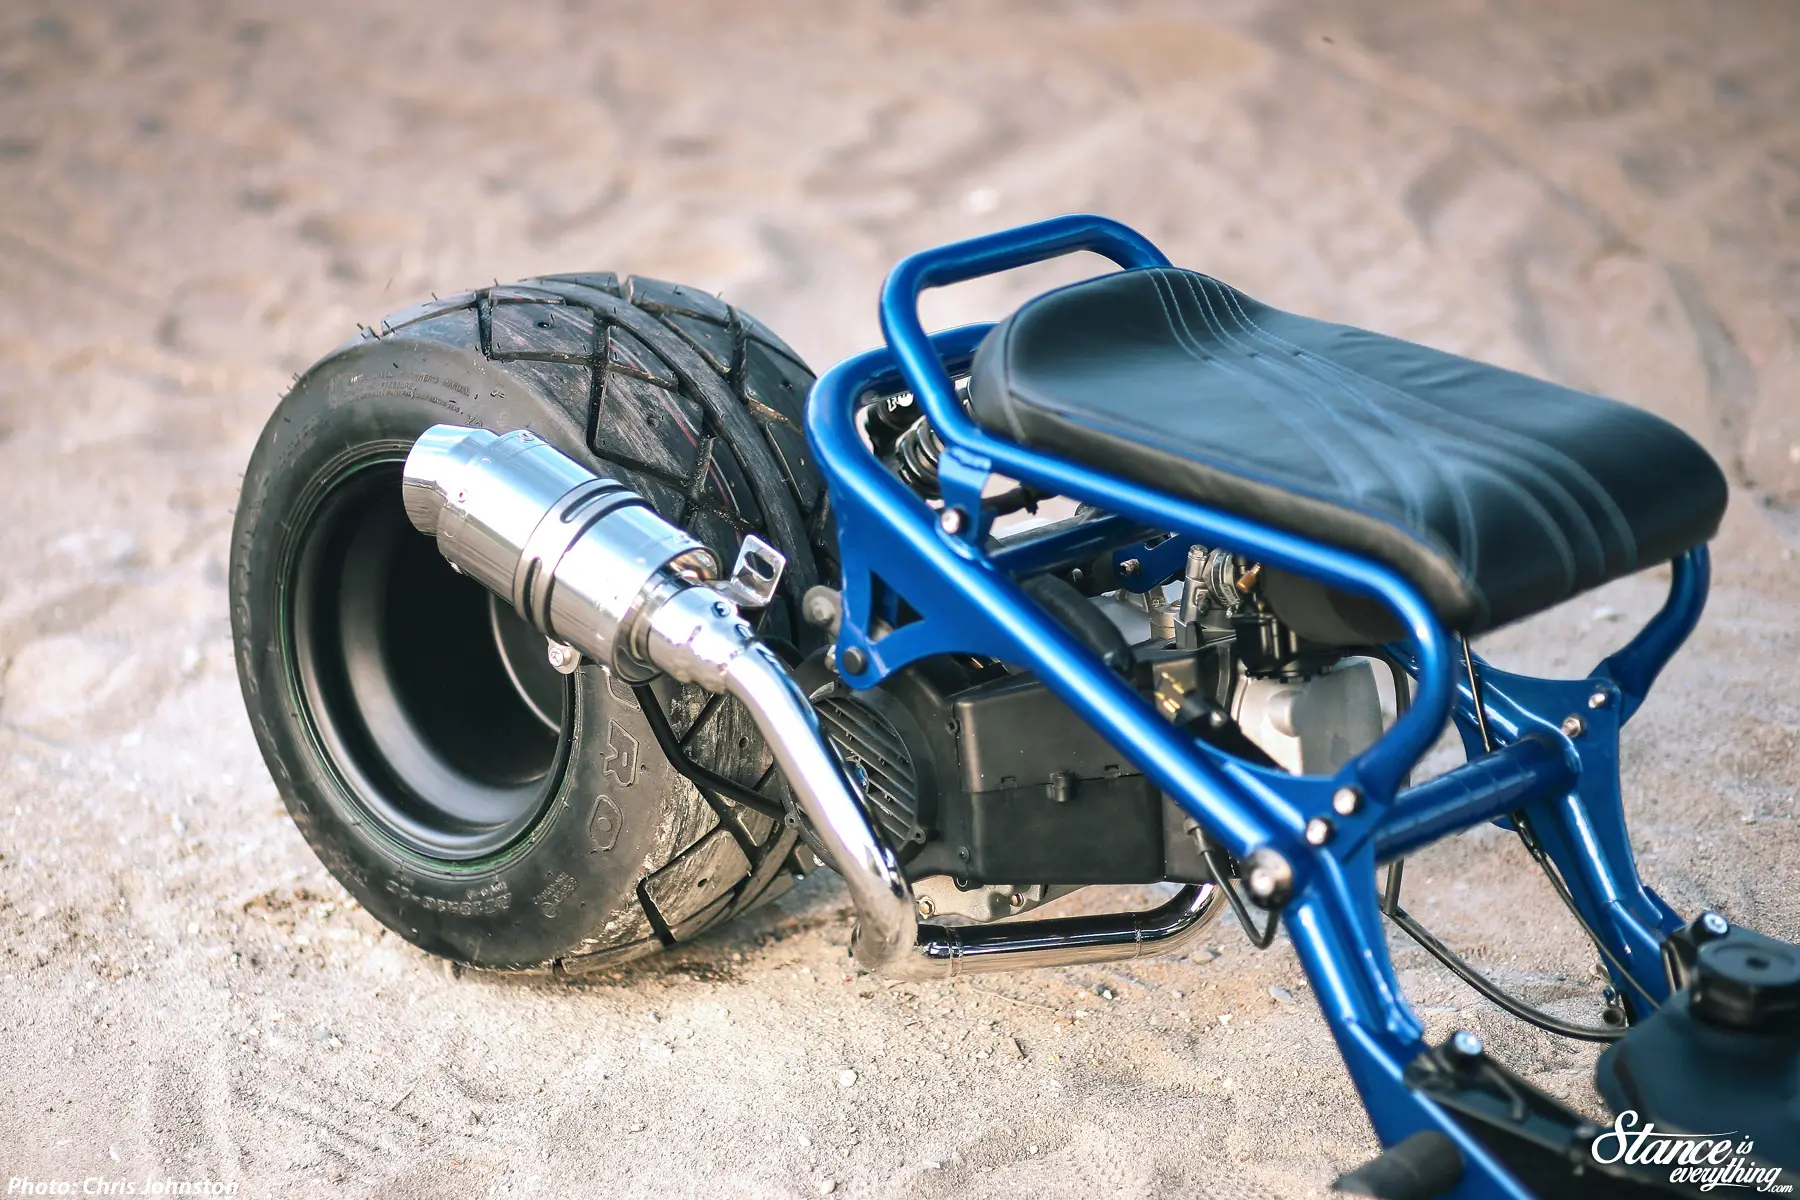
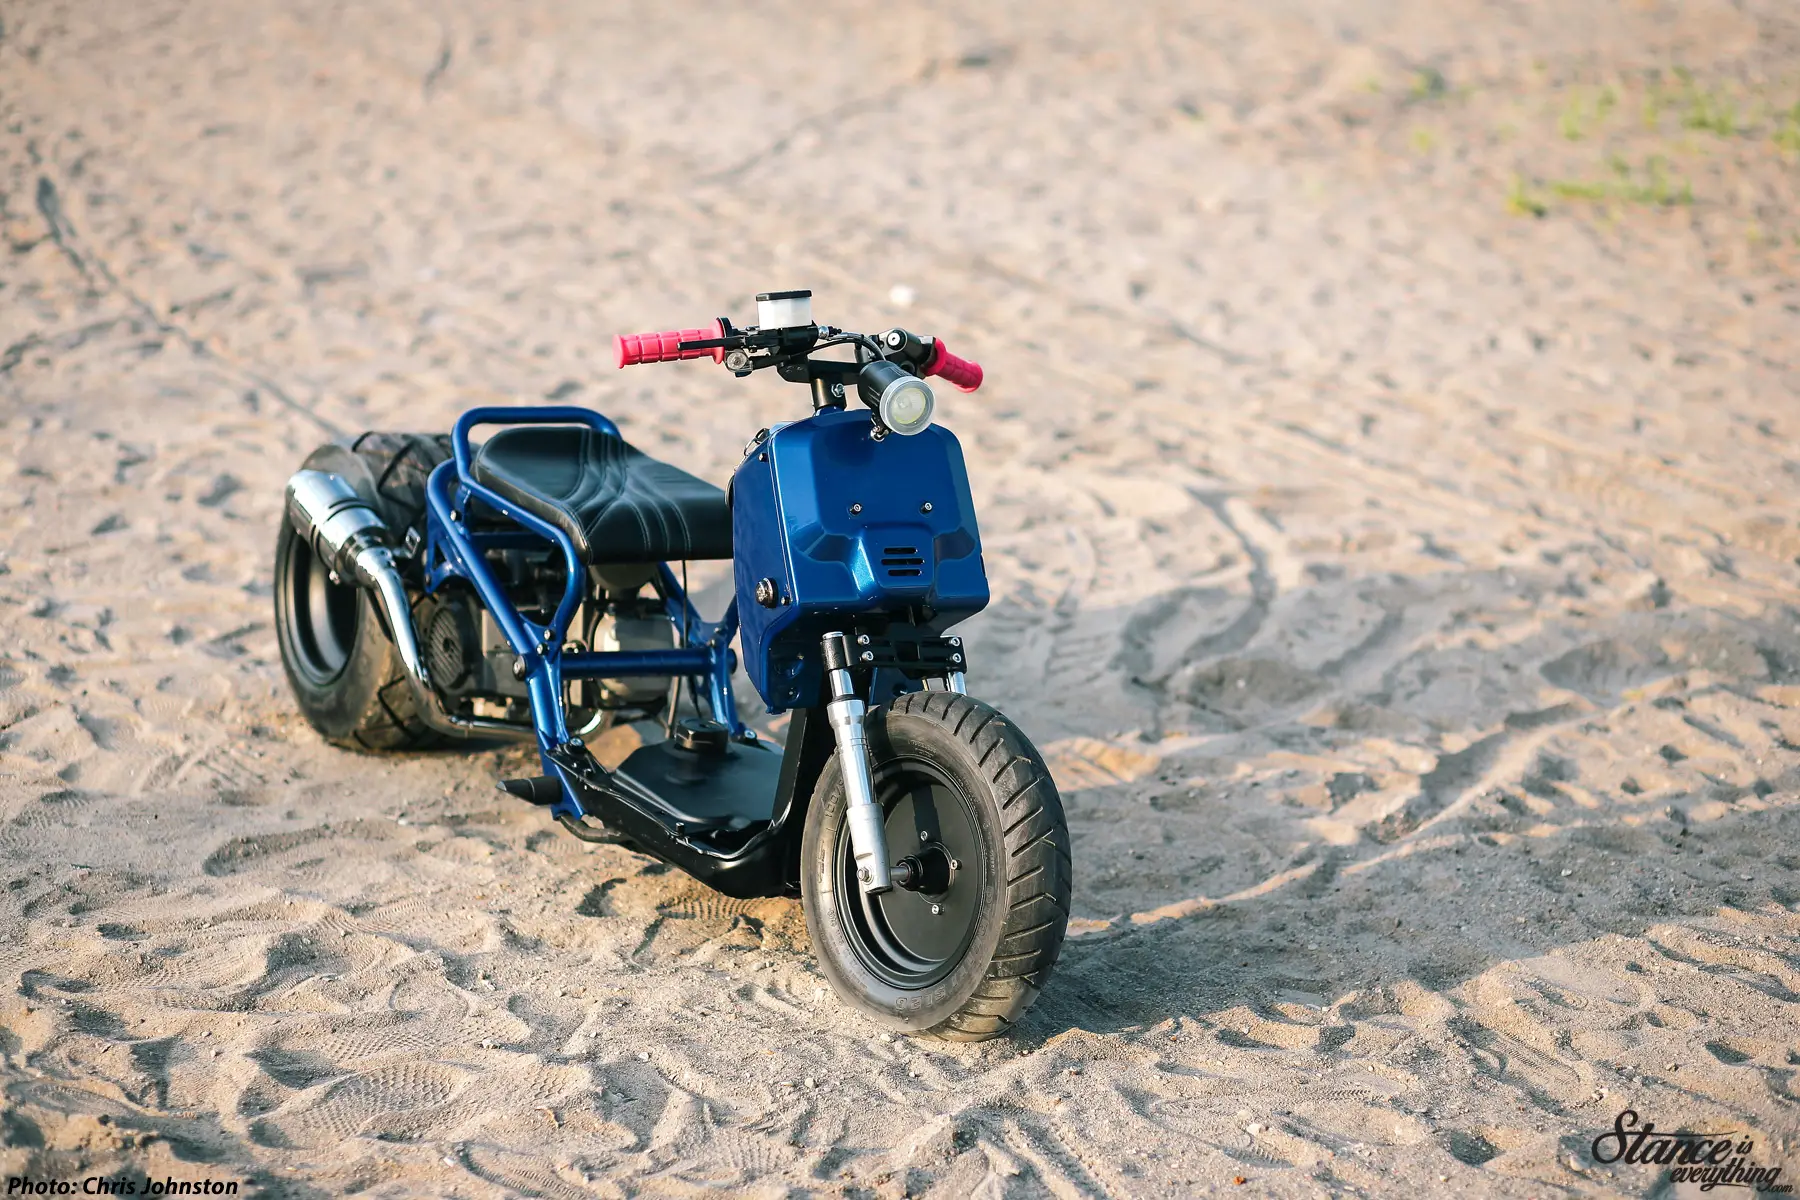
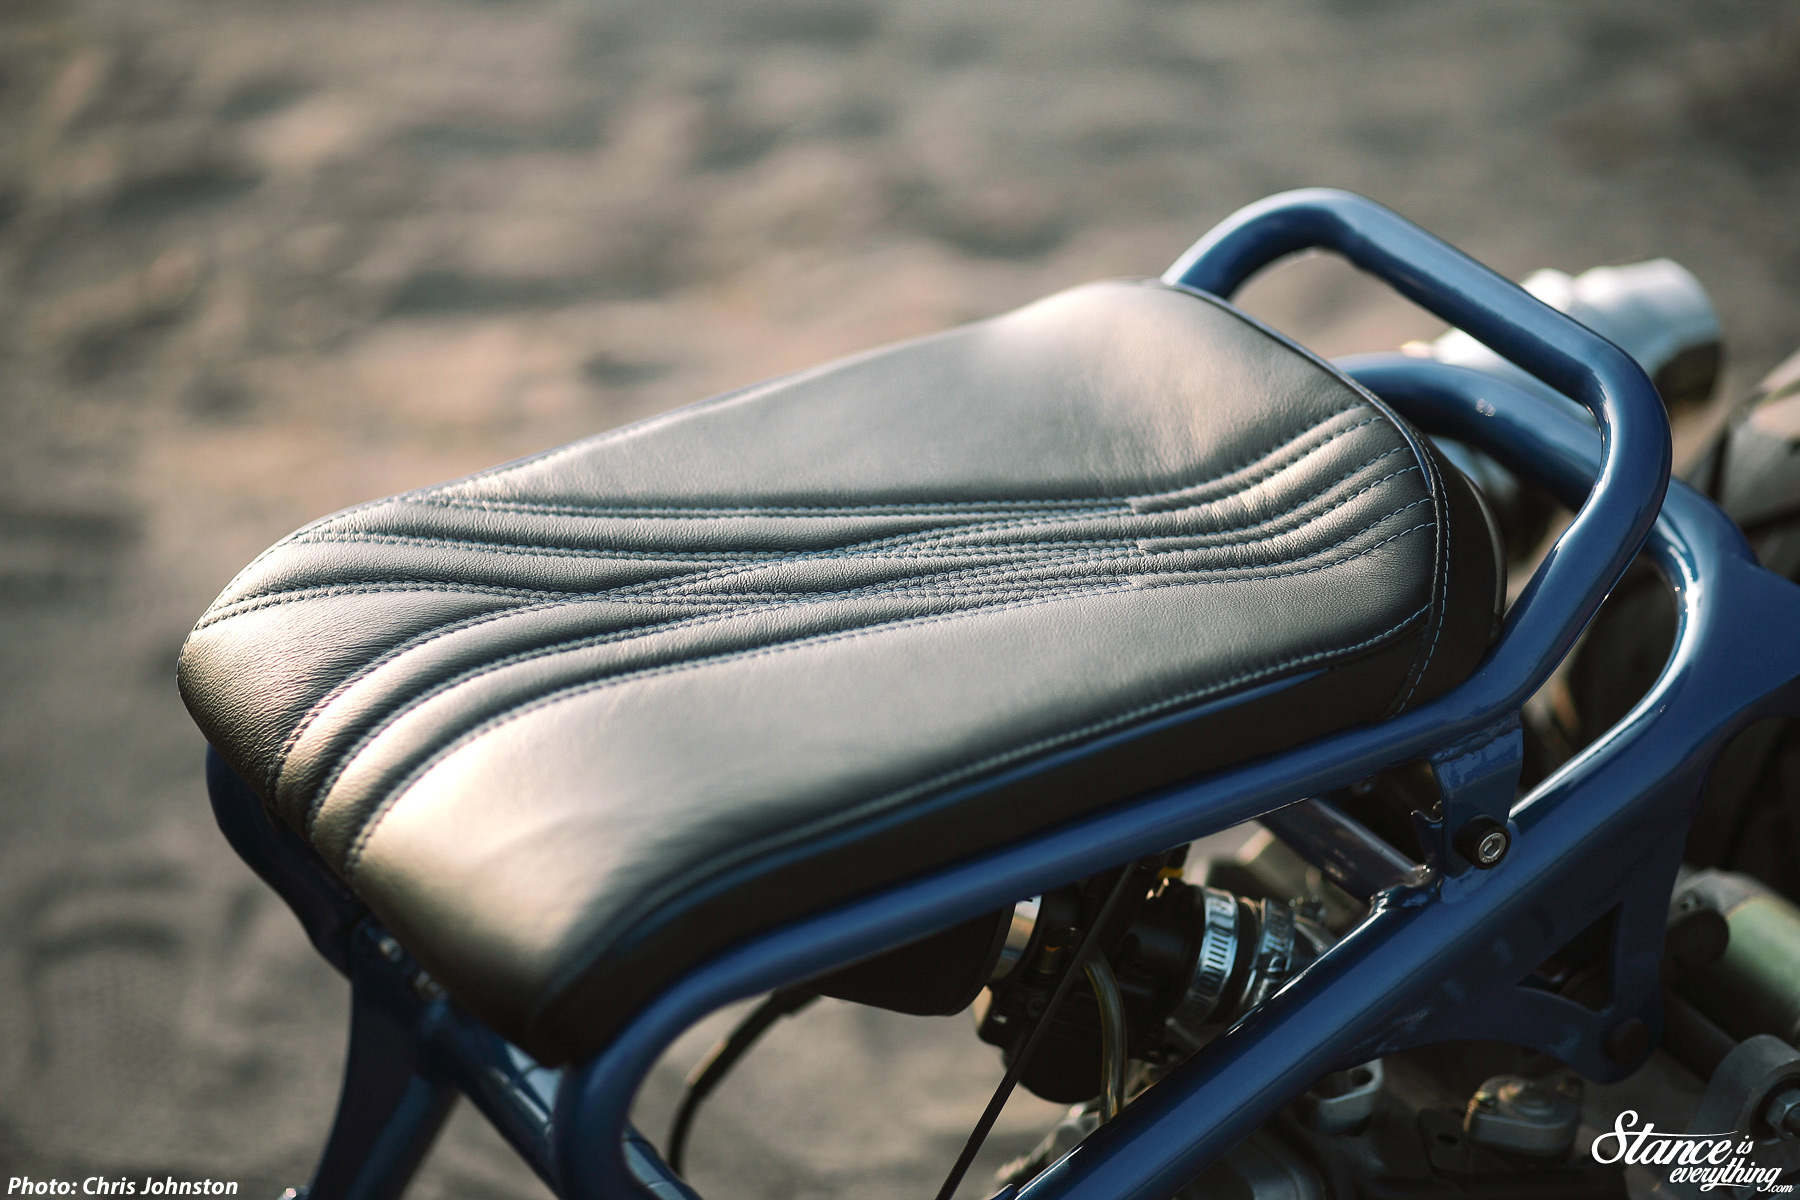
A custom seat, deep blue paint, and a laundry list of black and polished accessories outlined below round out the rest of the build and Anthony says she rides like a tank and is a whole lot of fun.
Mini Moto Lab will be at Fitted Lifestyle this weekend at Ontario Place where you can check out Ms. Fat Booty in person.
If you have a Ruck of your own join their cruse to the show, starting at 9am August 15th at Honda Canada 180 Honda Blvd.
Modification List
Go Parts
- Custom WirusWin Exhaust
- NCY Intake Manifold
- Rucksters GY6 Harness
- GY6 Motor
- GY6 Short Axle and Nut
- OKO 30mm Slide Carb (Black)
- ComposiMo Angled Clocking Flange
- Foam Race Filter
Chassis/Custom Framework
- Rucksters Custom Weld On Mount (10″ wide one-off)
- Weld On Kickstand
- PSWRD JDM KickStand
- PSWRD JDM Seat Frame
- MML Contour Seat Pan
- rPro Triple Tree Cover
- rPro Washer Kit
- rPro Turn Signals
- MML Frame Caps
- CNC Gas Cap Cover
- MML Front Frame Cover
- Custom Cut CVT Cover
- MML Licence Plate Mount
- Metal Tank Cover
- rPro Step Tone Pegs
Electrical
- Full Harness tuck front and rear
- TrailTech SCMR16 HID Light
- Arcade Console Buttons
- Electric Flasher Relay
- MML Contour LED Seat Pan Taillight
Controls
- rPro Monster Drag Bars – v2 (Top Mount)
- Oury Mountain Grips
- Stage6 Throttle and Controls
Wheels, Brakes & Suspension
- Douglas 10×10 Rear Rim (rear)
- Top Fighter Rear Tire
- rPro Rear Rim Center Cap
- Kitaco Front 10×3 Solid Dish (front)
- Front Pirelli – 90/90/10
- Fox Shox Vanilla RC Shock
- Eye to Eye Shock Adapter
- 700lb Fox Spring
- GY6 Rear Drum Hub
- Custom Hub Adapter
- rPro Front Hub
- KN Low Down Forks – Silver
- Brembo P32 Front Caliper – Black
- BOWLS P32 Caliper Adapter – 190mm – Black
- Braking Wave 190mm Front Disk
- WilWood Shorty Lever/Brake Master
- Custom Drum Rear Foot Brake
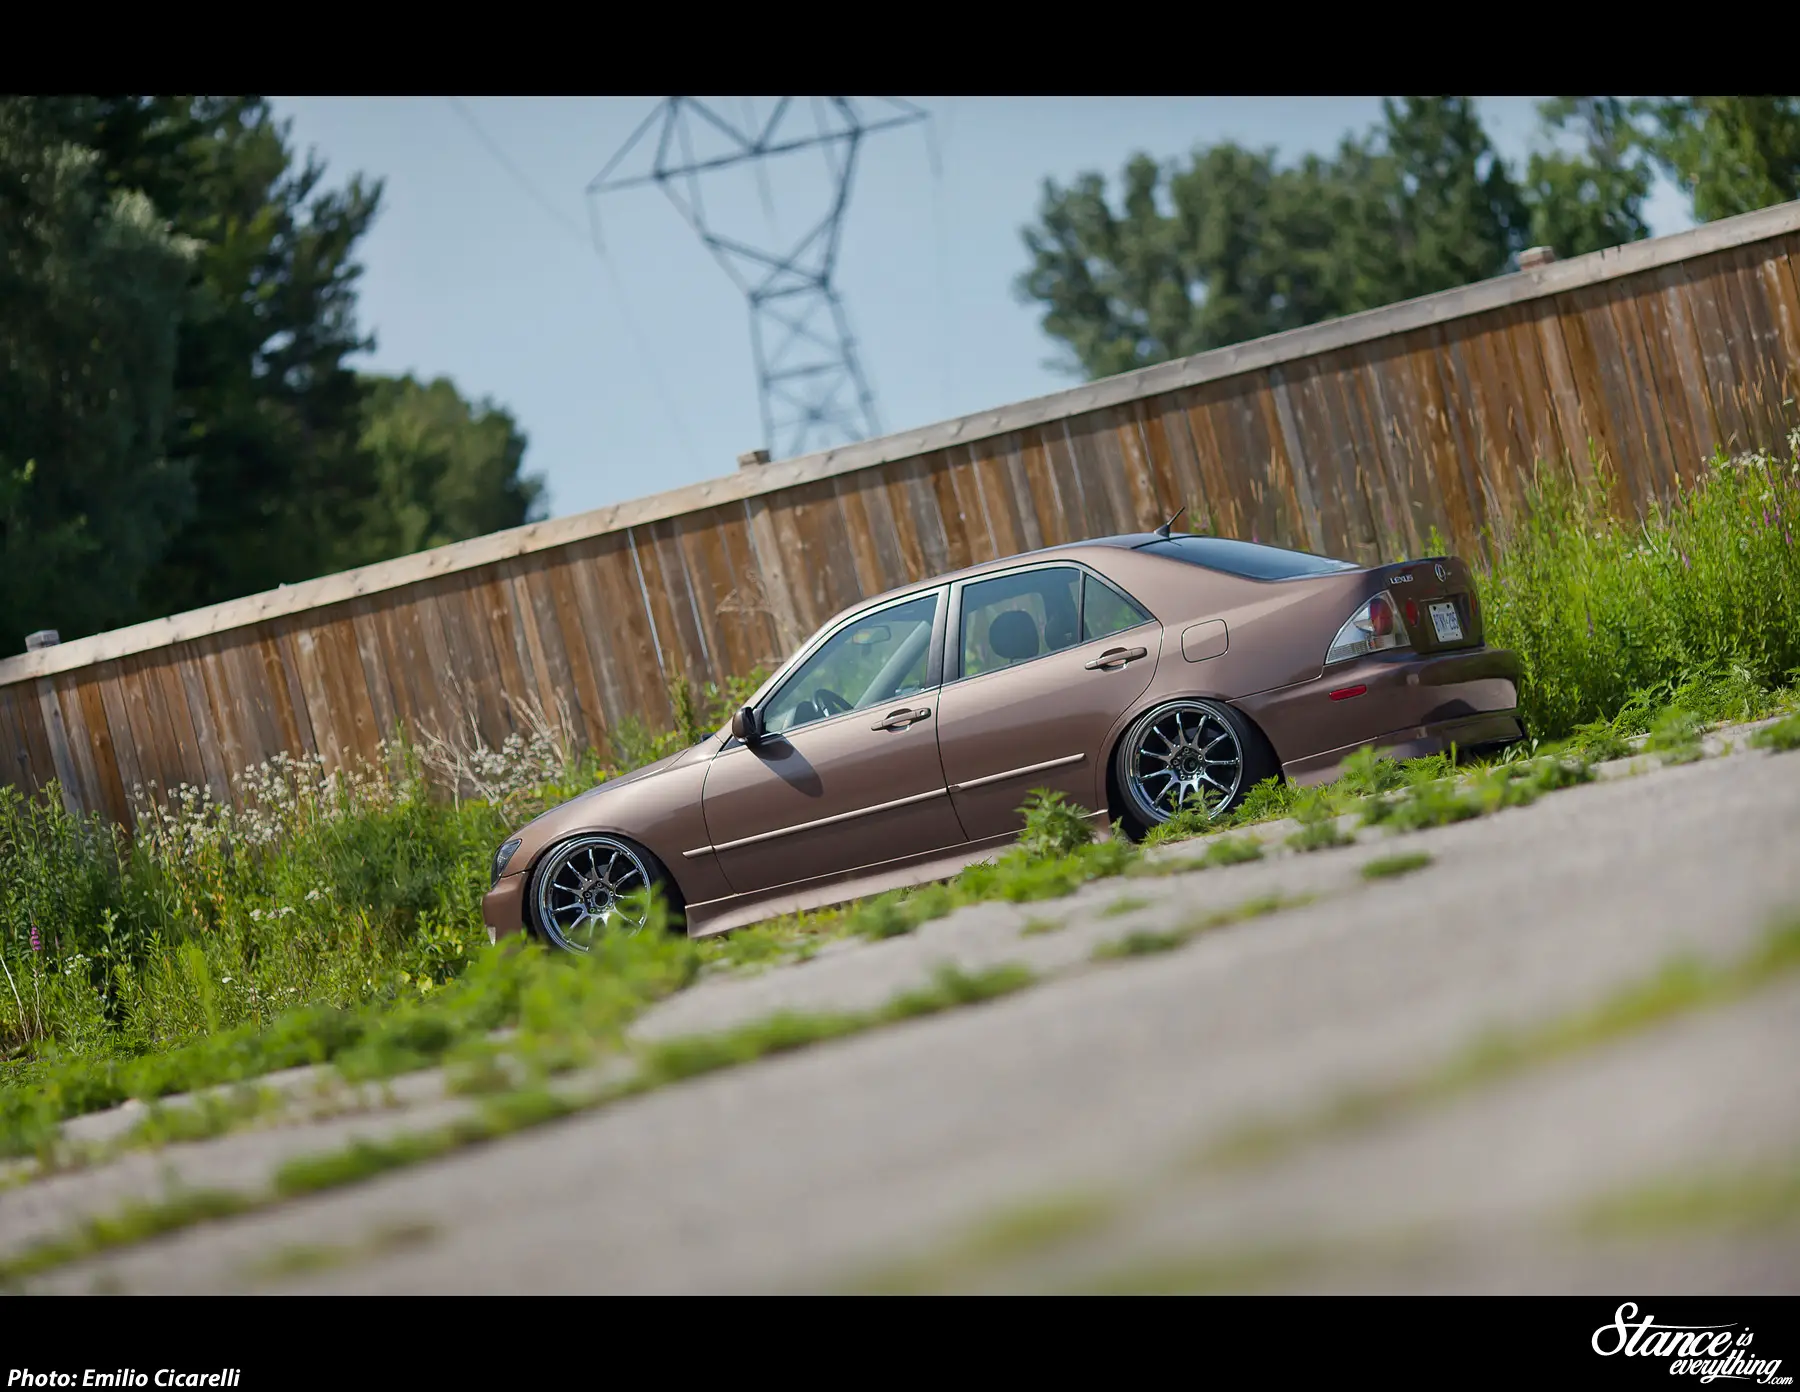
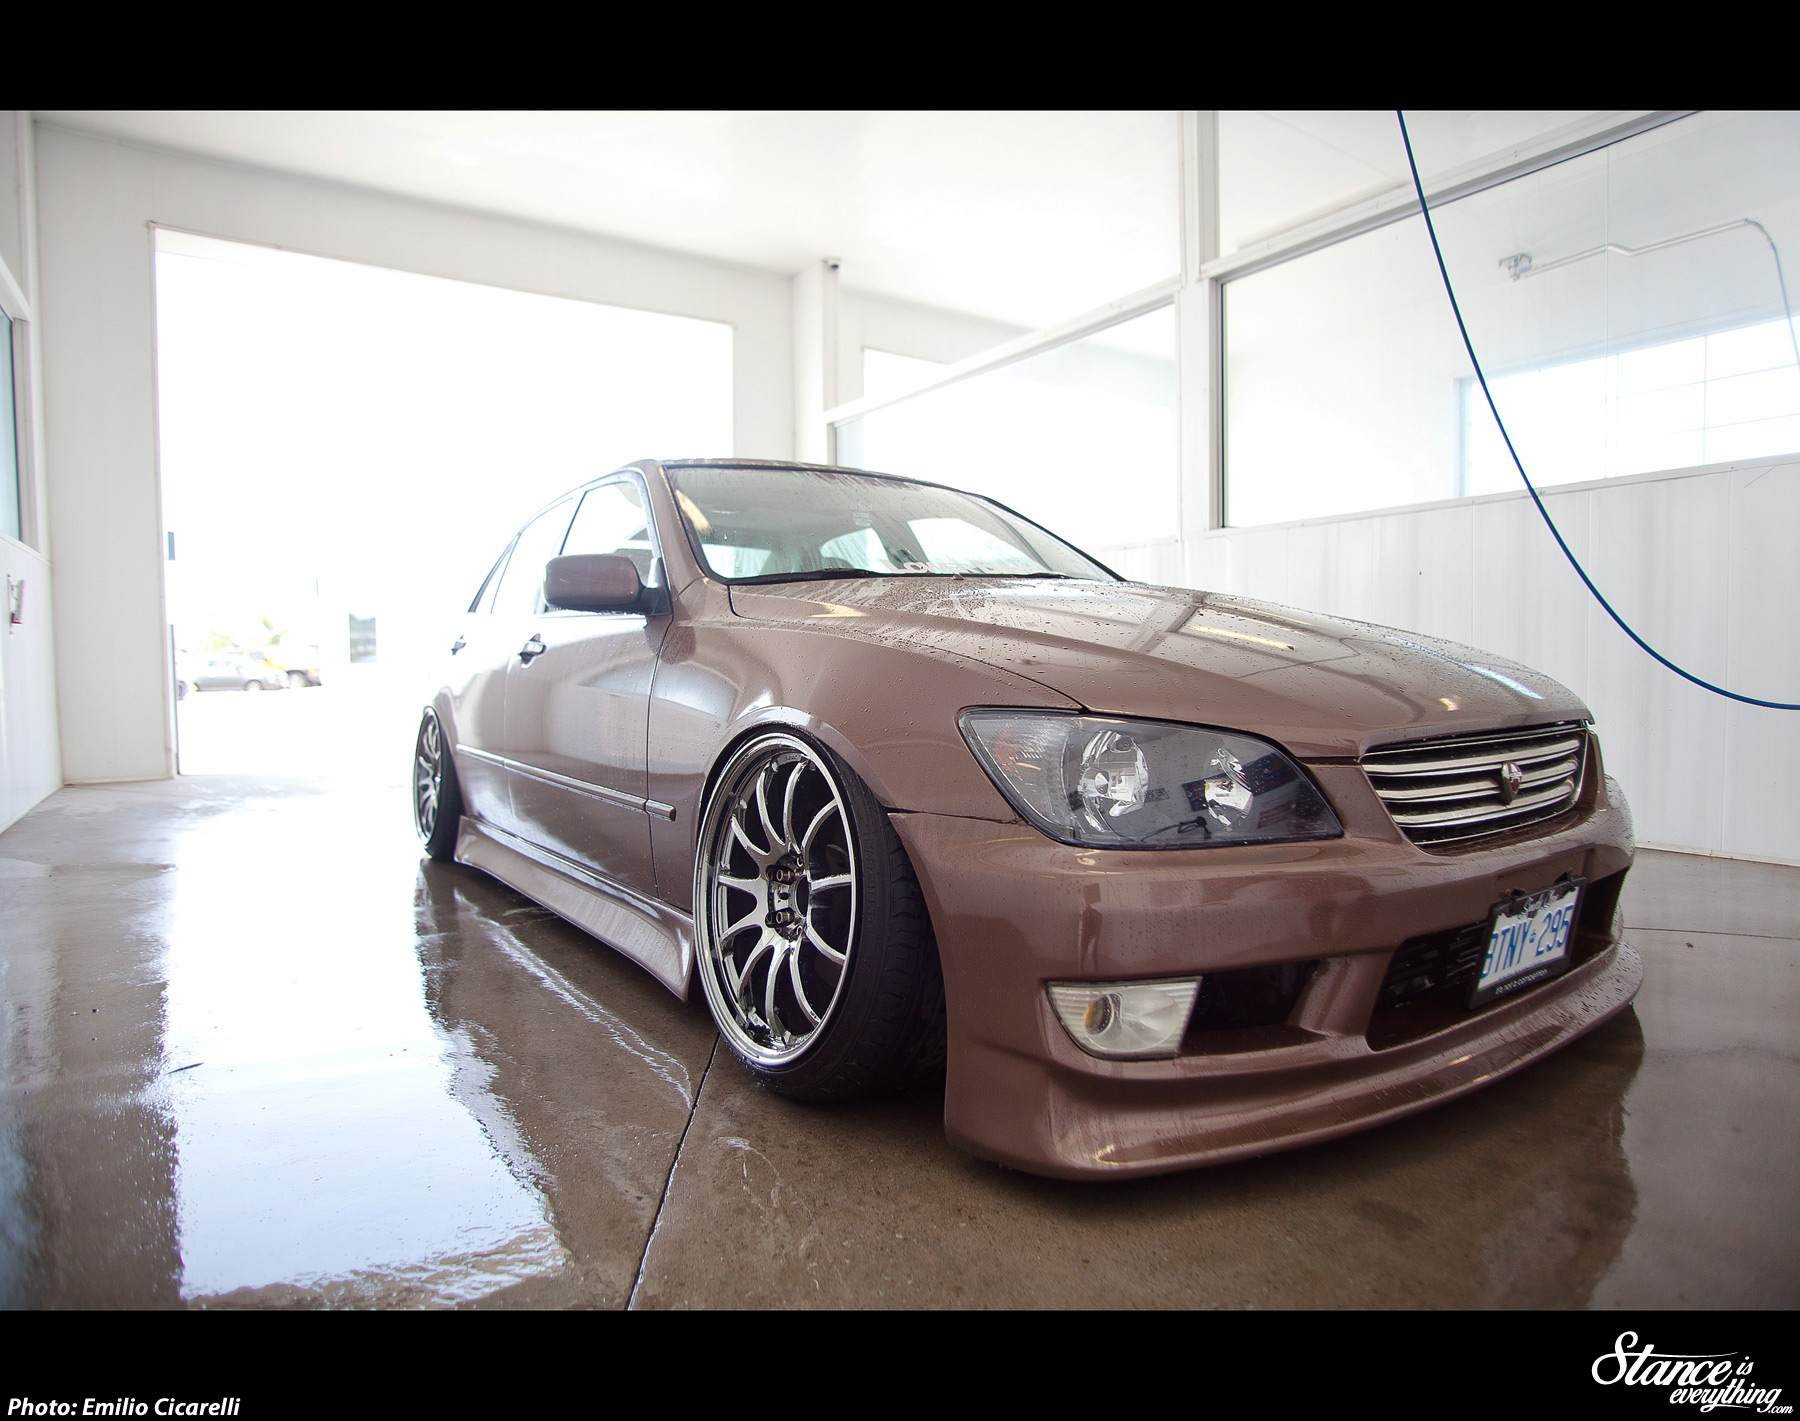
In 2014 the SAAQ (Société de l’assurance automobile du Québec) released an amended list of regulations that all cars travelling Quebec roads need to abide by. Dubbed the ‘Hellaflush’ act many of the new rules strictly out lined what was allowable when it came down to ride height and wheel fitment.
Tire stretch and camber were number one and two on the hit list and one of the first cars snared in the SAAQ’s display of power was the is300 brought to you today via the lens of
Emilio Ciccarelli.

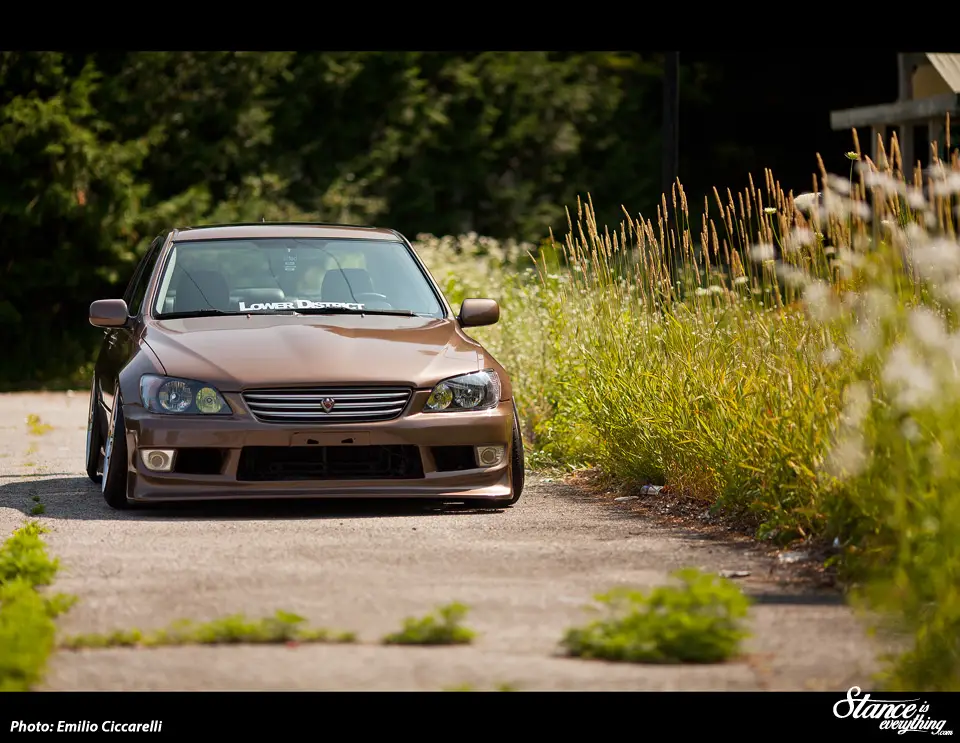
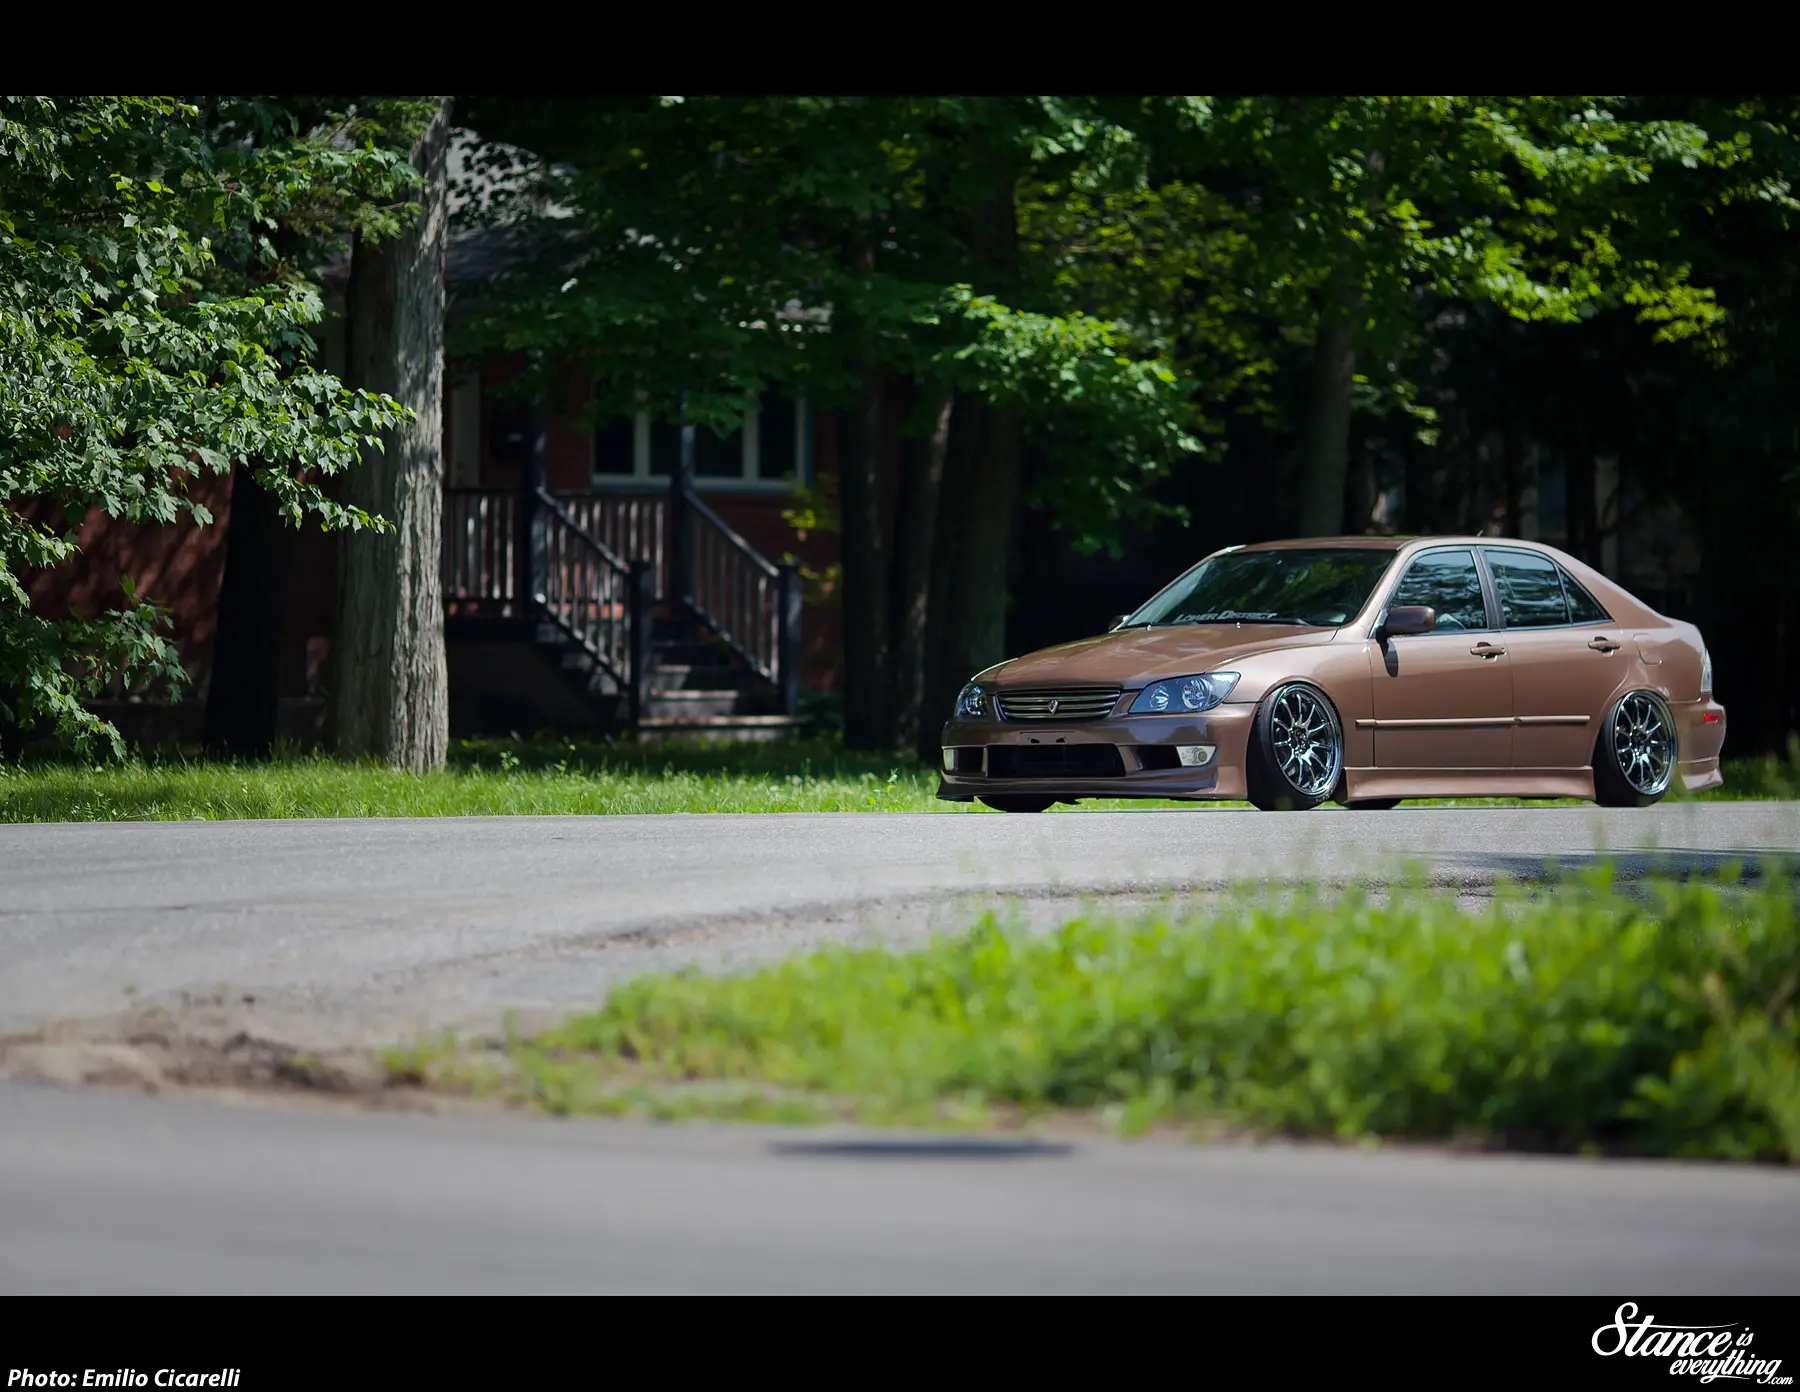
Though the SAAQ might be taken aback by the amount of negative camber Matt runs the car looks far less jarring than some of the other cars hovering around the streets of Ontario and Quebec.
In fact it flows so well with the is300 body lines that it’s almost easy to forget he’s well past -4 degrees all around.
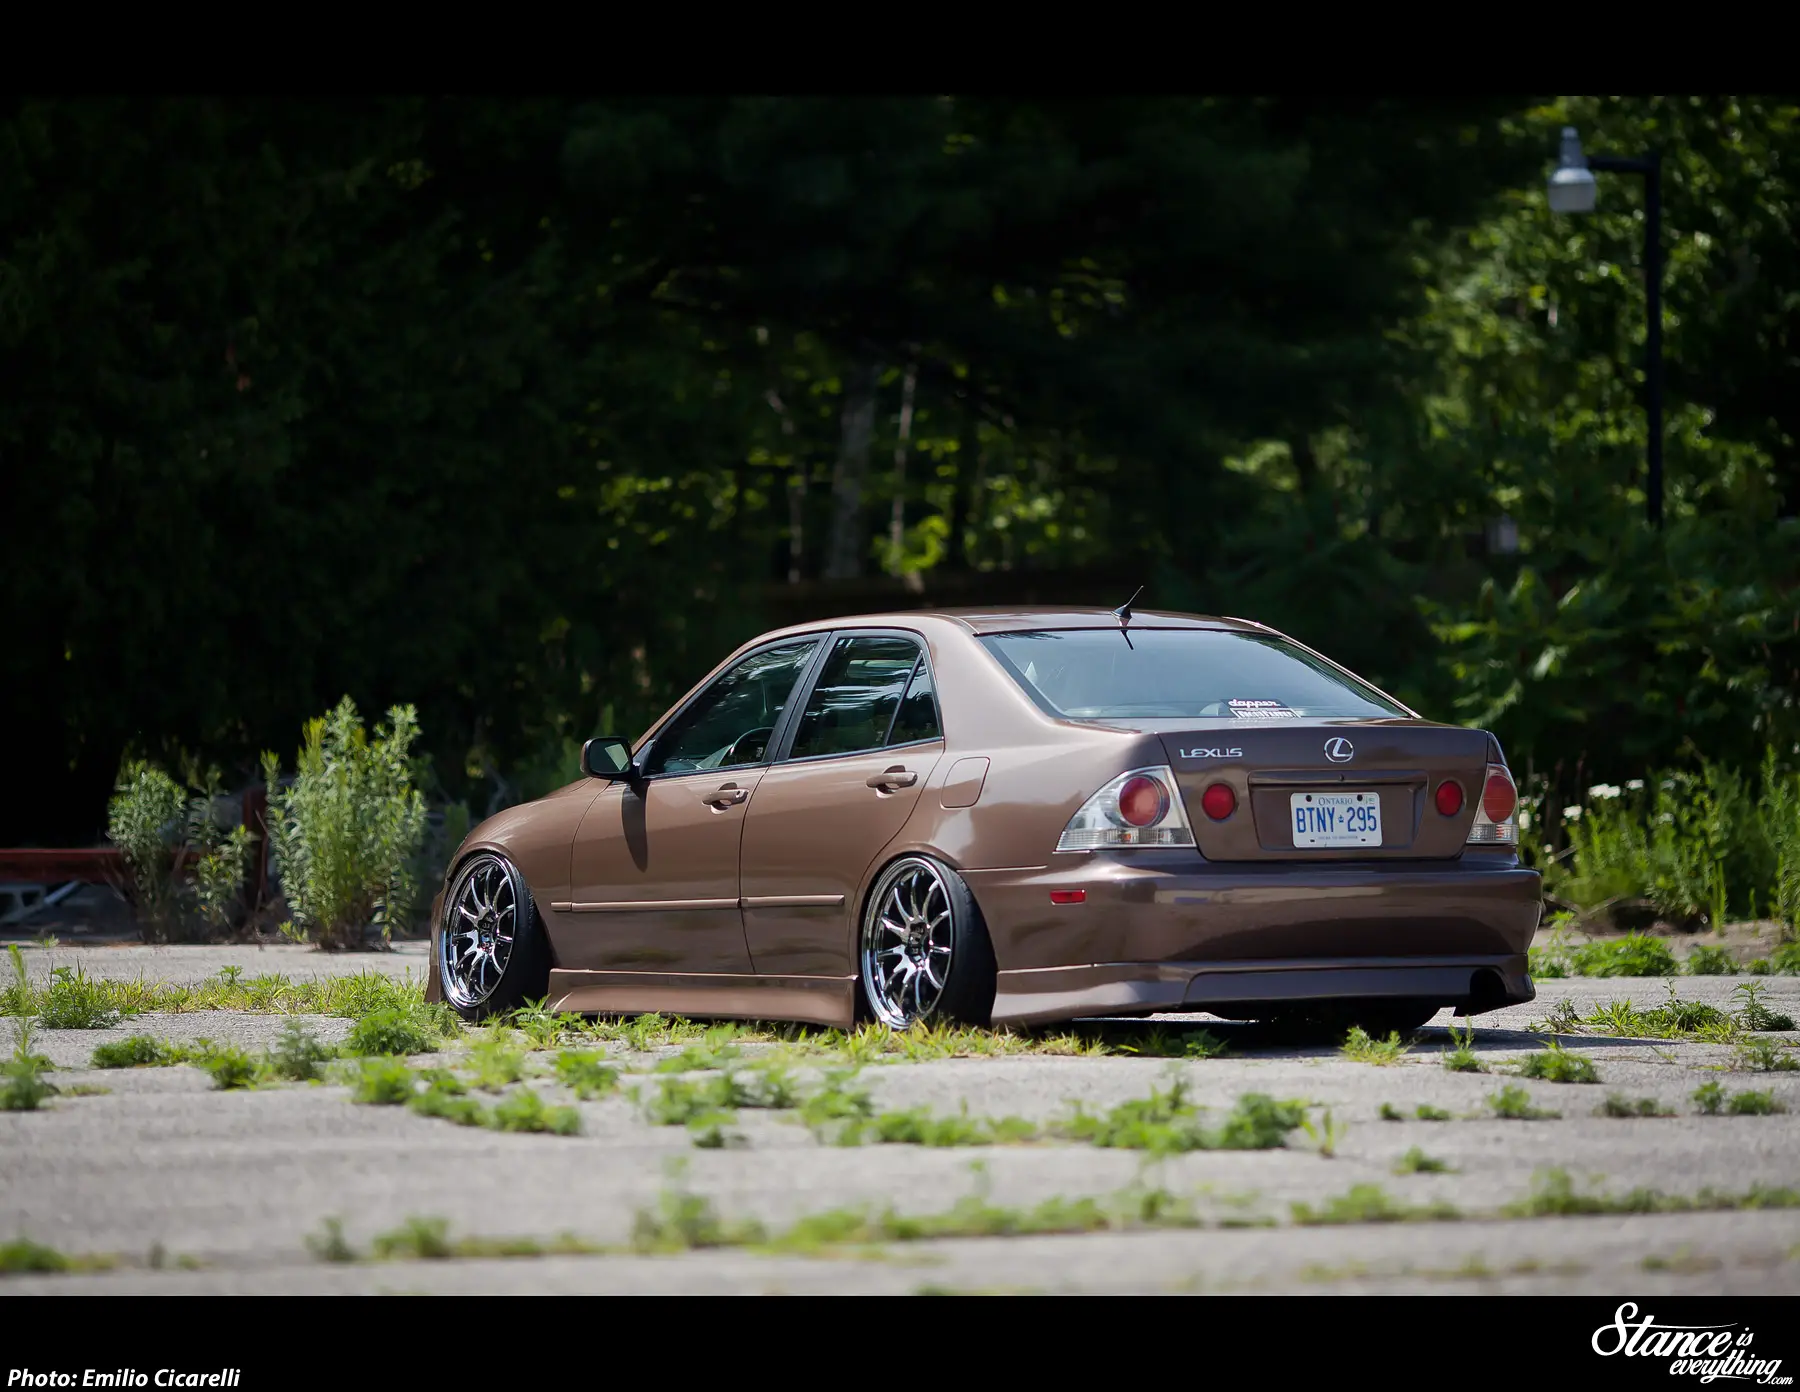
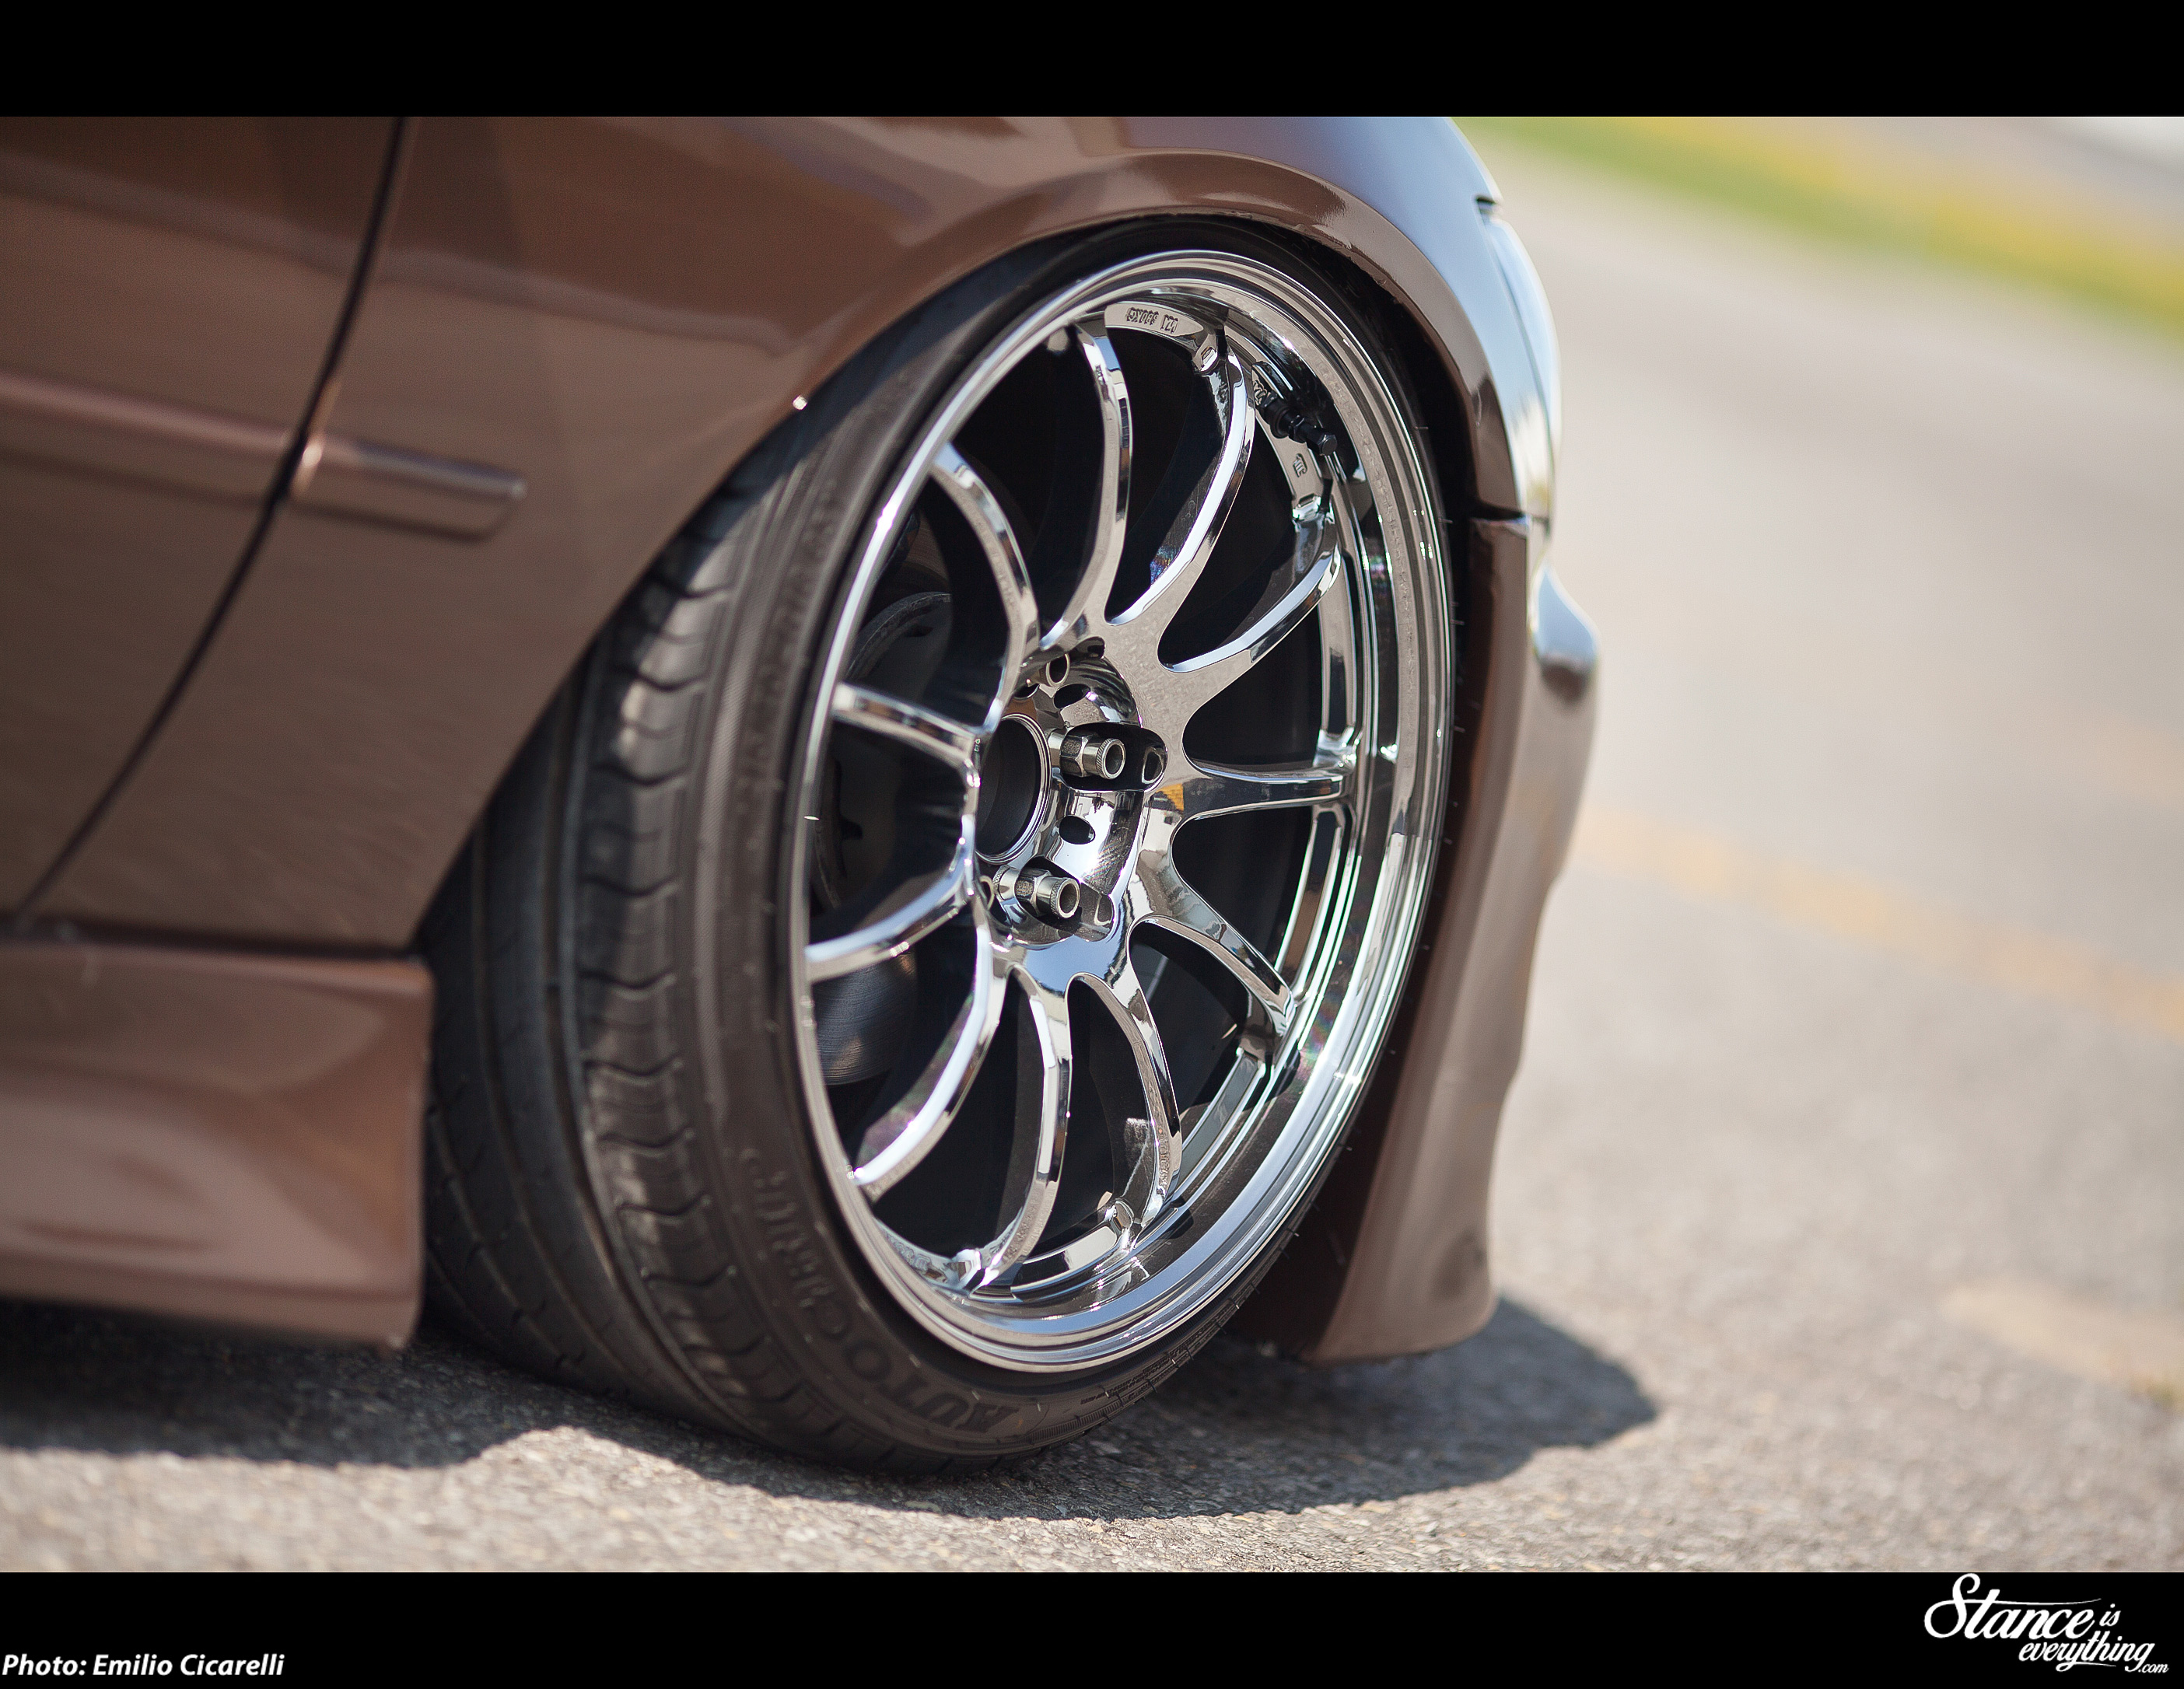
To achieve the stance he wanted Matt fit his BC extreme drop coil-overs with 14k and 12k springs and used JX 100 upper control arms to provide ample camber adjustment up front.
In the rear Figs Engineering arms dial things in.
Since Matt’s car does see a lot of kilometres keeping the toe reasonable was a necessity and Figs engineering arms were used again to help with tire wear.

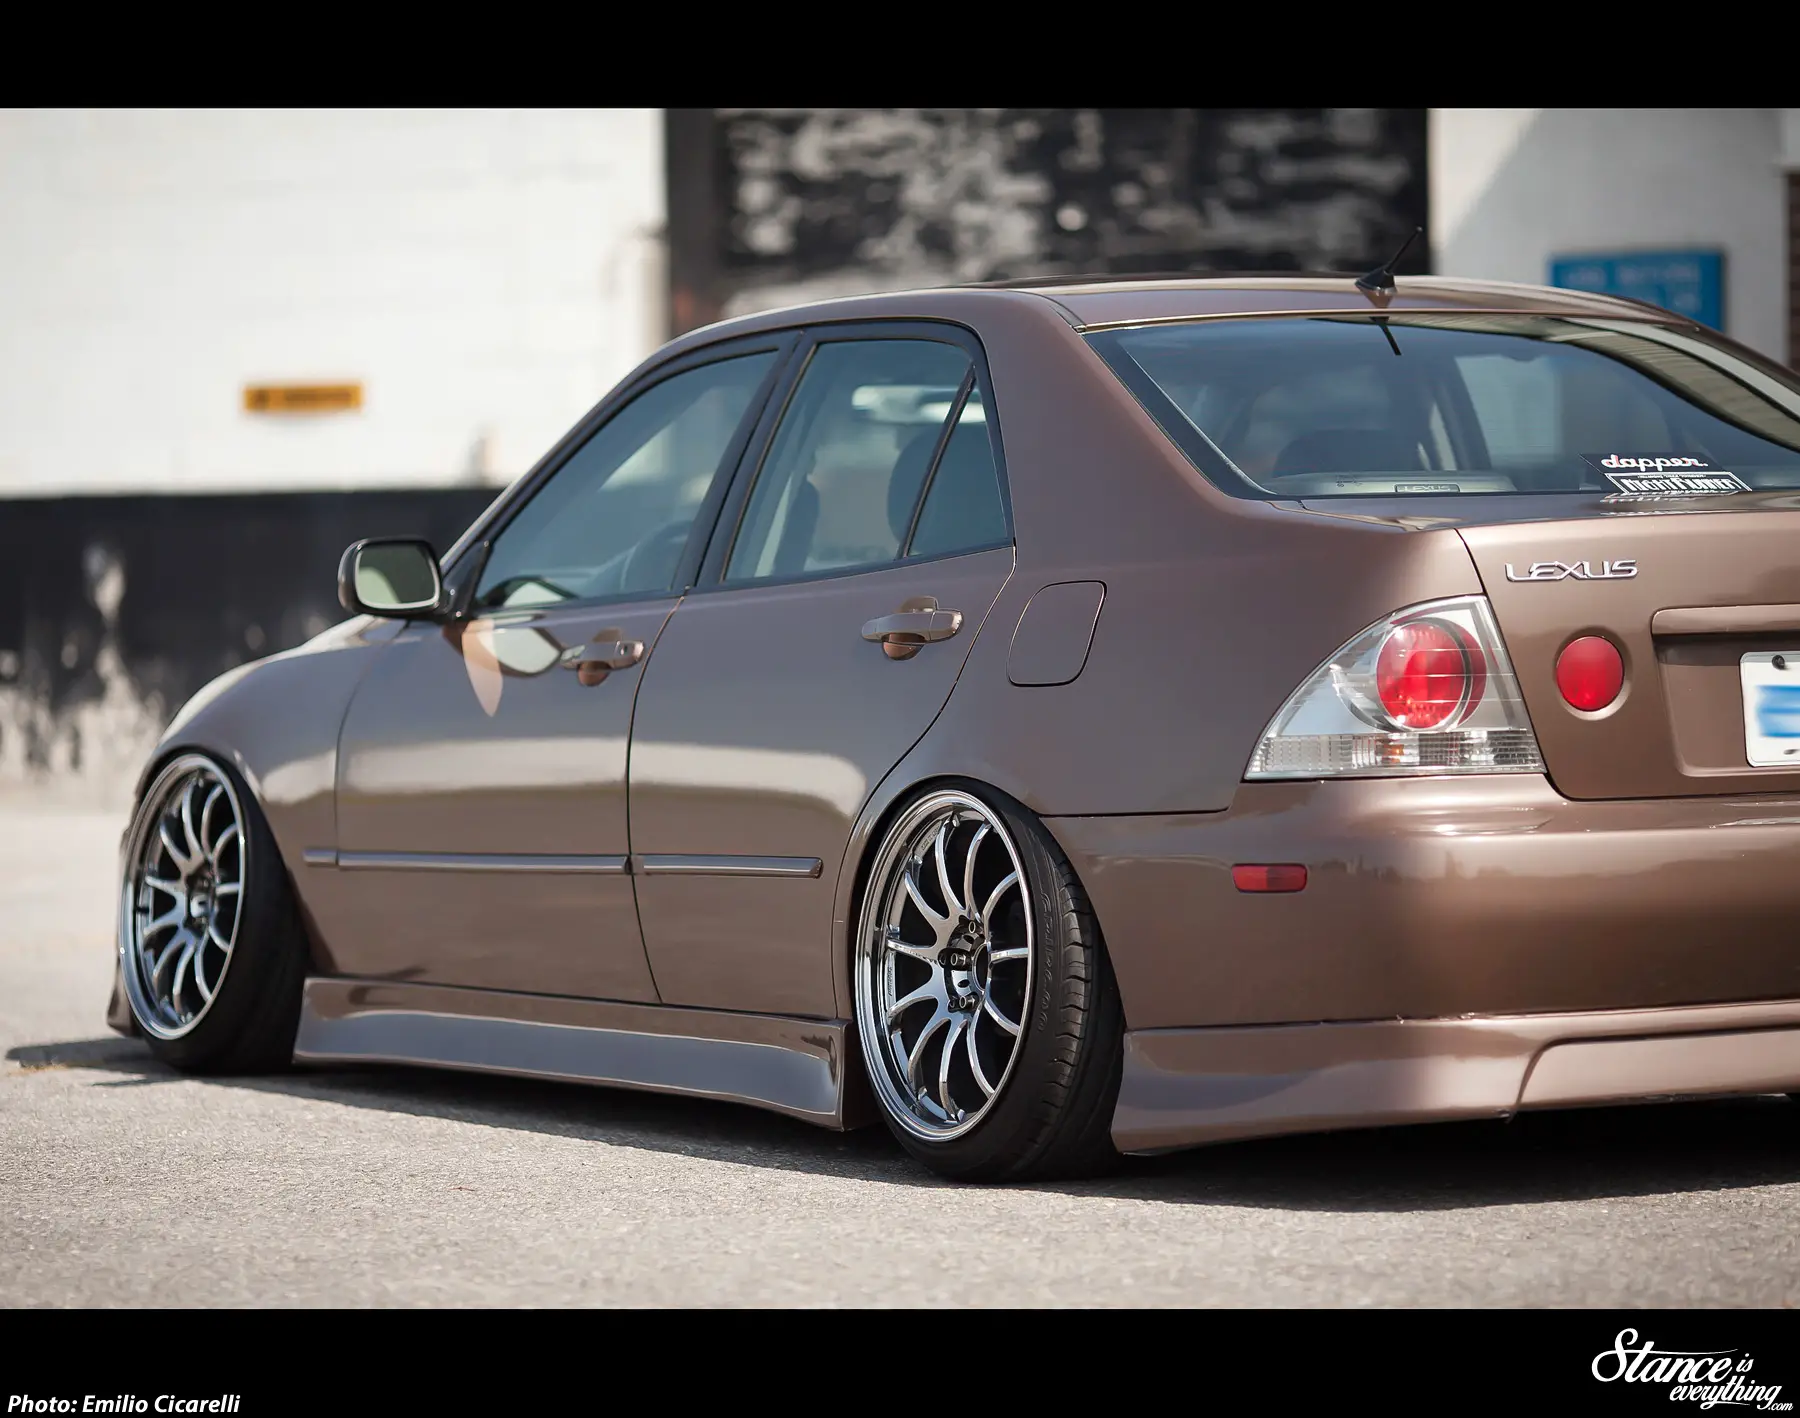
When it comes to wheels for his Lexus Matt’s brand of choice has always been Work, and Emotion 11rs replace the Miesters the car wore for the 2014 season.

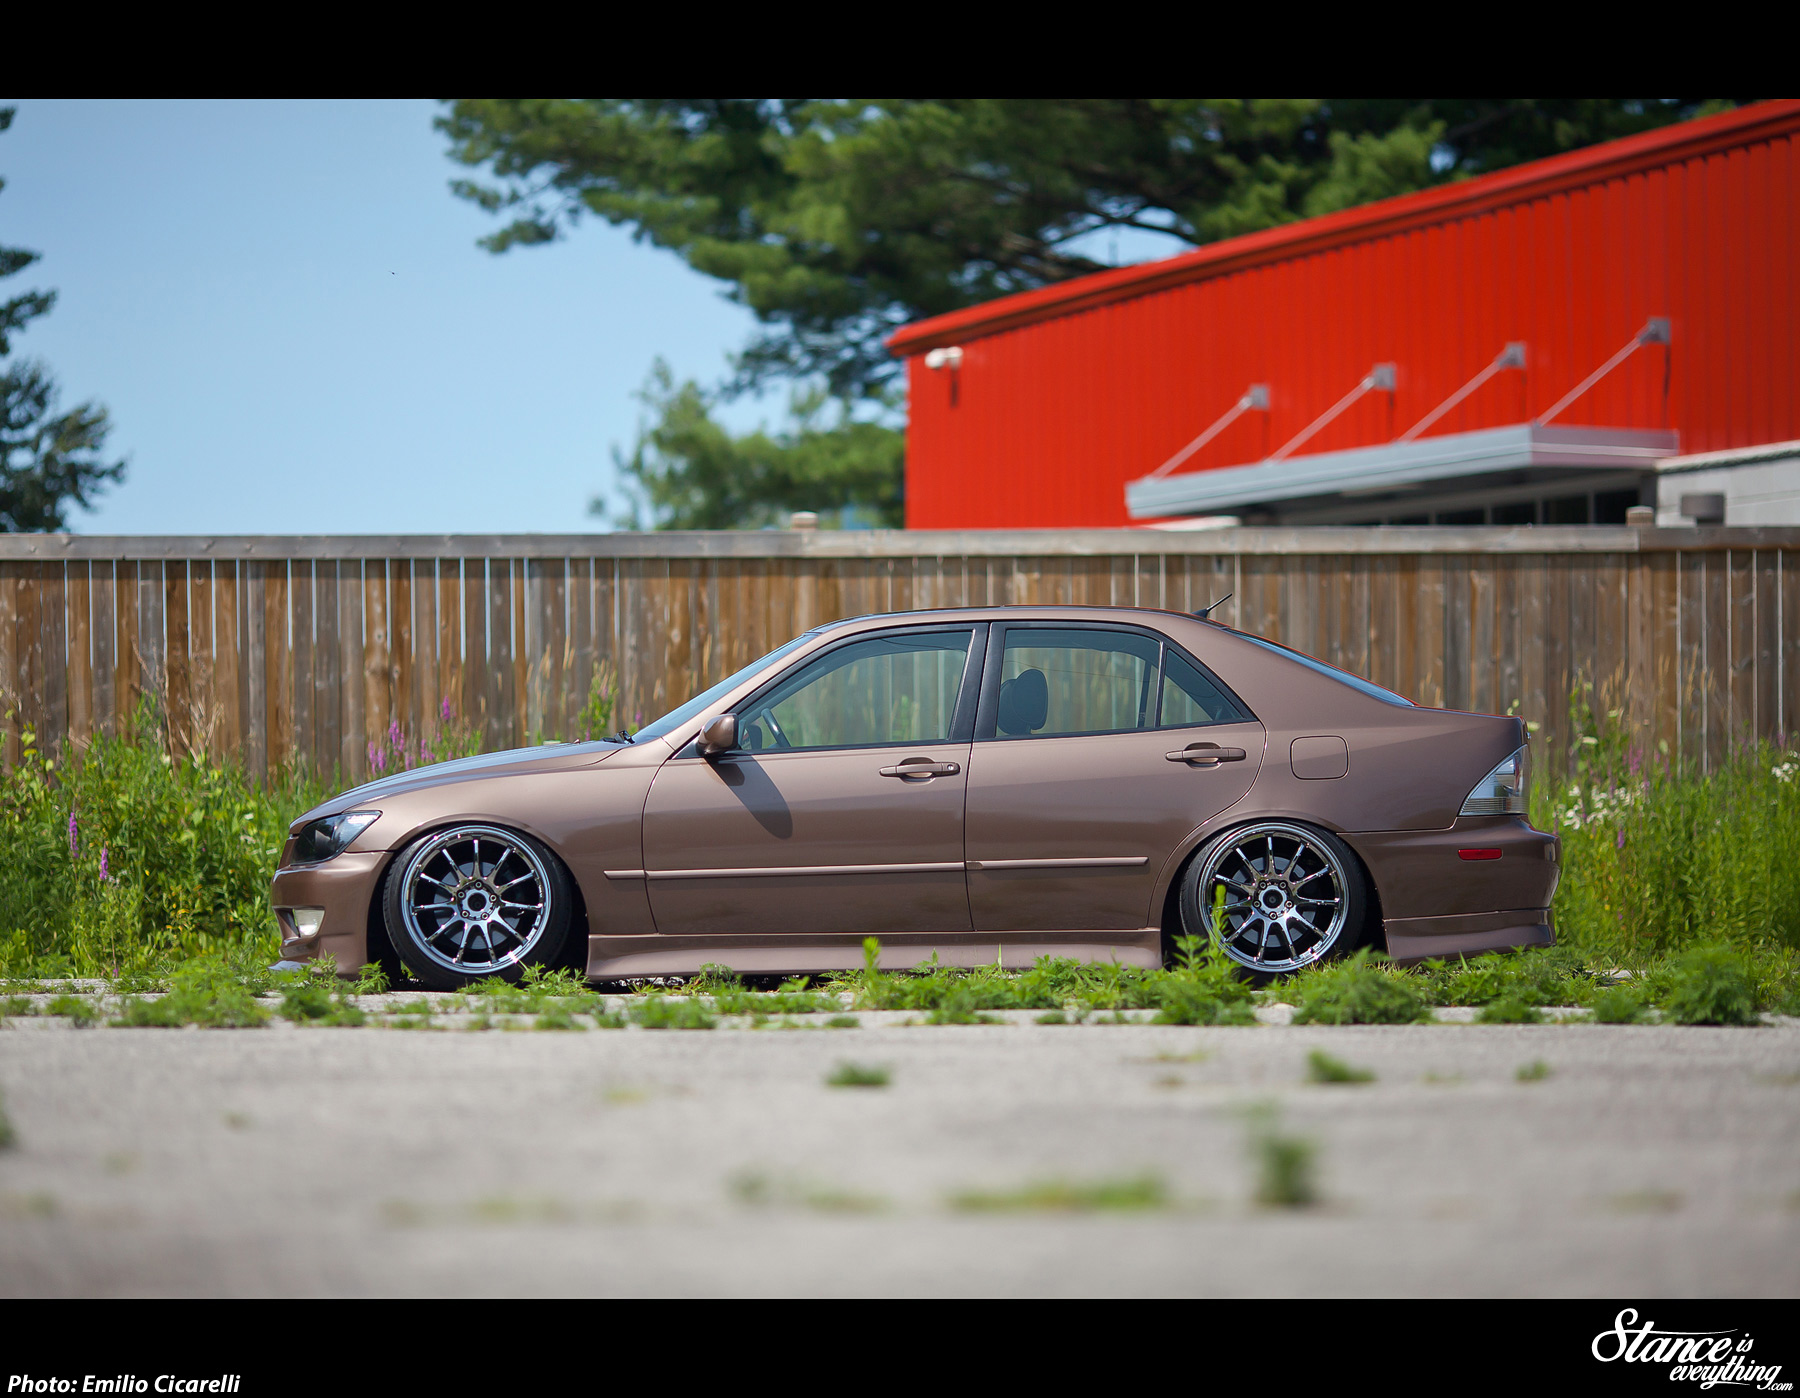
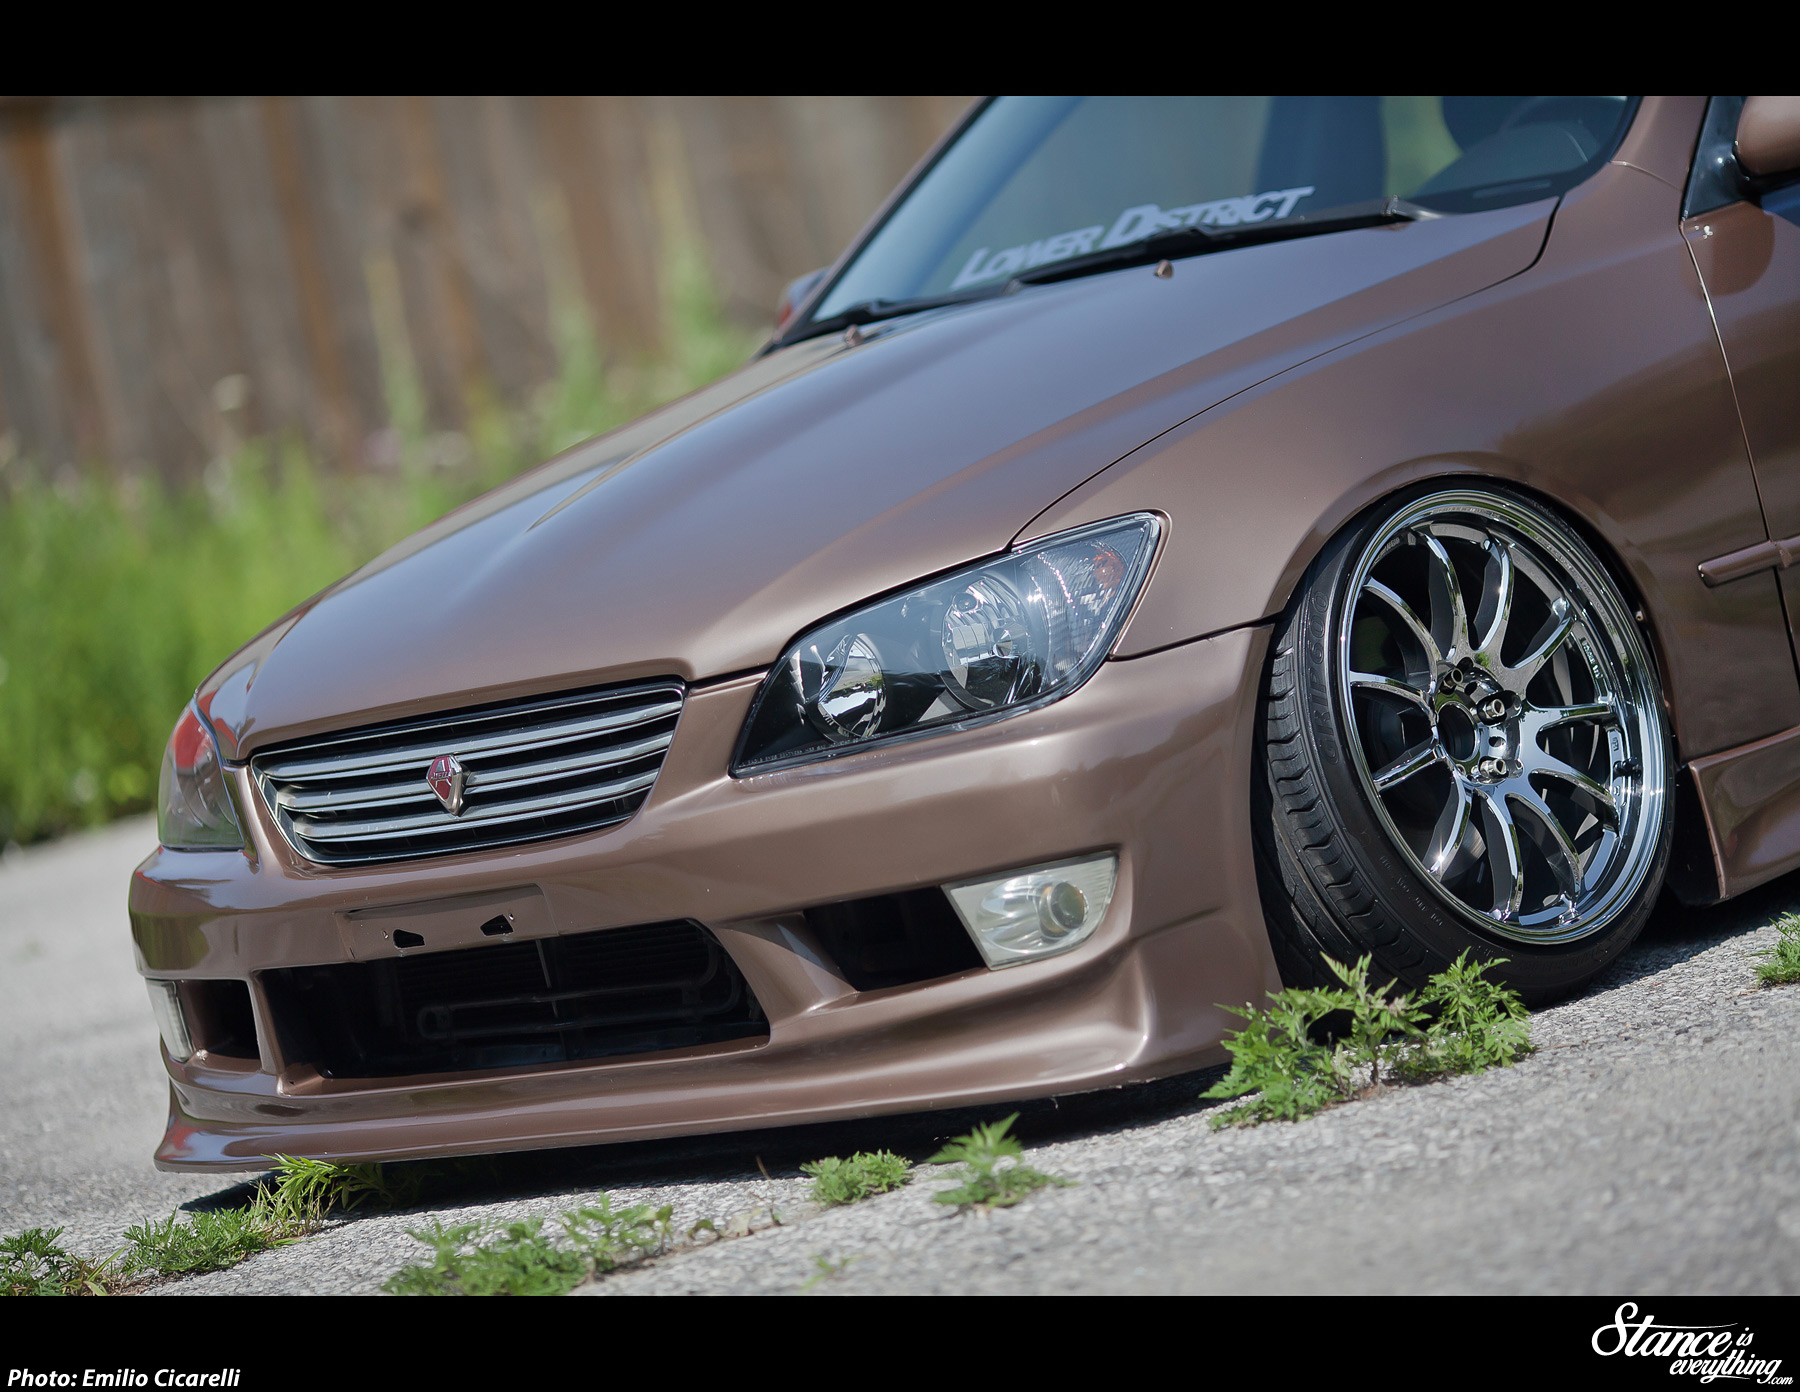
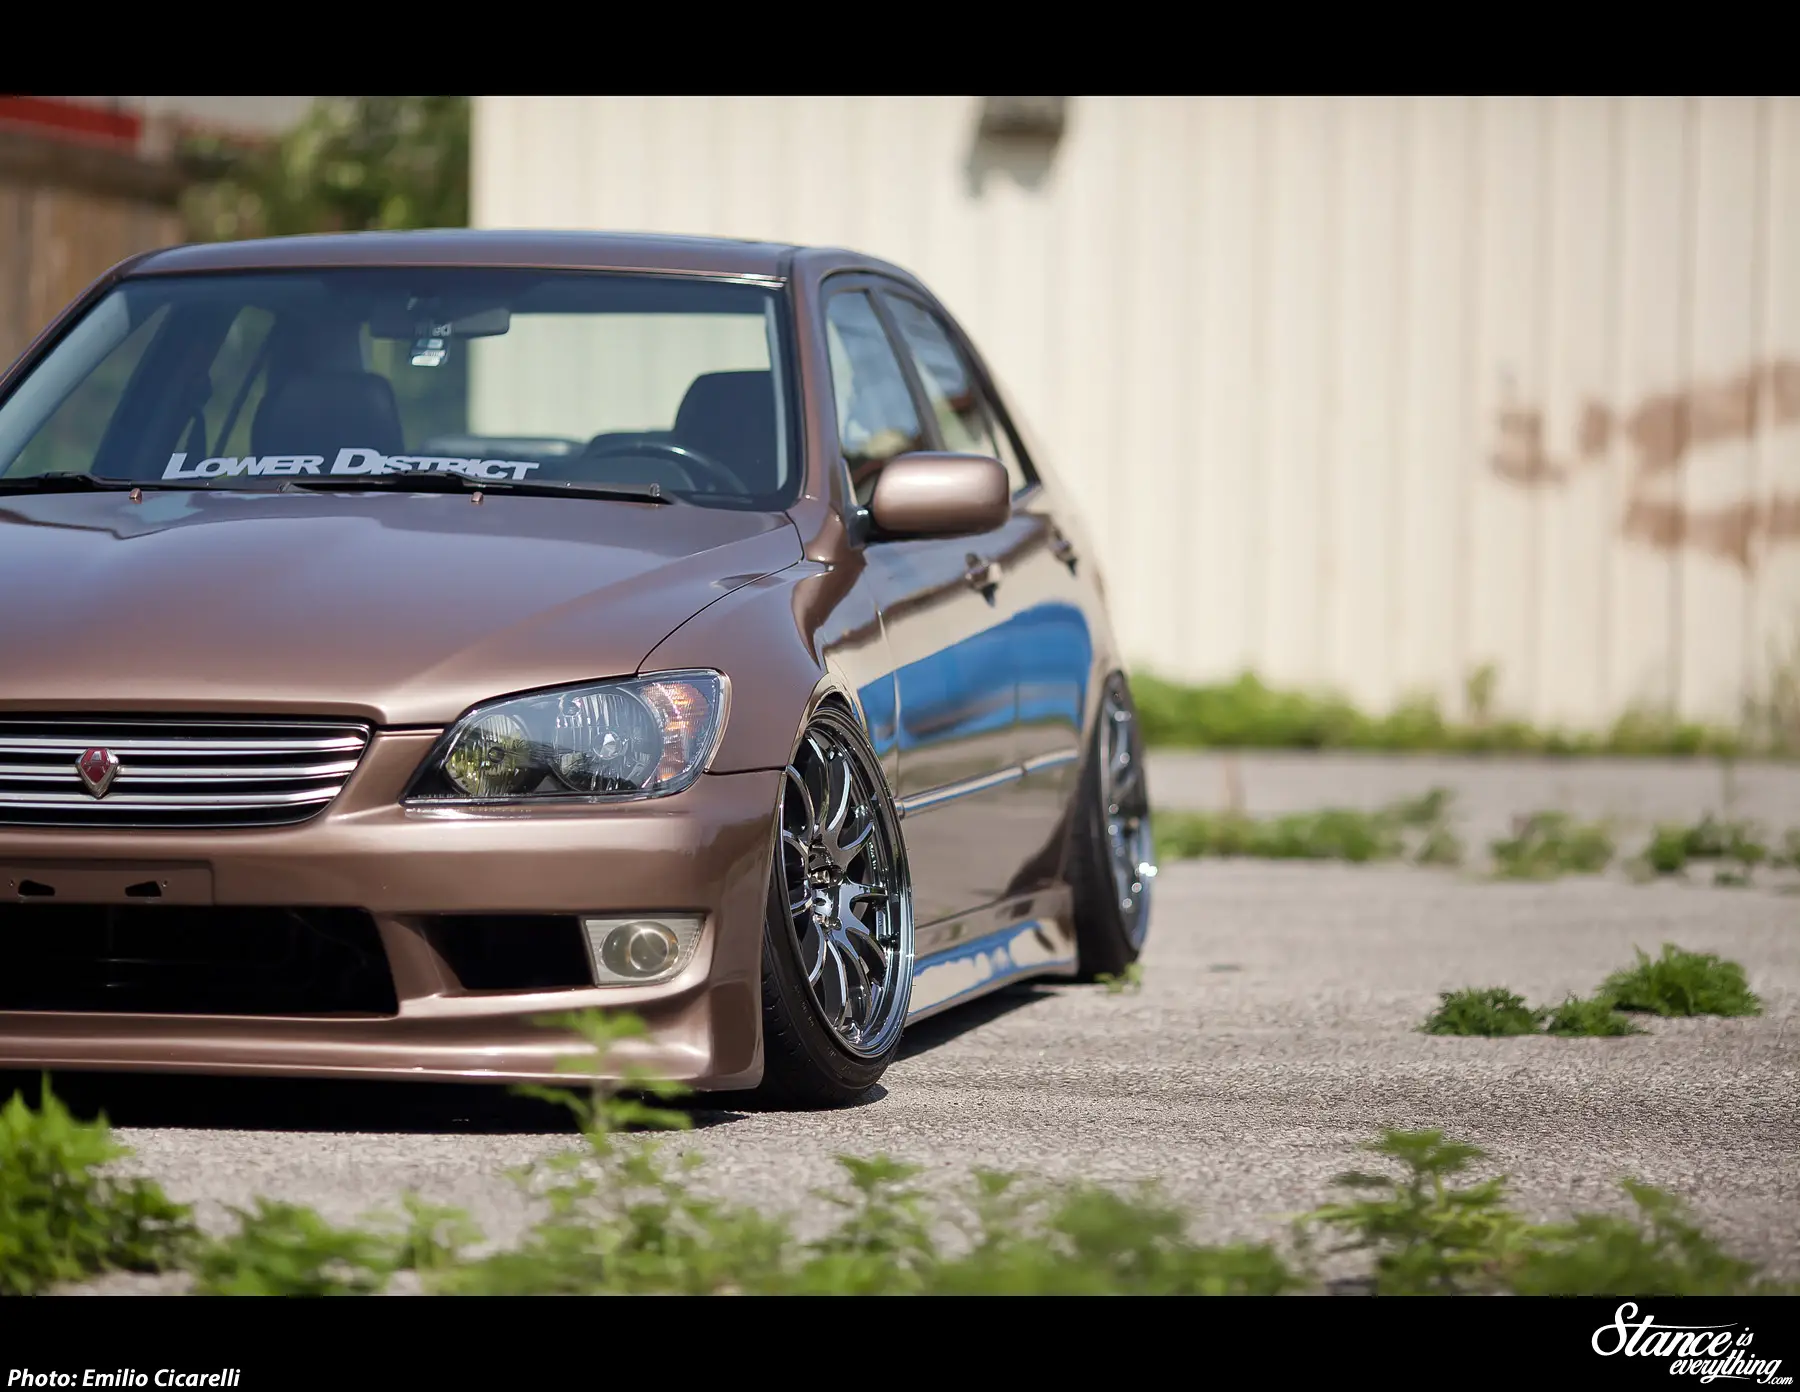
Exterior wise Matt didn’t tamper too much with lines Lexus created for this sports sedan.
Vertex USA pieces have been added all around, and Metallic Brown vinyl done by Nextmod Ottawa gives the car a unique and classy look.
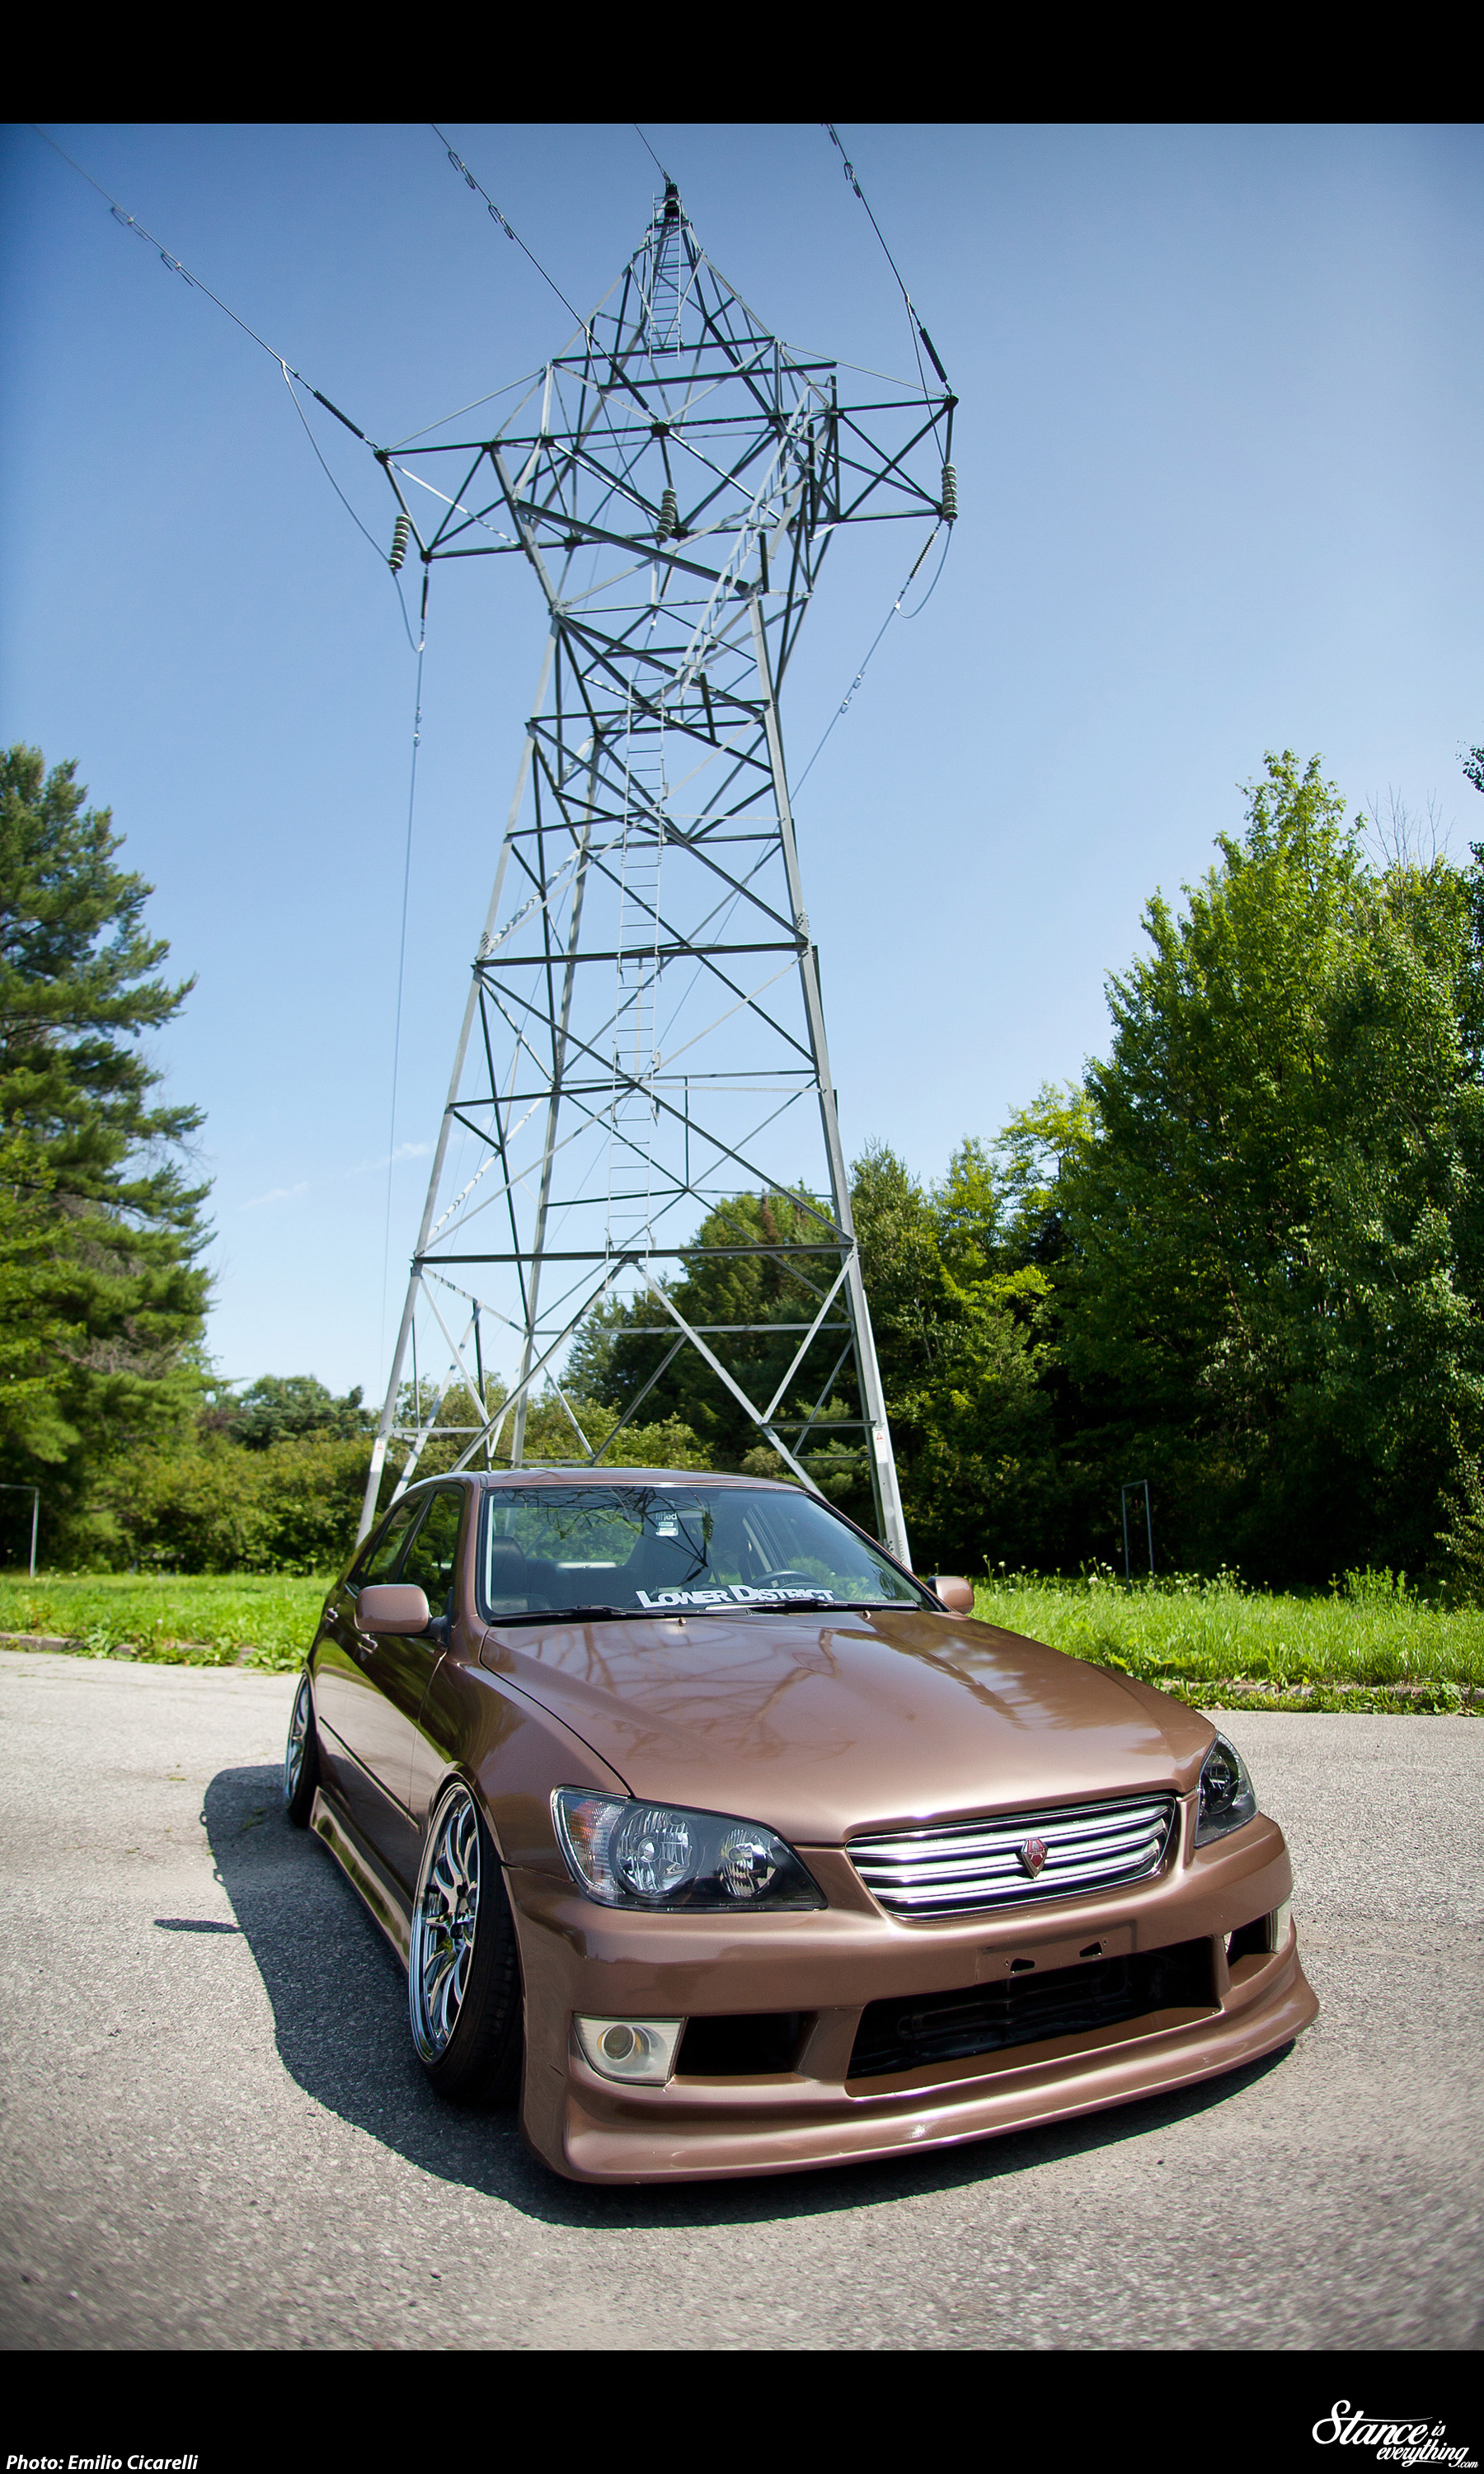
As it sits Matt’s is300 has taken home three well deserved Static awards from Fitted Lifestyle events, with the most being top honours at Fitted Ottawa and Fitted Toronto.
Of course trophies are not really what Matt does it for, but the Fitted awards are an especially nice addition to any garage shelf.
Of late Matt has shifted his attention to the rest of the car and as such the automatic transmission has been plucked out so that a proper 5 speed can make its way in.
Instagram (@mattbrunett) is where you can follow the latest progress on this car and even catch Matt occasionally musing about losing the camber all together and going in an entirely different direction.

What’s truly next for this car might be a mystery but if the revisions so far are any indication of what’s in store I can’t wait to see V.3!
If you want to follow more of Emilio Ciccarelli’s work follow him on instagram at @twolitremedia.